> ## Documentation Index
> Fetch the complete documentation index at: https://docs.firmhouse.com/llms.txt
> Use this file to discover all available pages before exploring further.
# Edit transactional email templates
> Edit Firmhouse transactional email templates directly in the portal to customize subject lines, content, and branding for your subscribers.
When running a subscription service and renting out your products, there are many instances where you have to notify your customer of something by sending out an email. In Firmhouse you can edit all these emails directly in the portal.
## Accessing email configuration
### Steps
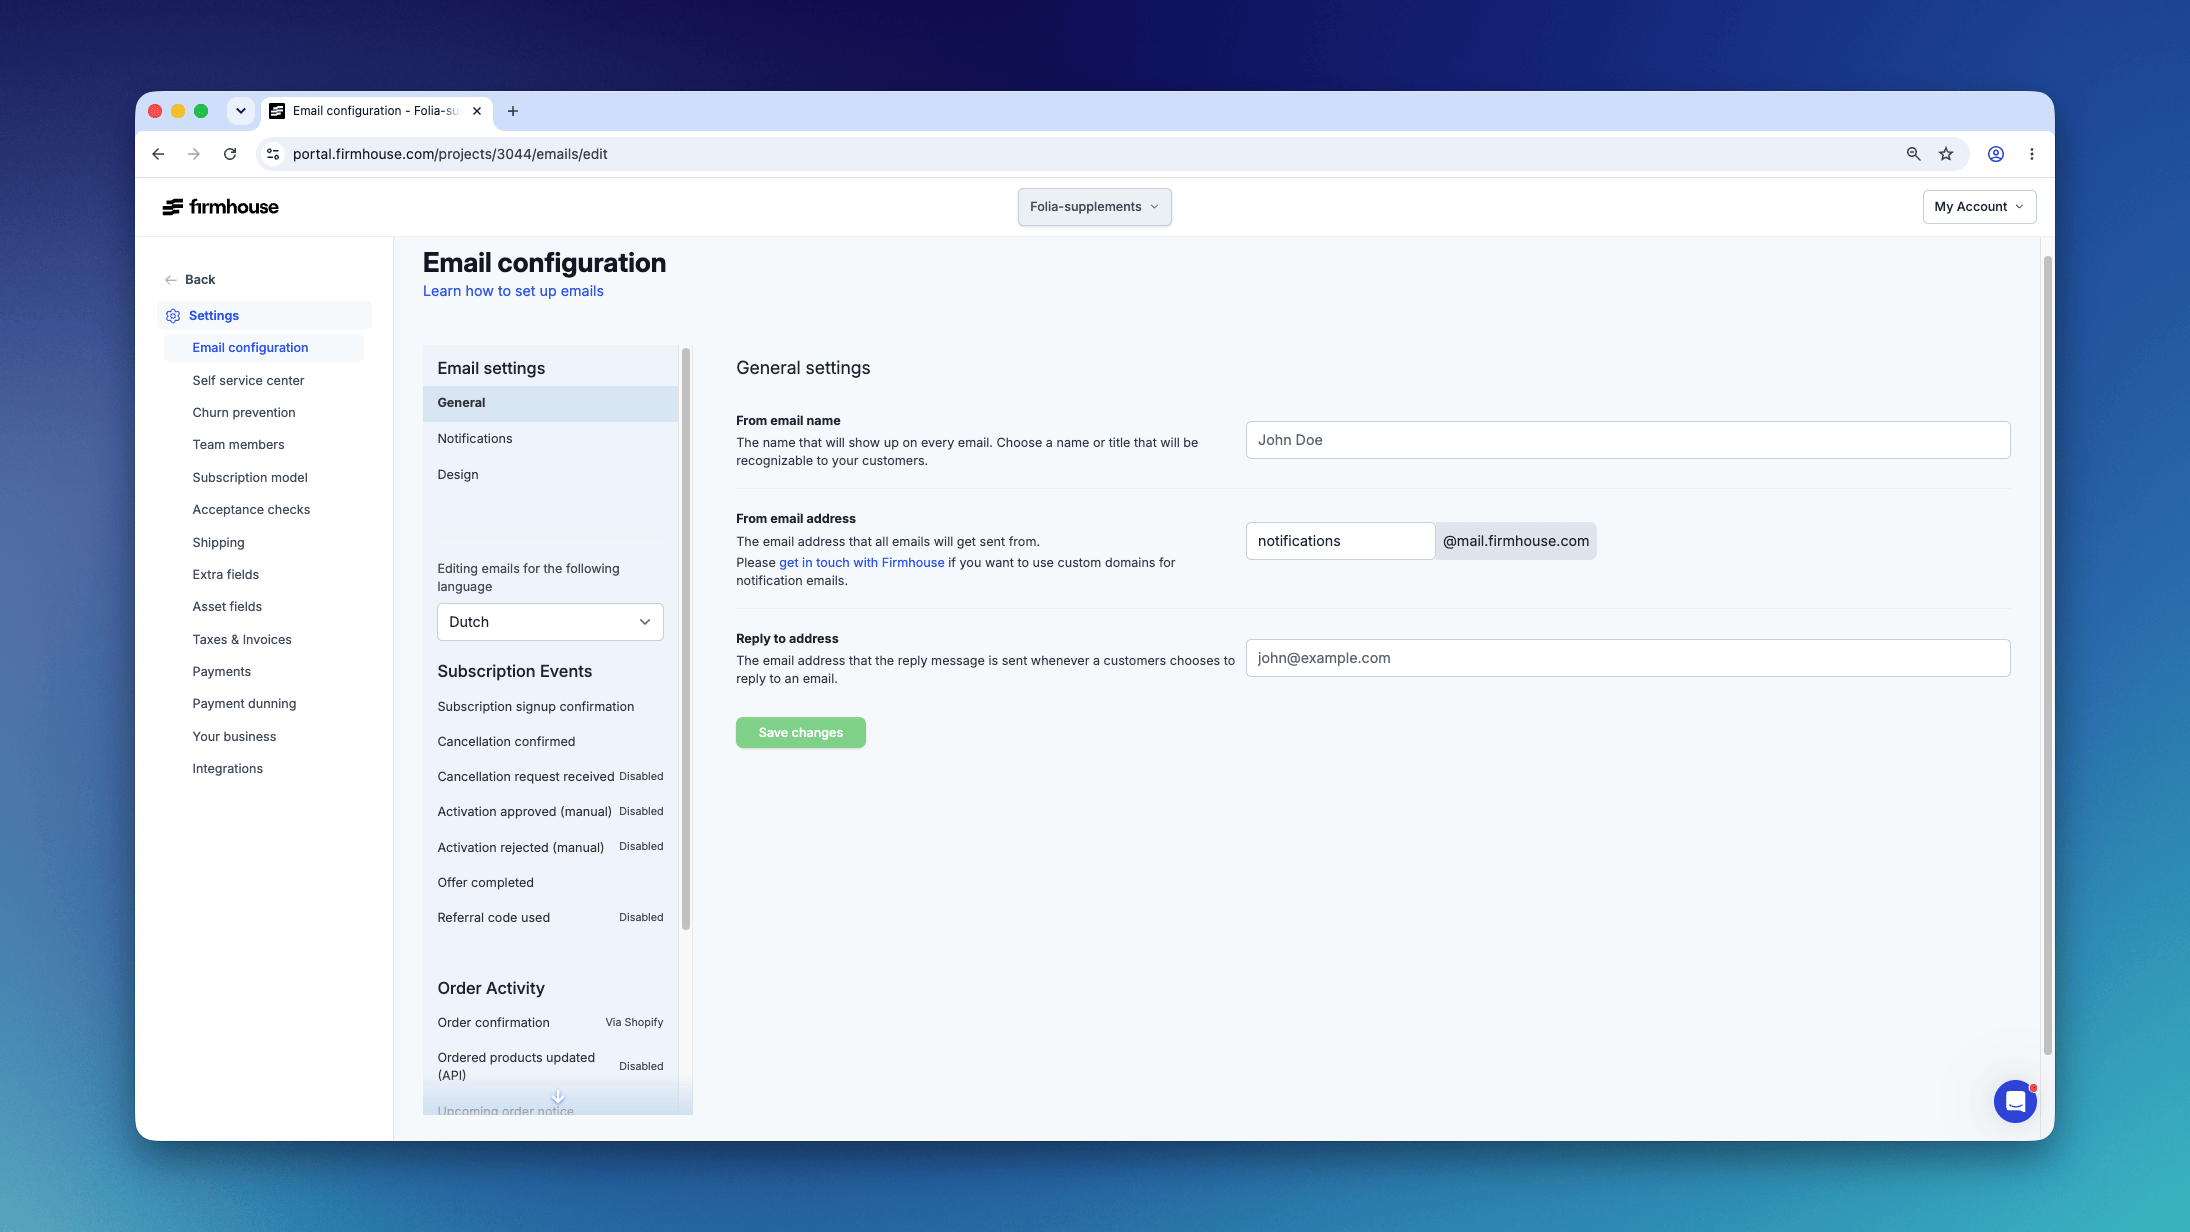
1. Navigate to **Settings** → **Email configuration**.
2. In the navigation panel on the left, you'll see:
* **General settings** - Configure from email name, from email address, and reply-to address
* **Email event categories** - Organized by Subscription Events, Order Activity, and Billing, Payments & Account
3. Click on the specific email template you want to edit from the list (e.g., Subscription signup confirmation, Cancellation confirmed, Failed payment, Upcoming order notice).
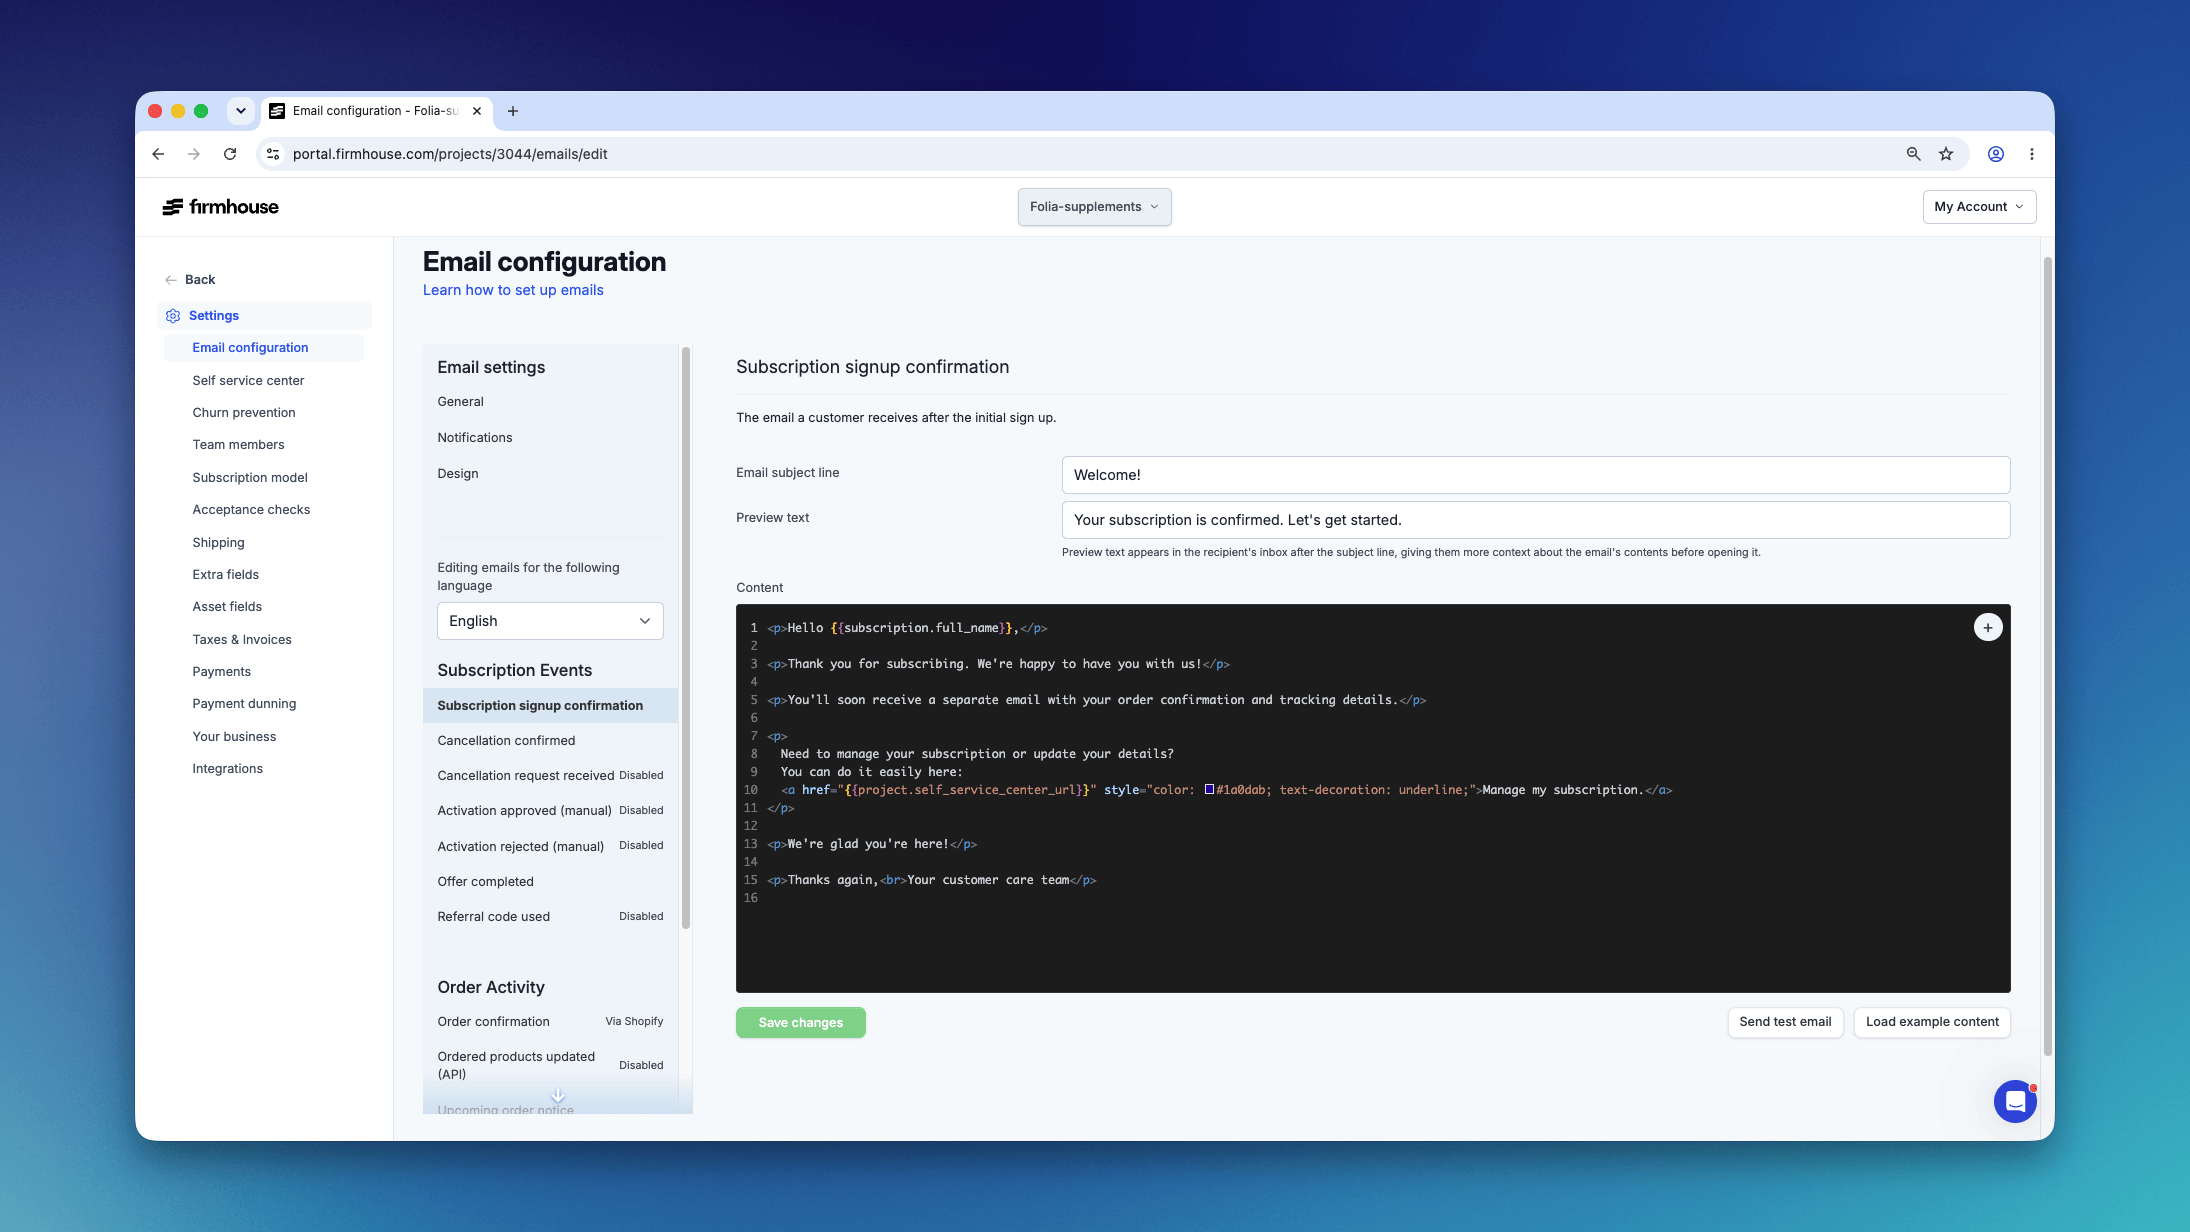
4. The email editor will appear in the main content area.
 5. In the editor, you can modify:
* Email subject line
* Preview text
* Content editor
6. Click **Save changes** to apply your updates.
5. In the editor, you can modify:
* Email subject line
* Preview text
* Content editor
6. Click **Save changes** to apply your updates.
 ## Adding system variables
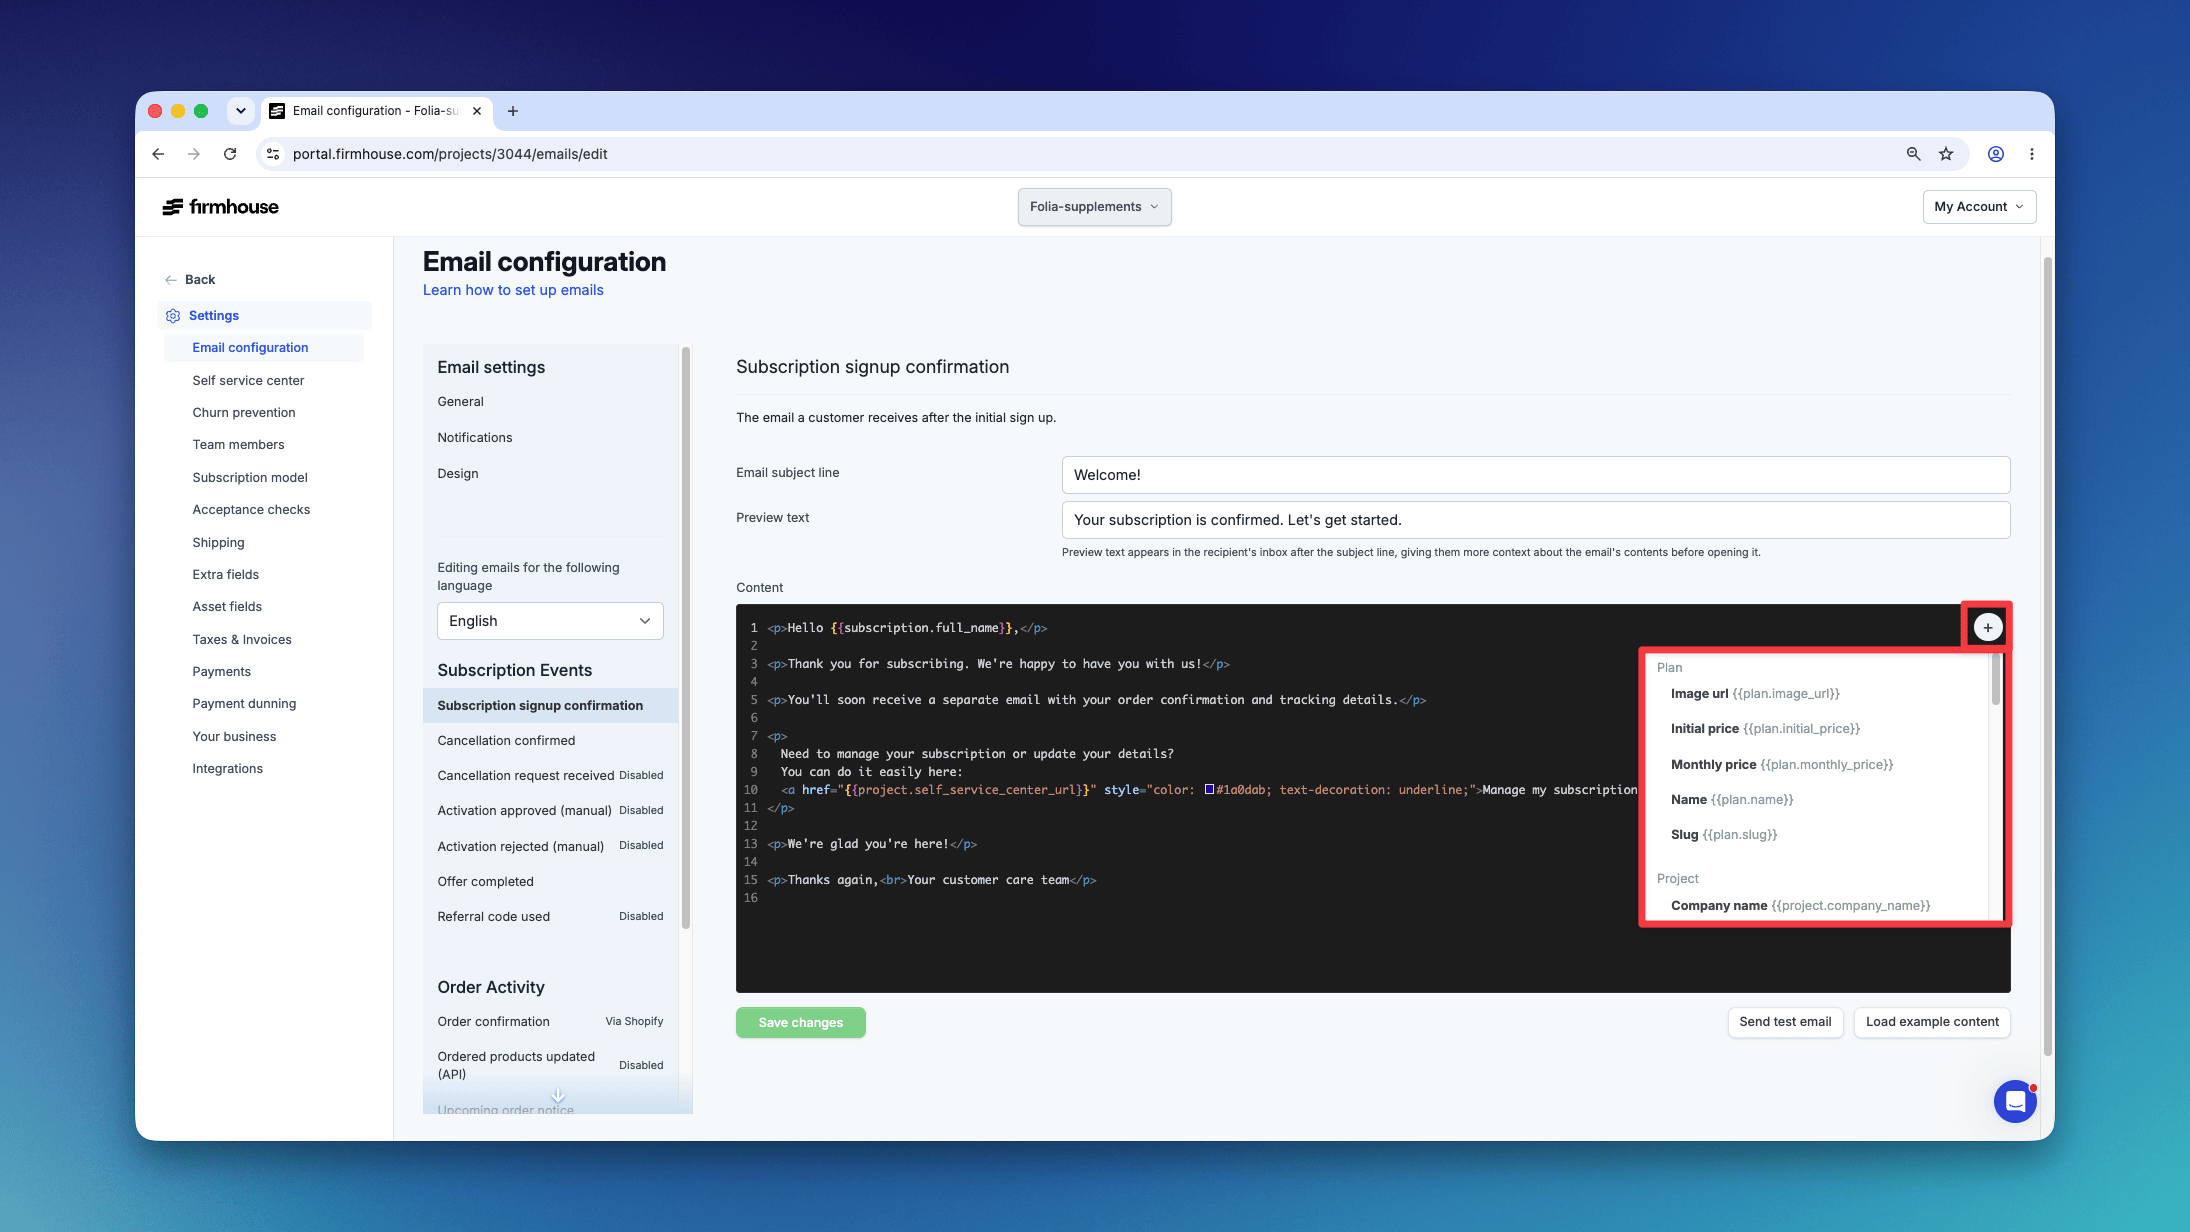
You can add variables stored in the system like a customer's name, the monthly price of the product, and more to personalize your emails.
### Steps
1. In the email content editor, click on the **+** icon in the top-right of the editing screen.
2. Select the variable you want to insert from the list.
## Adding system variables
You can add variables stored in the system like a customer's name, the monthly price of the product, and more to personalize your emails.
### Steps
1. In the email content editor, click on the **+** icon in the top-right of the editing screen.
2. Select the variable you want to insert from the list.
 For a complete list of all the variables you can use in emails, see the [Dynamic Email Liquid Tags](liquid-tags) article.
## Testing your emails
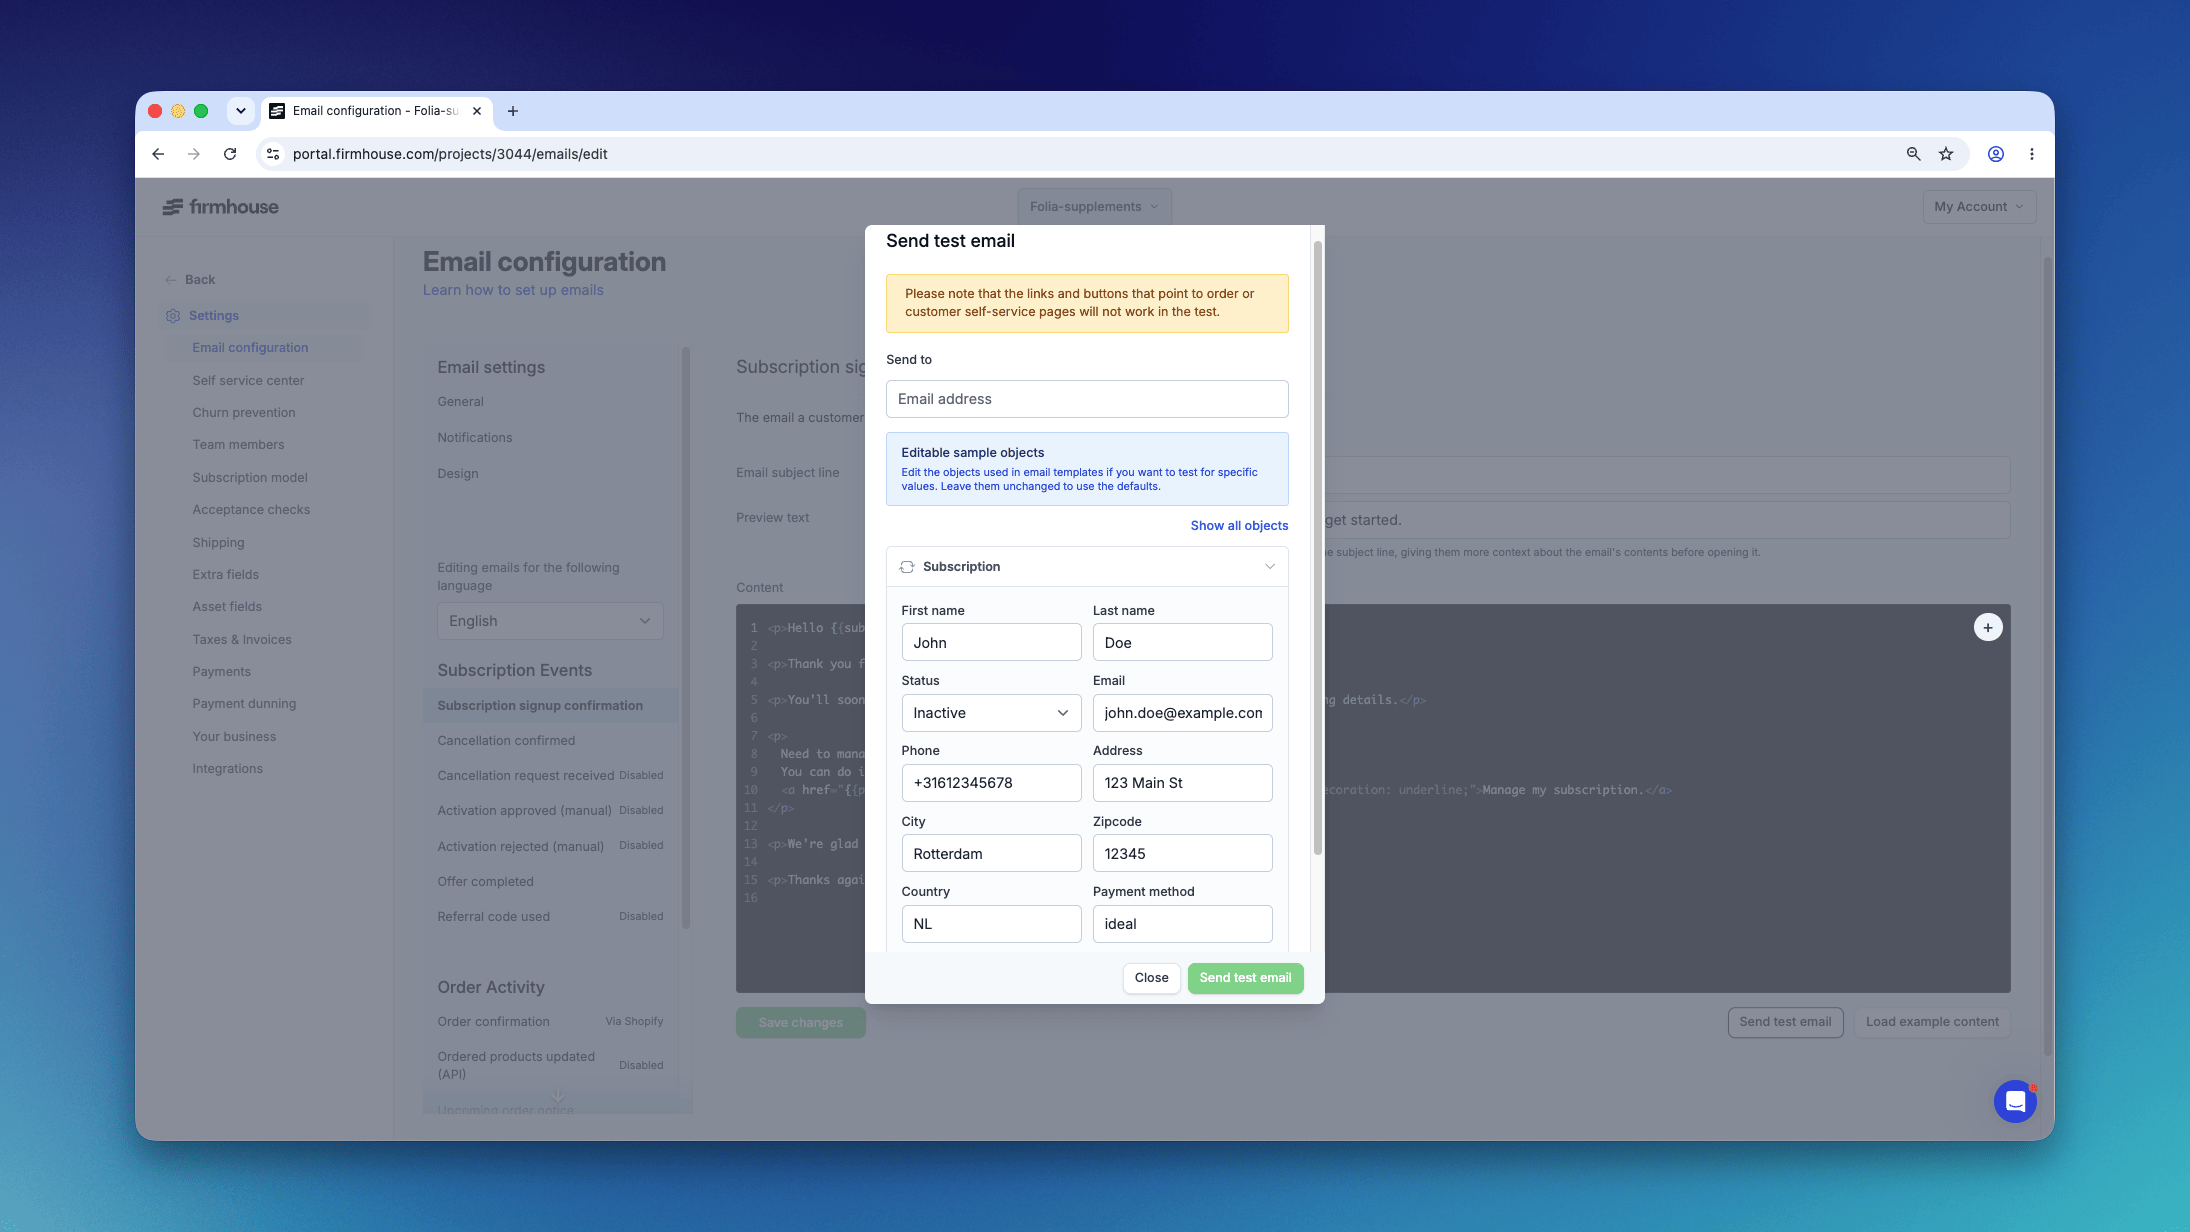
If you want to make sure everything looks the way you want it to, you can send out a test email before going live.
### Steps
1. Click on **Send a test mail** at the bottom of the email editor.
2. Enter your email address in the popup.
3. Click **Send** to receive the test email in your mailbox.
4. Check whether everything looks fine before saving your changes.
For a complete list of all the variables you can use in emails, see the [Dynamic Email Liquid Tags](liquid-tags) article.
## Testing your emails
If you want to make sure everything looks the way you want it to, you can send out a test email before going live.
### Steps
1. Click on **Send a test mail** at the bottom of the email editor.
2. Enter your email address in the popup.
3. Click **Send** to receive the test email in your mailbox.
4. Check whether everything looks fine before saving your changes.