> ## Documentation Index
> Fetch the complete documentation index at: https://docs.firmhouse.com/llms.txt
> Use this file to discover all available pages before exploring further.
# Send webhook events to Klaviyo via Zapier
> Use Zapier to route Firmhouse webhook events to the Klaviyo profiles API, syncing subscription updates to customer profiles without writing code.
Zapier is an automation platform that connects your work apps and helps you do repetitive tasks without writing code or running servers. This article explains how to hook up webhooks in Firmhouse to a Zapier workflow so that it updates your Klaviyo profiles API. Zapier automates your work by connecting your apps and then moves information between them based on the rules you set.
## Getting Started
To get started, you need to create an account with Zapier. Sign up at [zapier.com](https://www.zapier.com/) if you don't have an account already. Once you have created an account, log into Zapier to create a Zap. A Zap is an automated workflow that tells your app to perform an action when an event happens. Every Zap has a trigger and one or more actions. A trigger is an event that starts a Zap and an action is what your Zap does for you.
## Add a Trigger
By using a Zap with a webhook trigger, you can catch information coming from Firmhouse and push that information to Klaviyo.
### Steps
1. Click on **Create Zap** on the top left corner of your Zapier account.
2. Search for **Webhooks by Zapier** and press **Enter**.
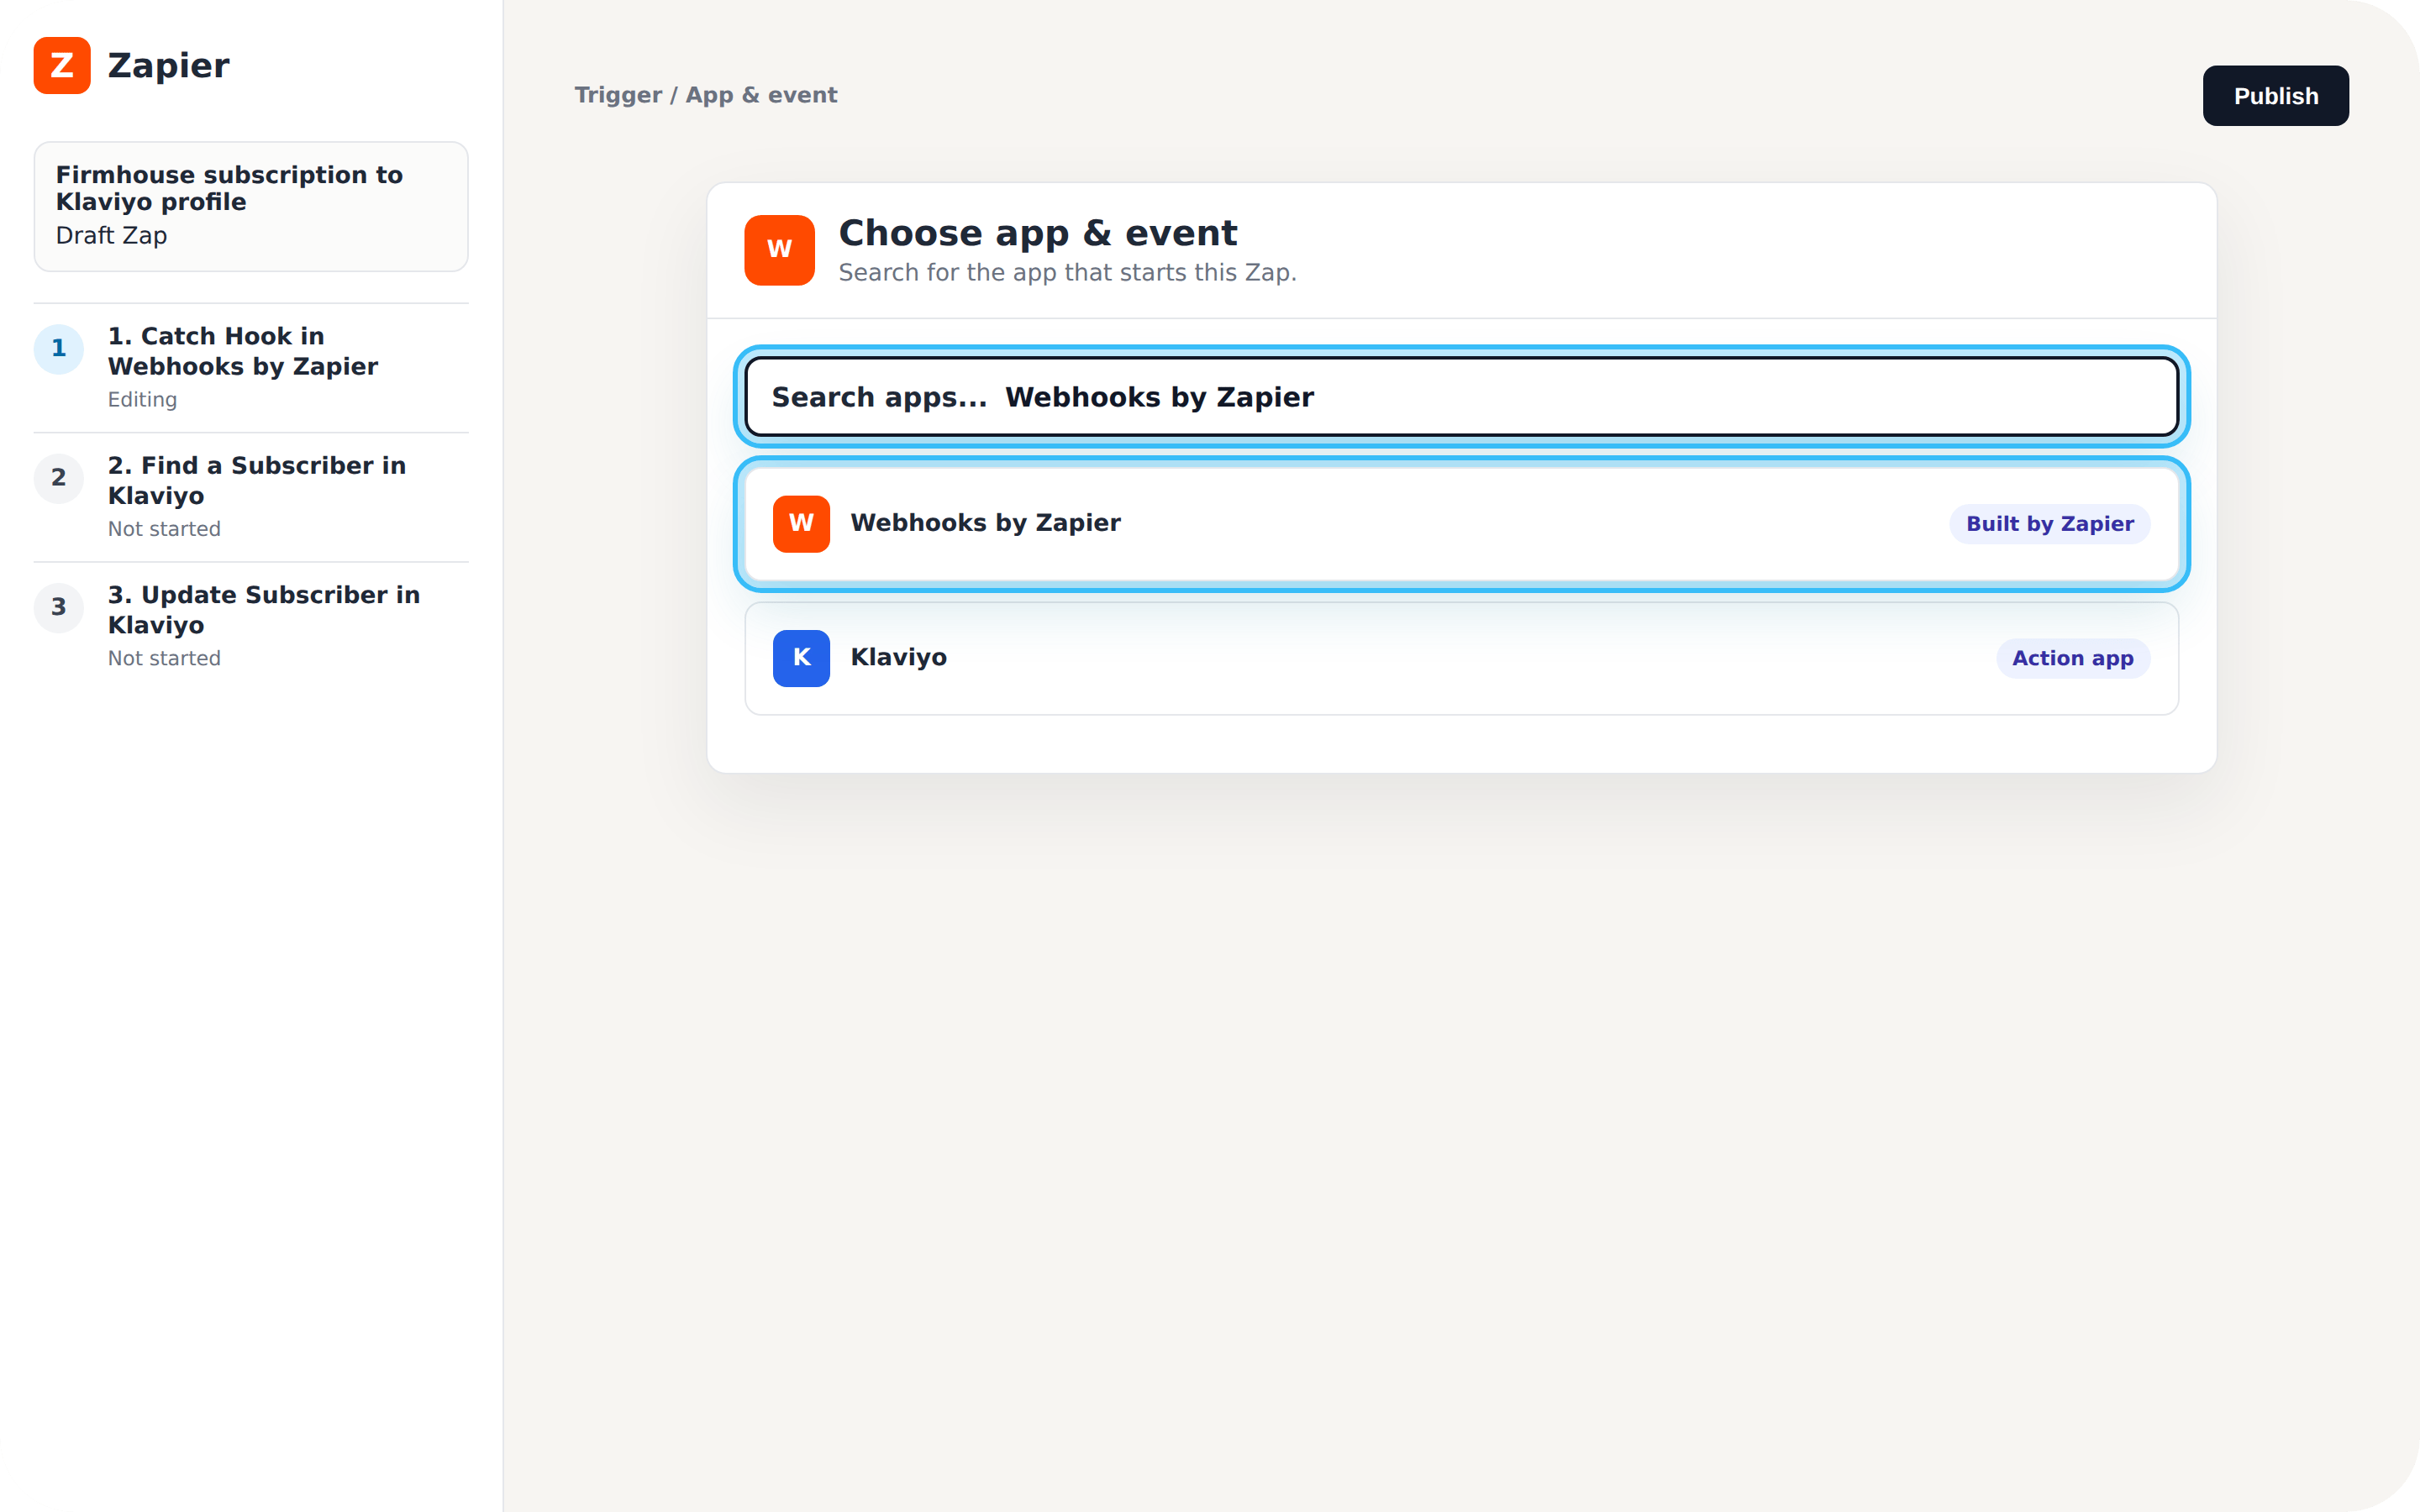 3. Click on the event dropdown menu to choose an event, select **Catch Hook** and click **Continue**.
4. You will see a field **Pick off a child key**. Leave this field empty and click **Continue**.
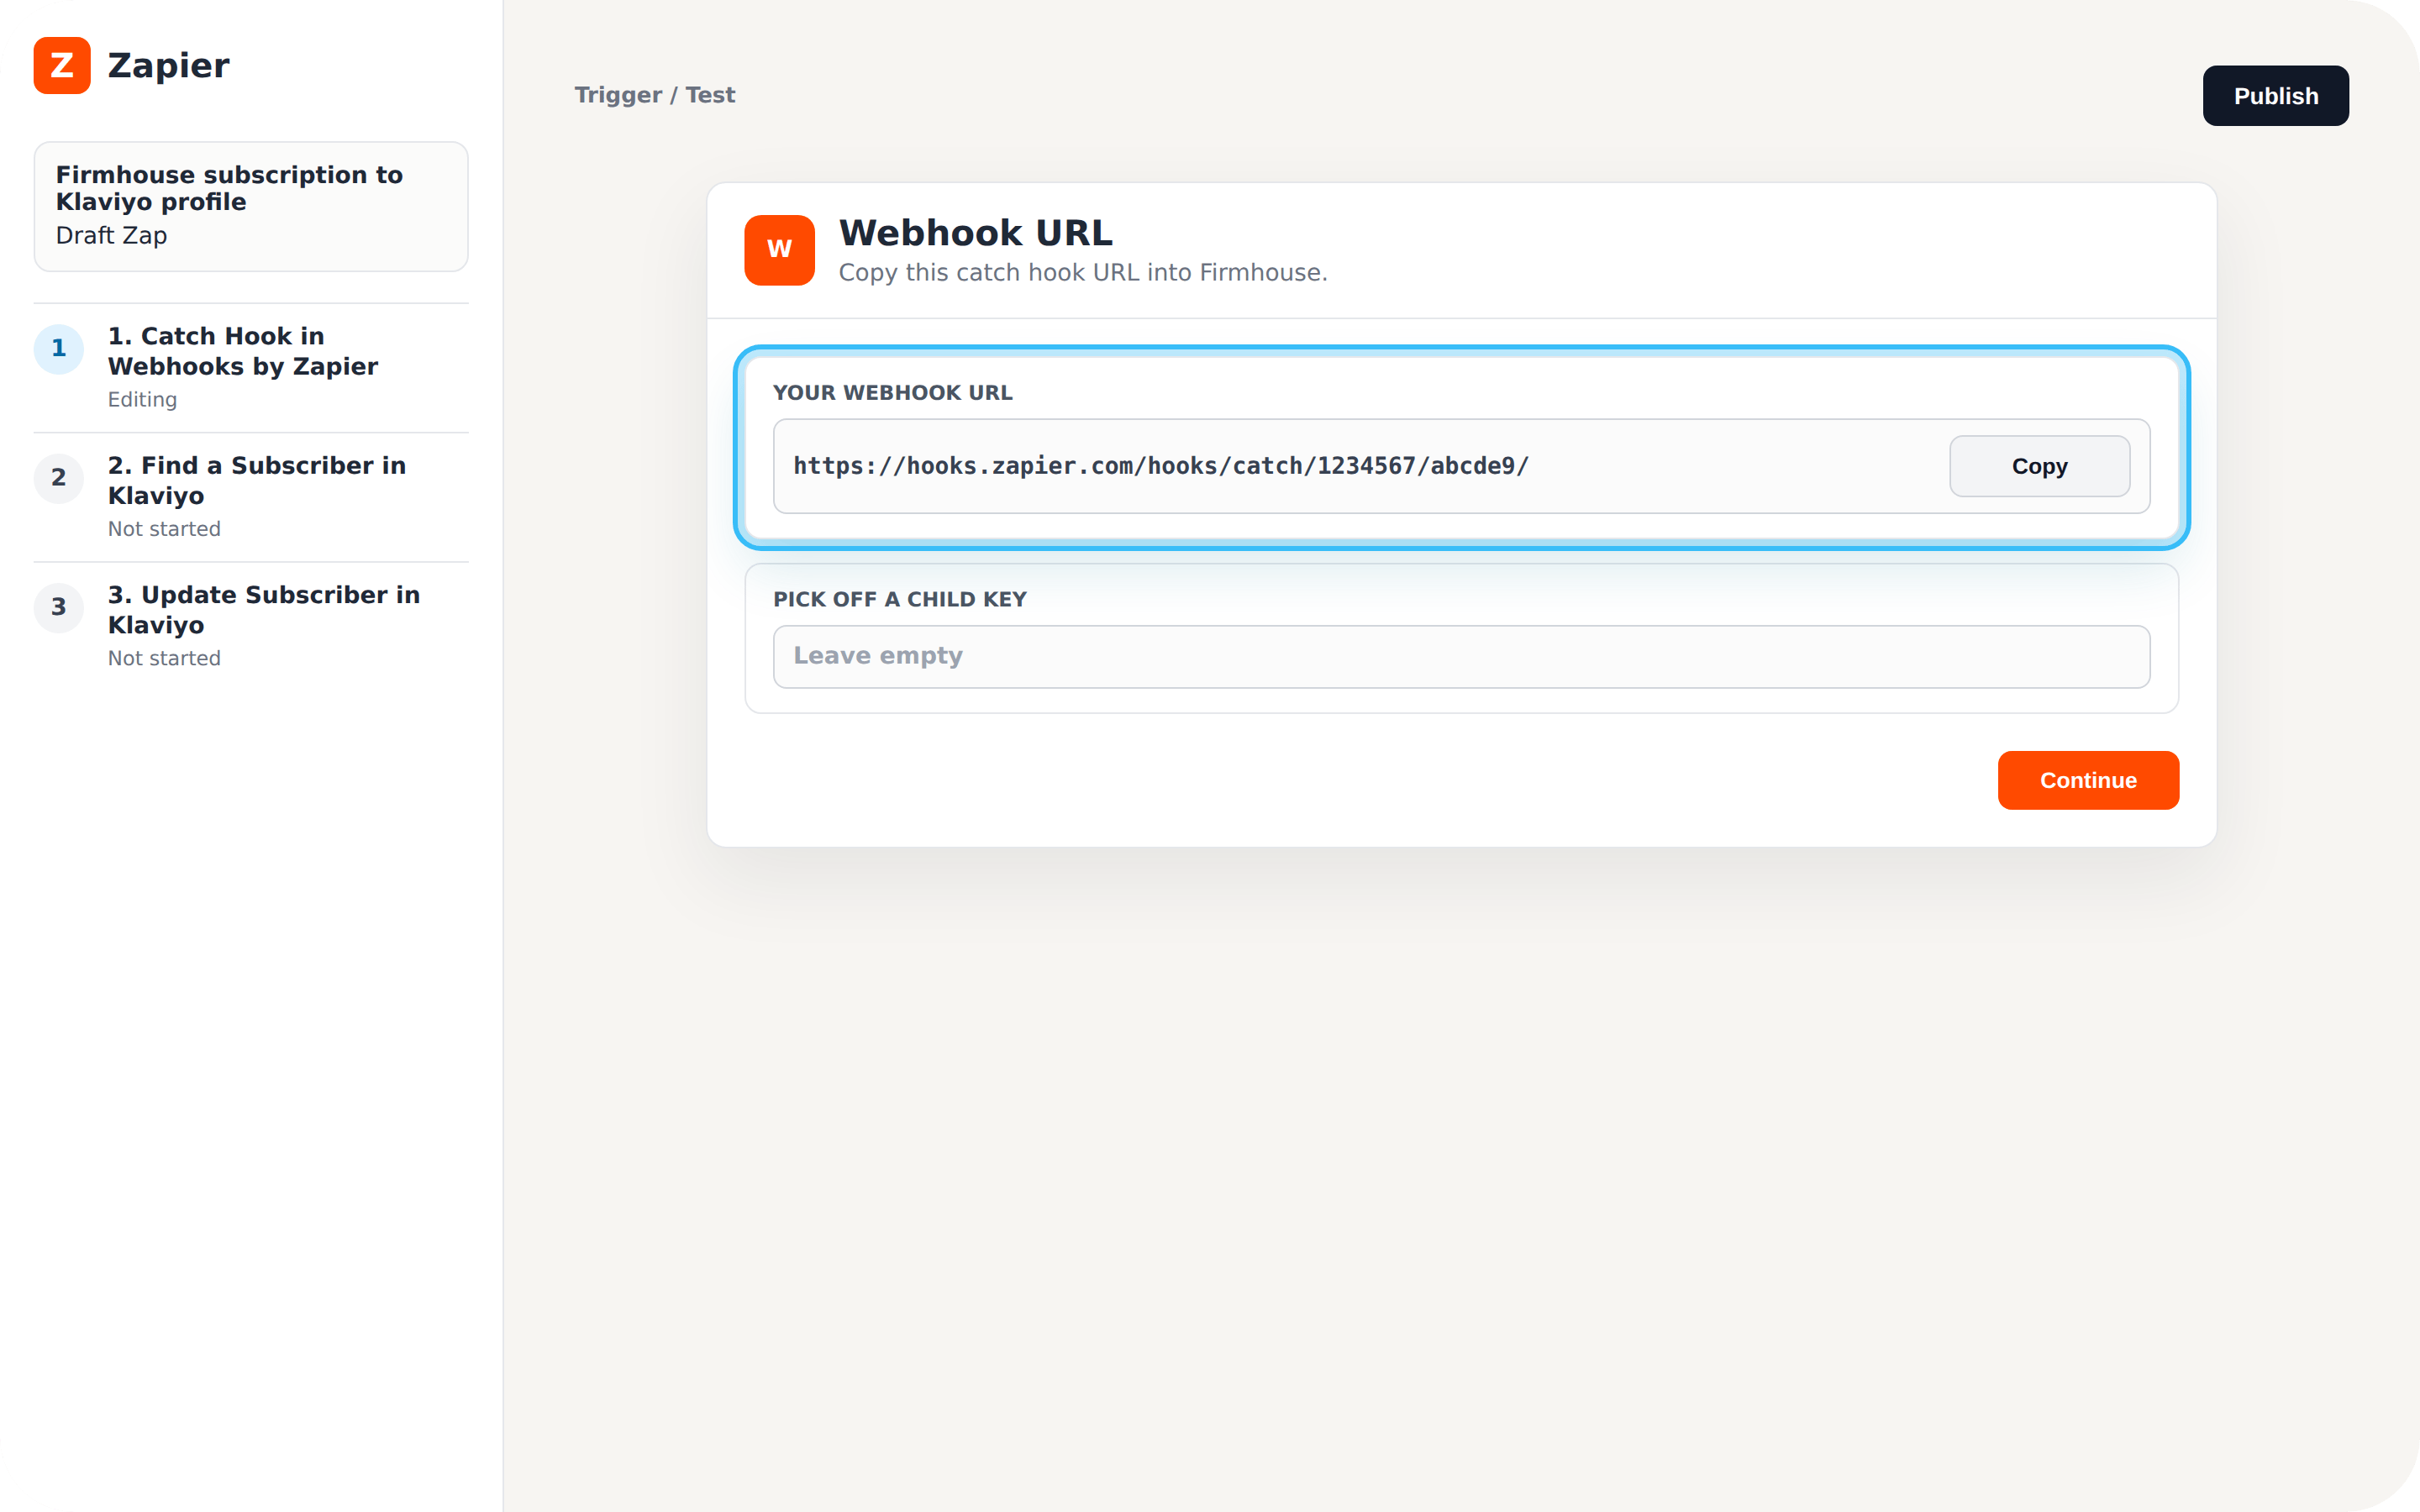
5. The catch hook trigger gives you a unique URL (something like `https://hooks.zapier.com/hooks/catch/xxxxxxxx/xxxxxxx/`) that you can make POST requests to. Copy this URL for use in the next steps.
3. Click on the event dropdown menu to choose an event, select **Catch Hook** and click **Continue**.
4. You will see a field **Pick off a child key**. Leave this field empty and click **Continue**.
5. The catch hook trigger gives you a unique URL (something like `https://hooks.zapier.com/hooks/catch/xxxxxxxx/xxxxxxx/`) that you can make POST requests to. Copy this URL for use in the next steps.
 ## Configure Webhook in Firmhouse
Now that you have your custom webhook URL generated by Zapier, it is time to create a Firmhouse webhook which will get triggered when someone completes the checkout for a subscription.
### Steps
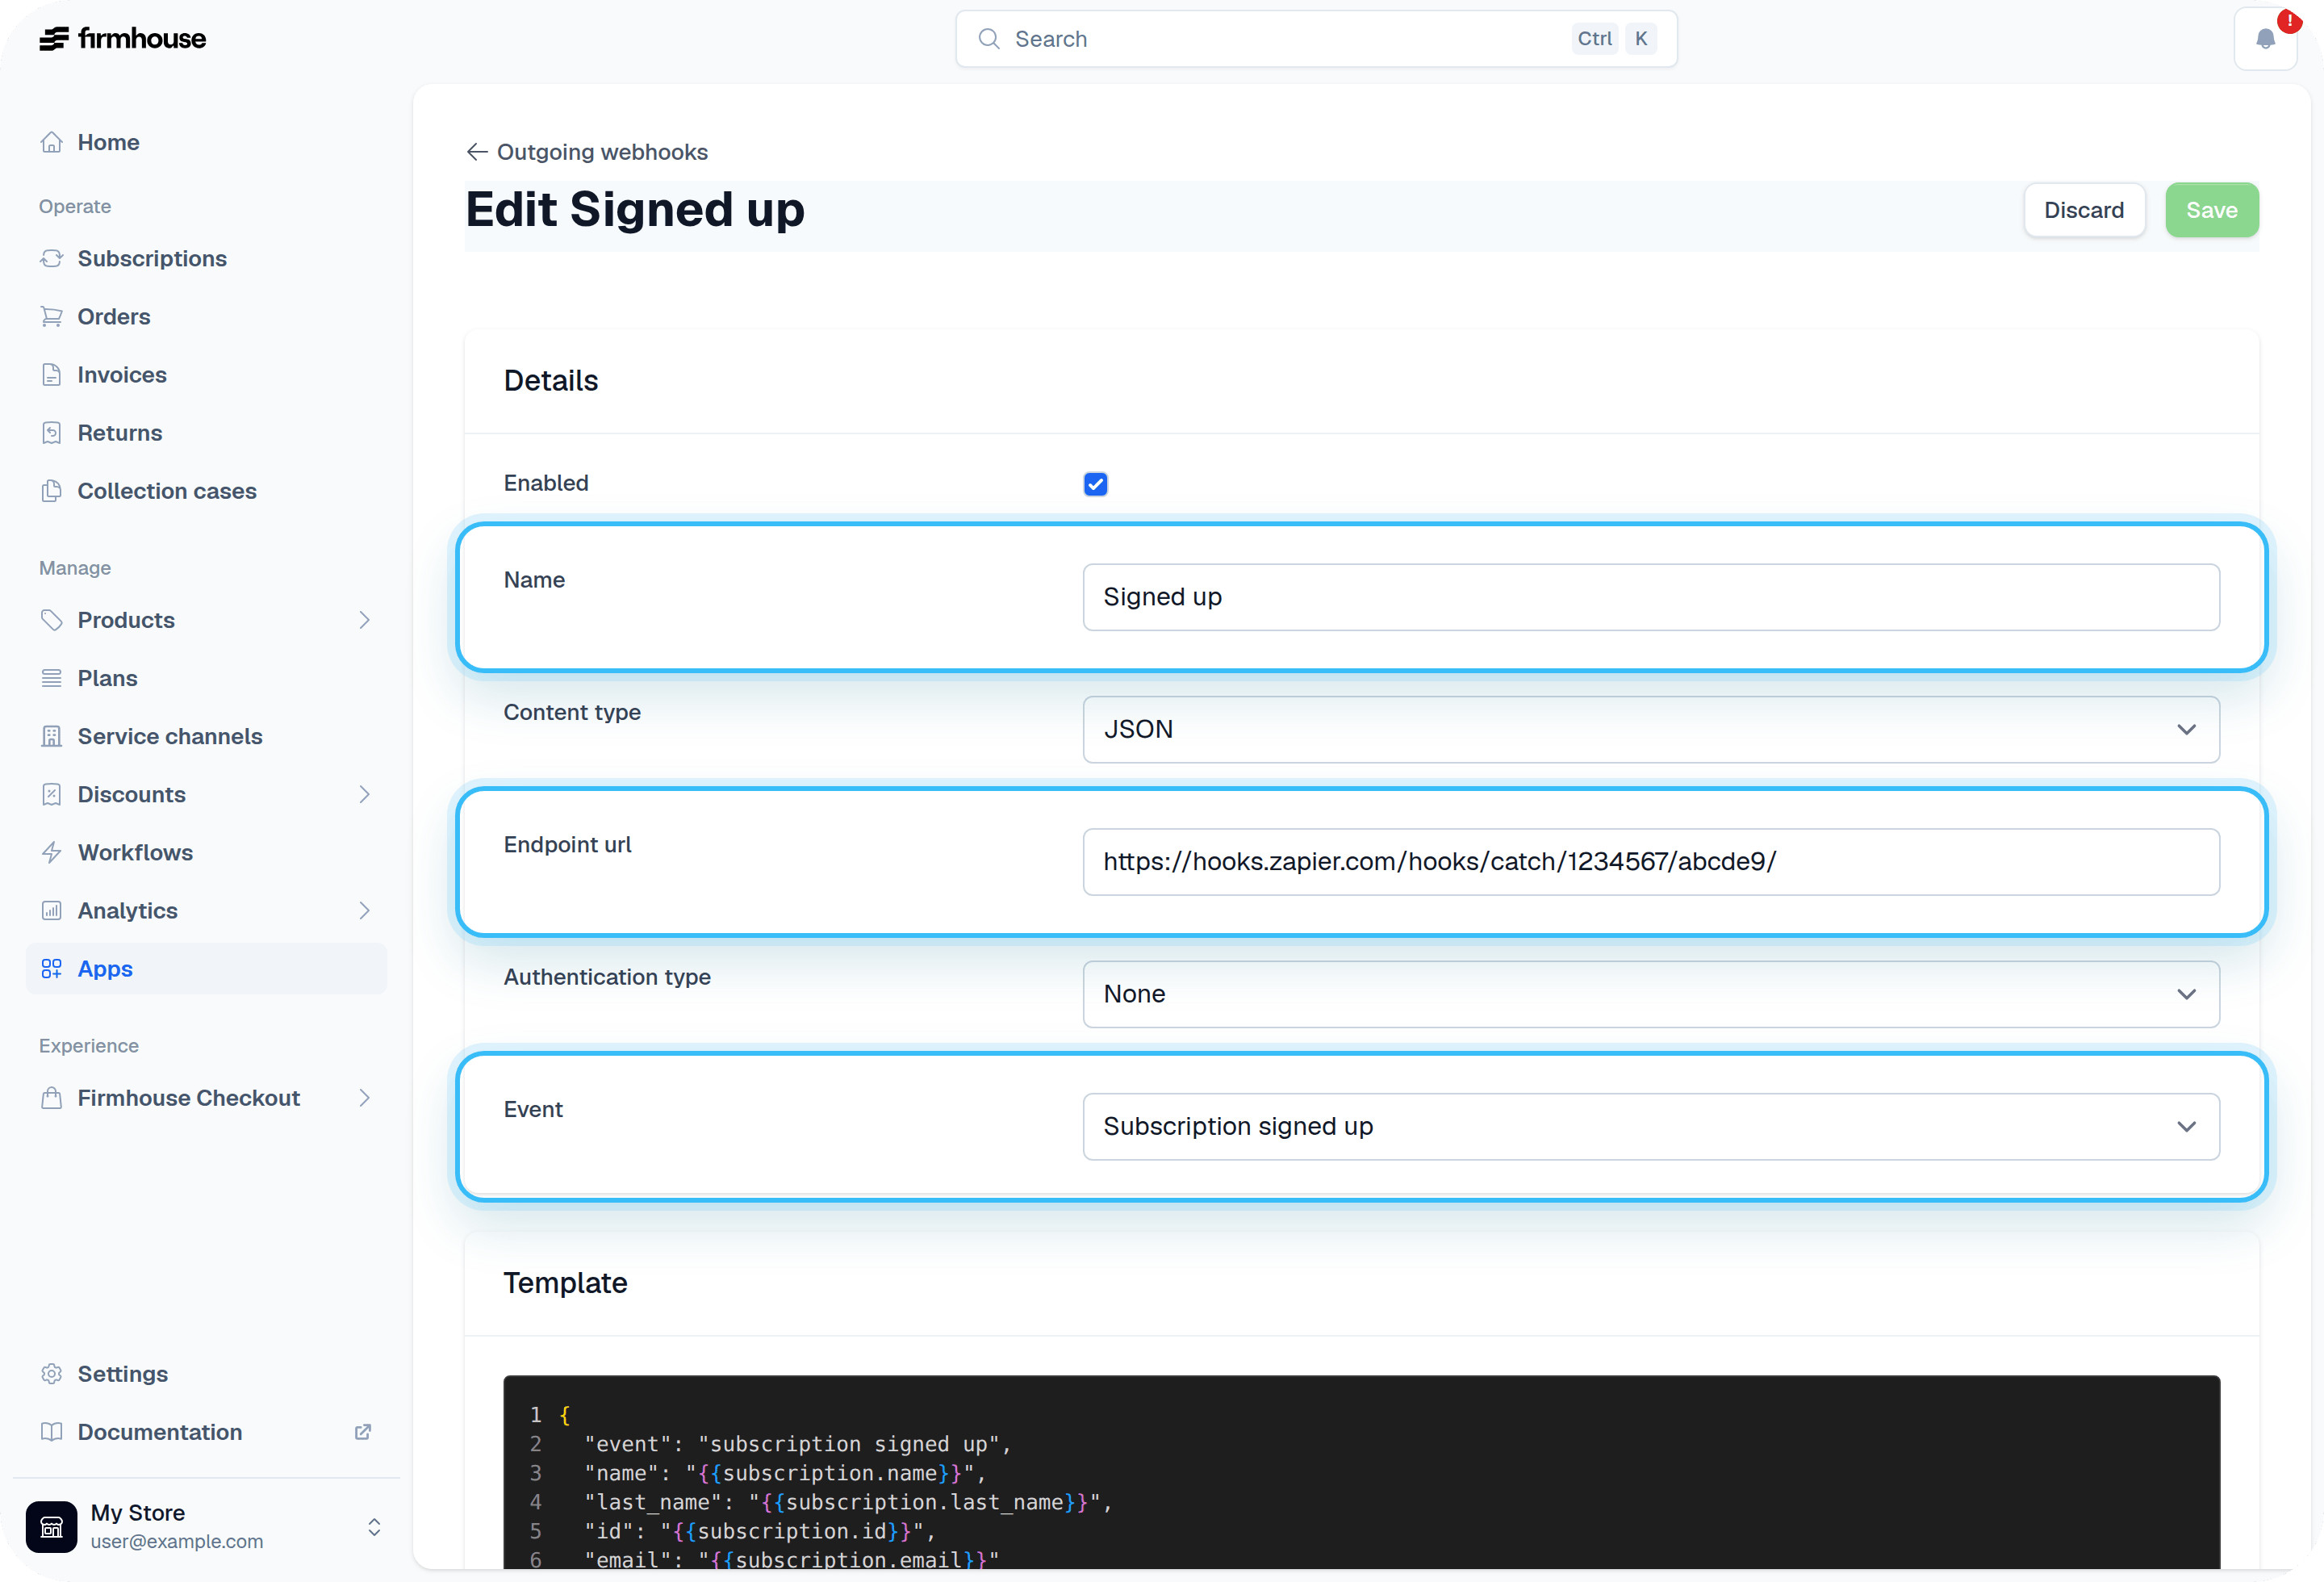
1. Go to your portal in Firmhouse and navigate to the **Apps** section located on the sidebar.
2. Look for **Webhooks** and click **Configure**. You will be taken to the **Outgoing webhooks** page.
3. Click on **New outgoing webhook** on the top right corner and fill out the form fields.
4. In the **Name** field, enter the name of your webhook. For example, use **Signed up**.
5. In the **Endpoint url** field, enter the URL you copied earlier from Zapier.
6. Leave the **Authentication type** to none.
7. In the **Event** dropdown menu, select **Subscription signed up**.
8. In the **Template** field, paste the following snippet. See the [Liquid tags documentation](https://developer.firmhouse.com/liquid/objects#subscription) for more tags you can use.
```json theme={null}
{
"event": "subscription signed up",
"name": "{{subscription.name}}",
"last_name": "{{subscription.last_name}}",
"id": "{{subscription.id}}",
"email": "{{subscription.email}}"
}
```
9. Click **Save** to save the outgoing webhook.
## Configure Webhook in Firmhouse
Now that you have your custom webhook URL generated by Zapier, it is time to create a Firmhouse webhook which will get triggered when someone completes the checkout for a subscription.
### Steps
1. Go to your portal in Firmhouse and navigate to the **Apps** section located on the sidebar.
2. Look for **Webhooks** and click **Configure**. You will be taken to the **Outgoing webhooks** page.
3. Click on **New outgoing webhook** on the top right corner and fill out the form fields.
4. In the **Name** field, enter the name of your webhook. For example, use **Signed up**.
5. In the **Endpoint url** field, enter the URL you copied earlier from Zapier.
6. Leave the **Authentication type** to none.
7. In the **Event** dropdown menu, select **Subscription signed up**.
8. In the **Template** field, paste the following snippet. See the [Liquid tags documentation](https://developer.firmhouse.com/liquid/objects#subscription) for more tags you can use.
```json theme={null}
{
"event": "subscription signed up",
"name": "{{subscription.name}}",
"last_name": "{{subscription.last_name}}",
"id": "{{subscription.id}}",
"email": "{{subscription.email}}"
}
```
9. Click **Save** to save the outgoing webhook.
 ## Test the Trigger
This step ensures the trigger works as expected.
### Steps
1. To get your test to work correctly, you must first start a subscription in Firmhouse via your regular checkout so that a webhook will trigger towards your Zap.
2. Head over to your Zapier account and click **Test trigger**.
## Test the Trigger
This step ensures the trigger works as expected.
### Steps
1. To get your test to work correctly, you must first start a subscription in Firmhouse via your regular checkout so that a webhook will trigger towards your Zap.
2. Head over to your Zapier account and click **Test trigger**.
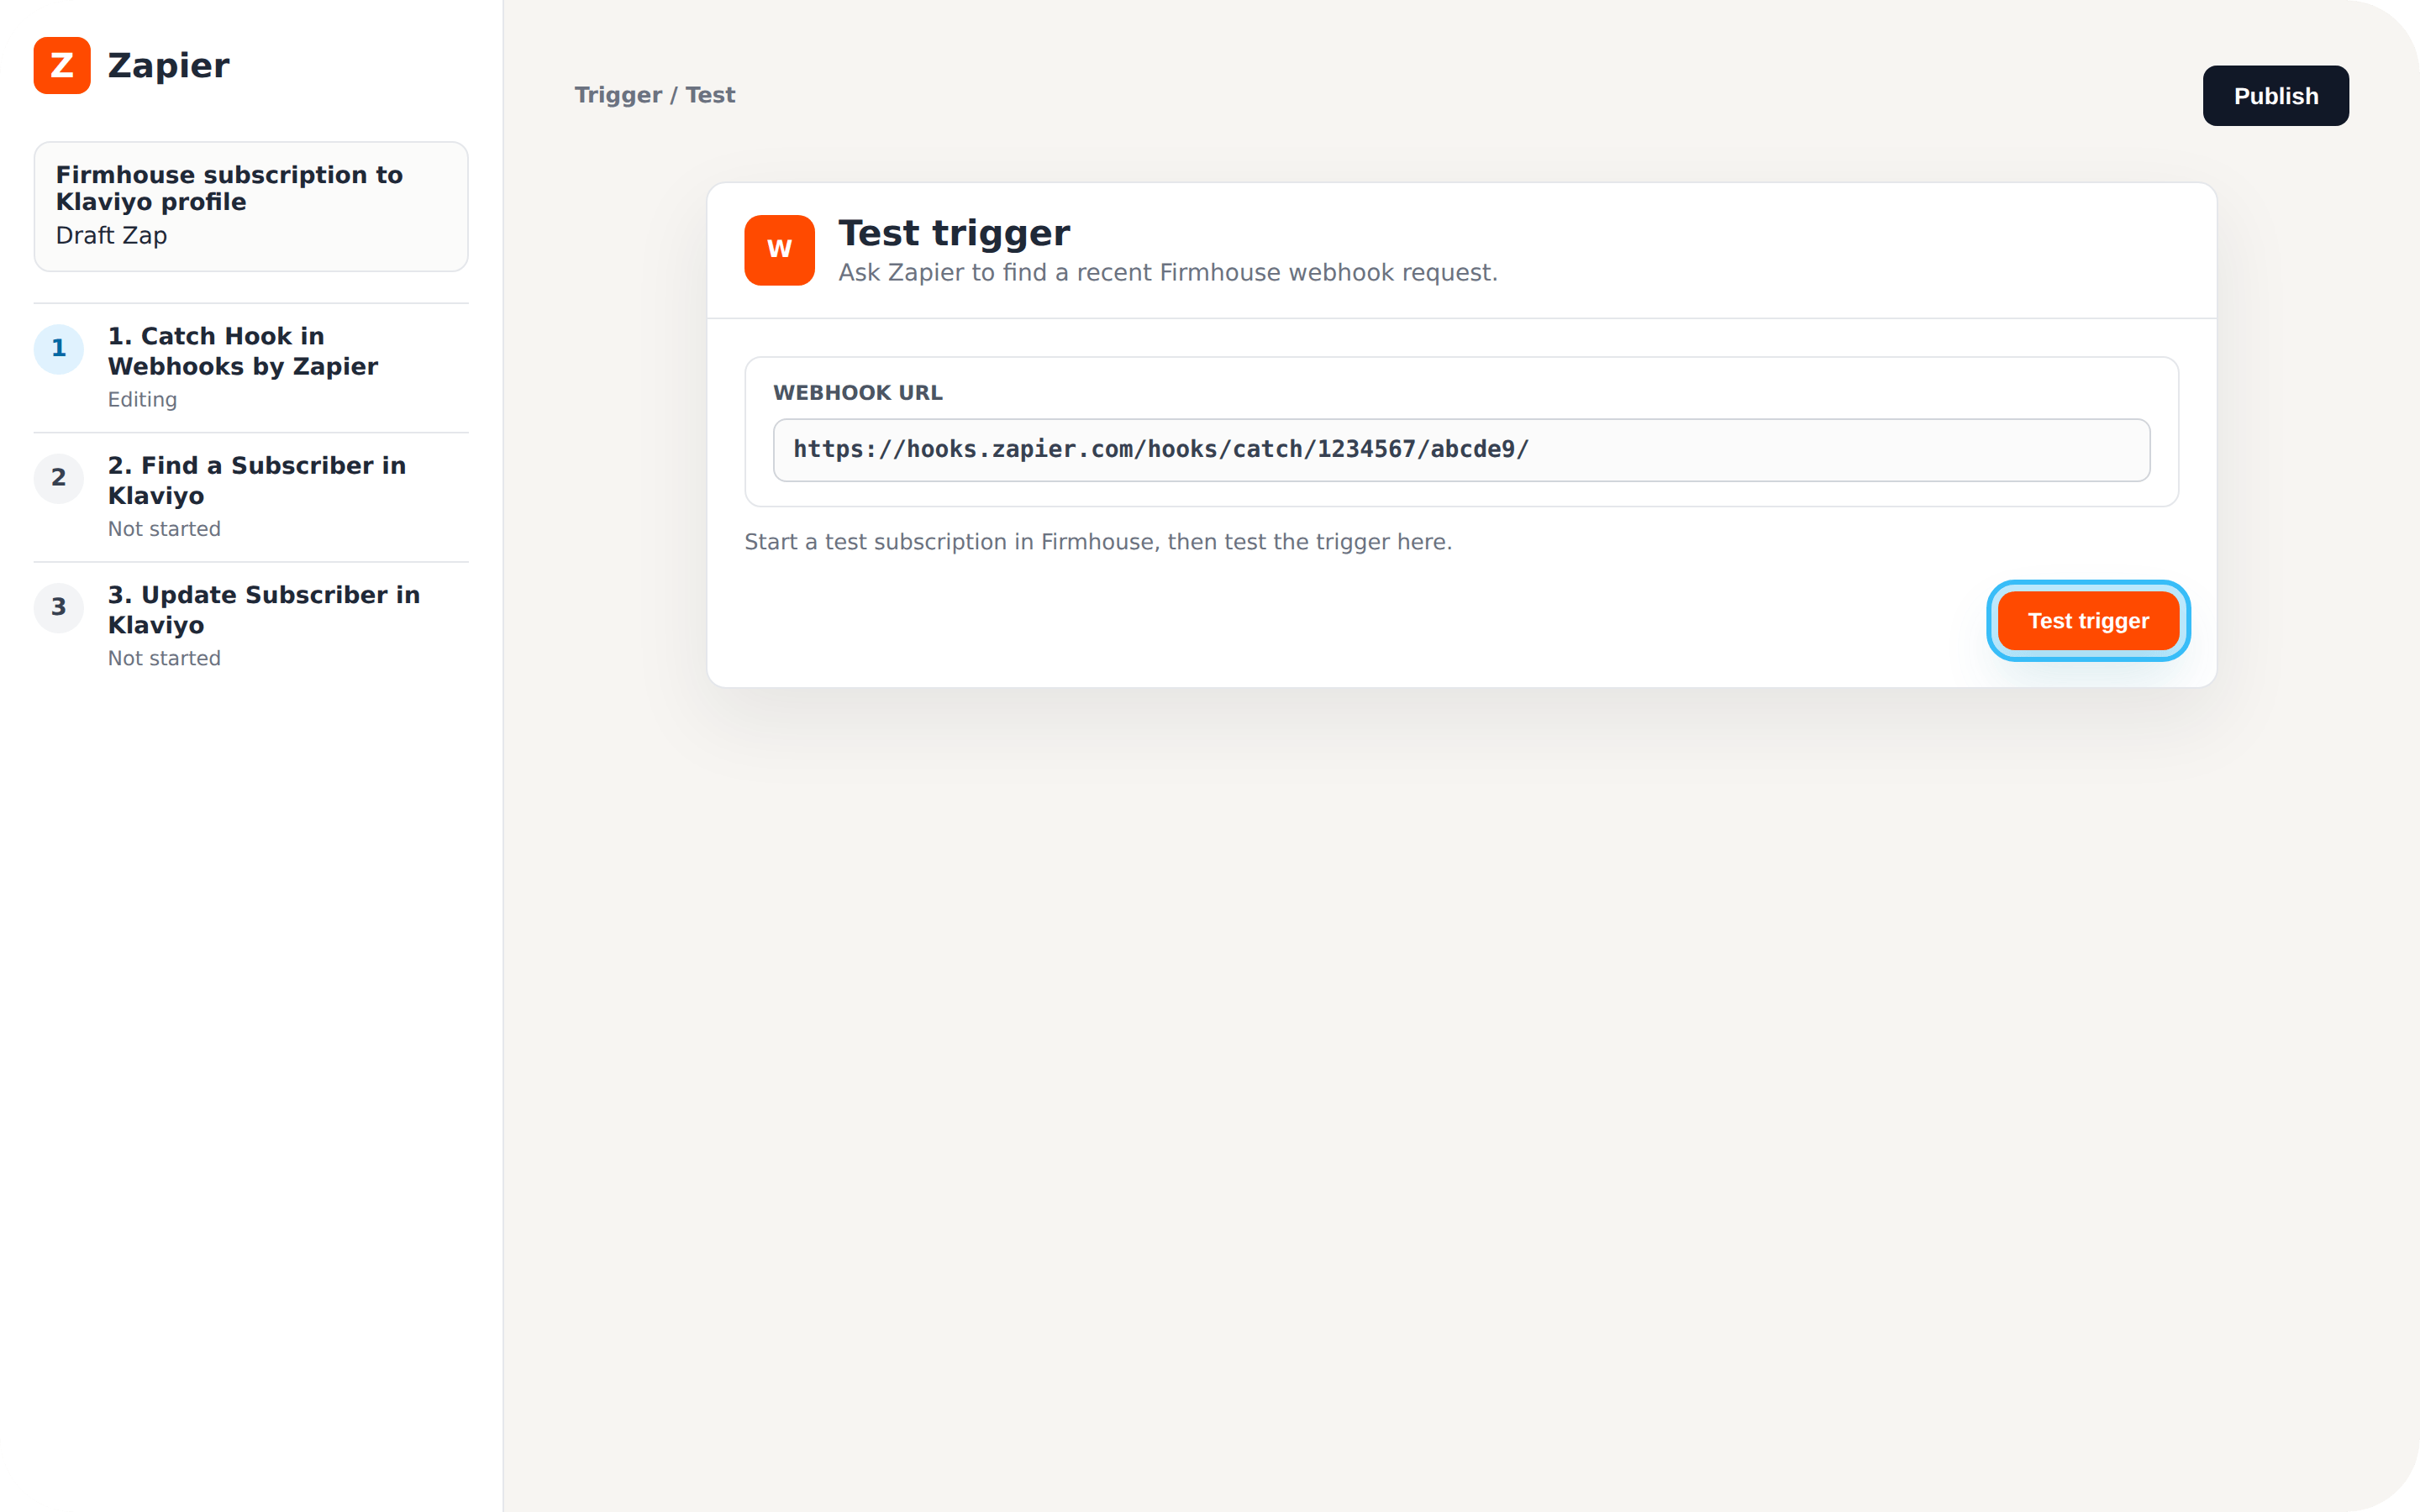 3. You should see a green tick and a success message that a request was found. You will also see a display of the webhook payload or the data it carries.
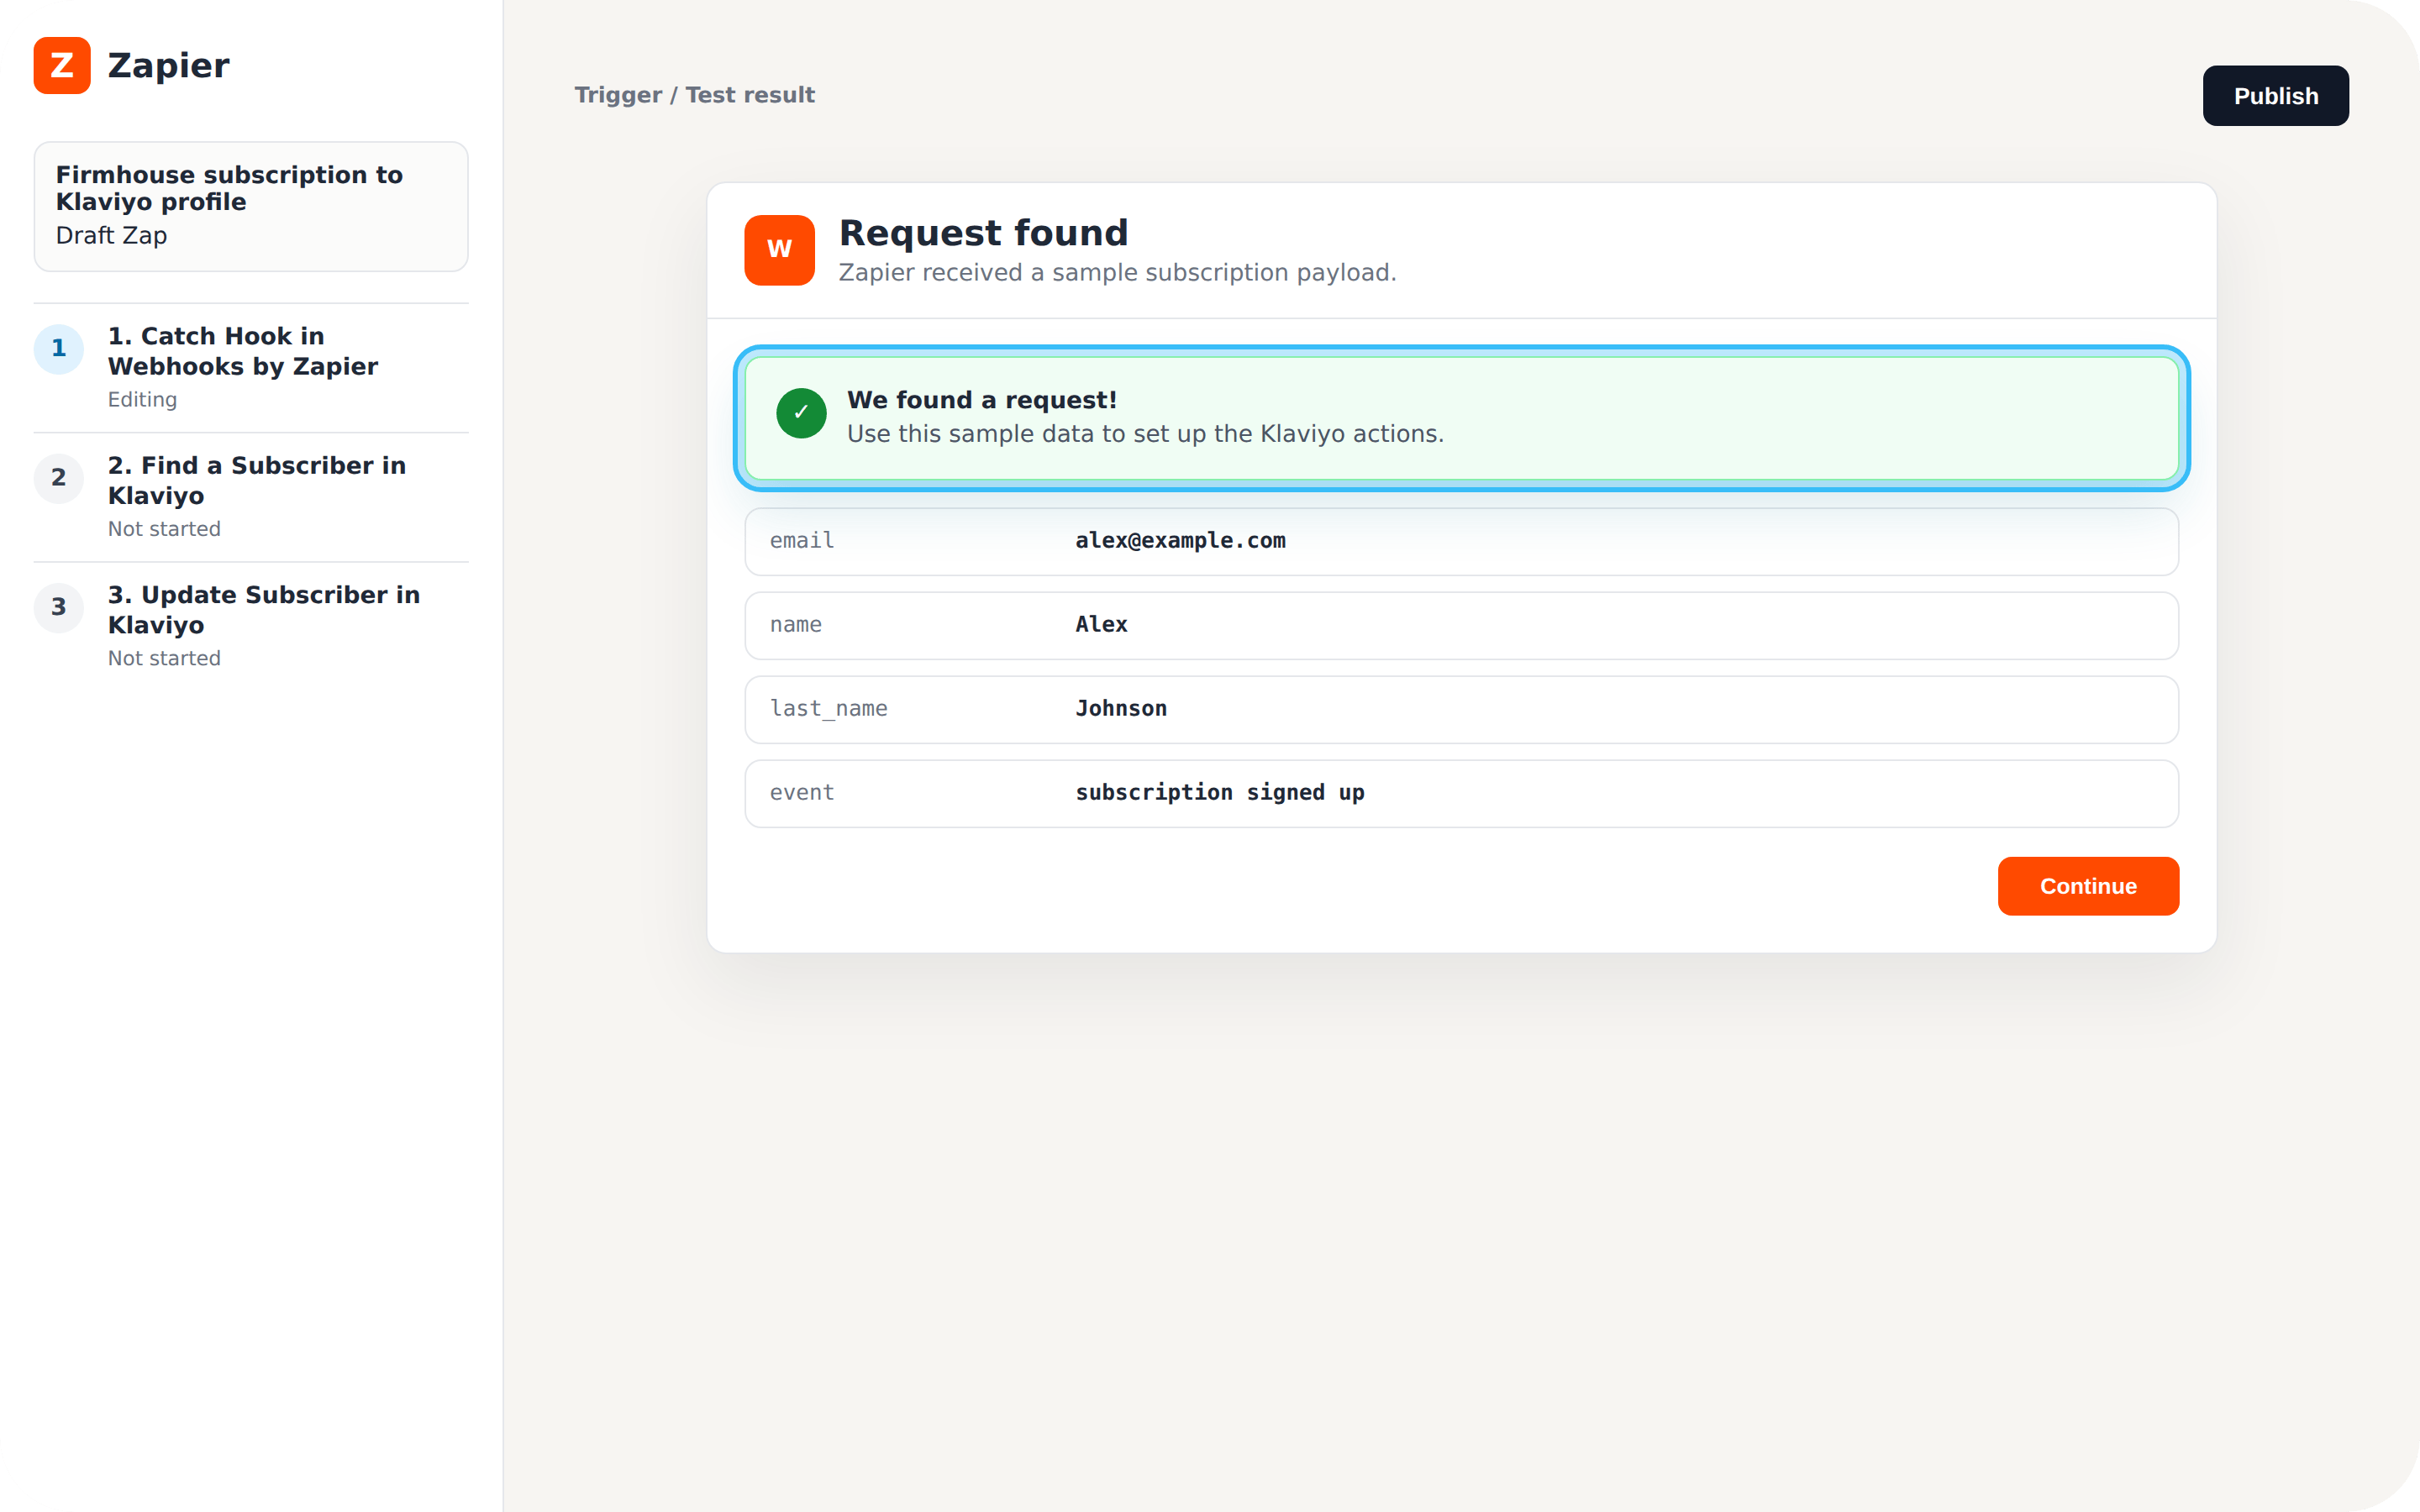 4. Click **Continue** to proceed to the next stage which is setting up an action.
## Set Up Zap Action
After setting up the Zap trigger correctly and passing the test, the next step is to add actions to your Zap. You will be adding two action steps: finding a subscriber in Klaviyo and updating the subscriber in Klaviyo.
### Add Find a Subscriber Event
#### Steps
1. In your Zap editor, click on the **plus \[+] icon** underneath the Zap trigger to add a new action.
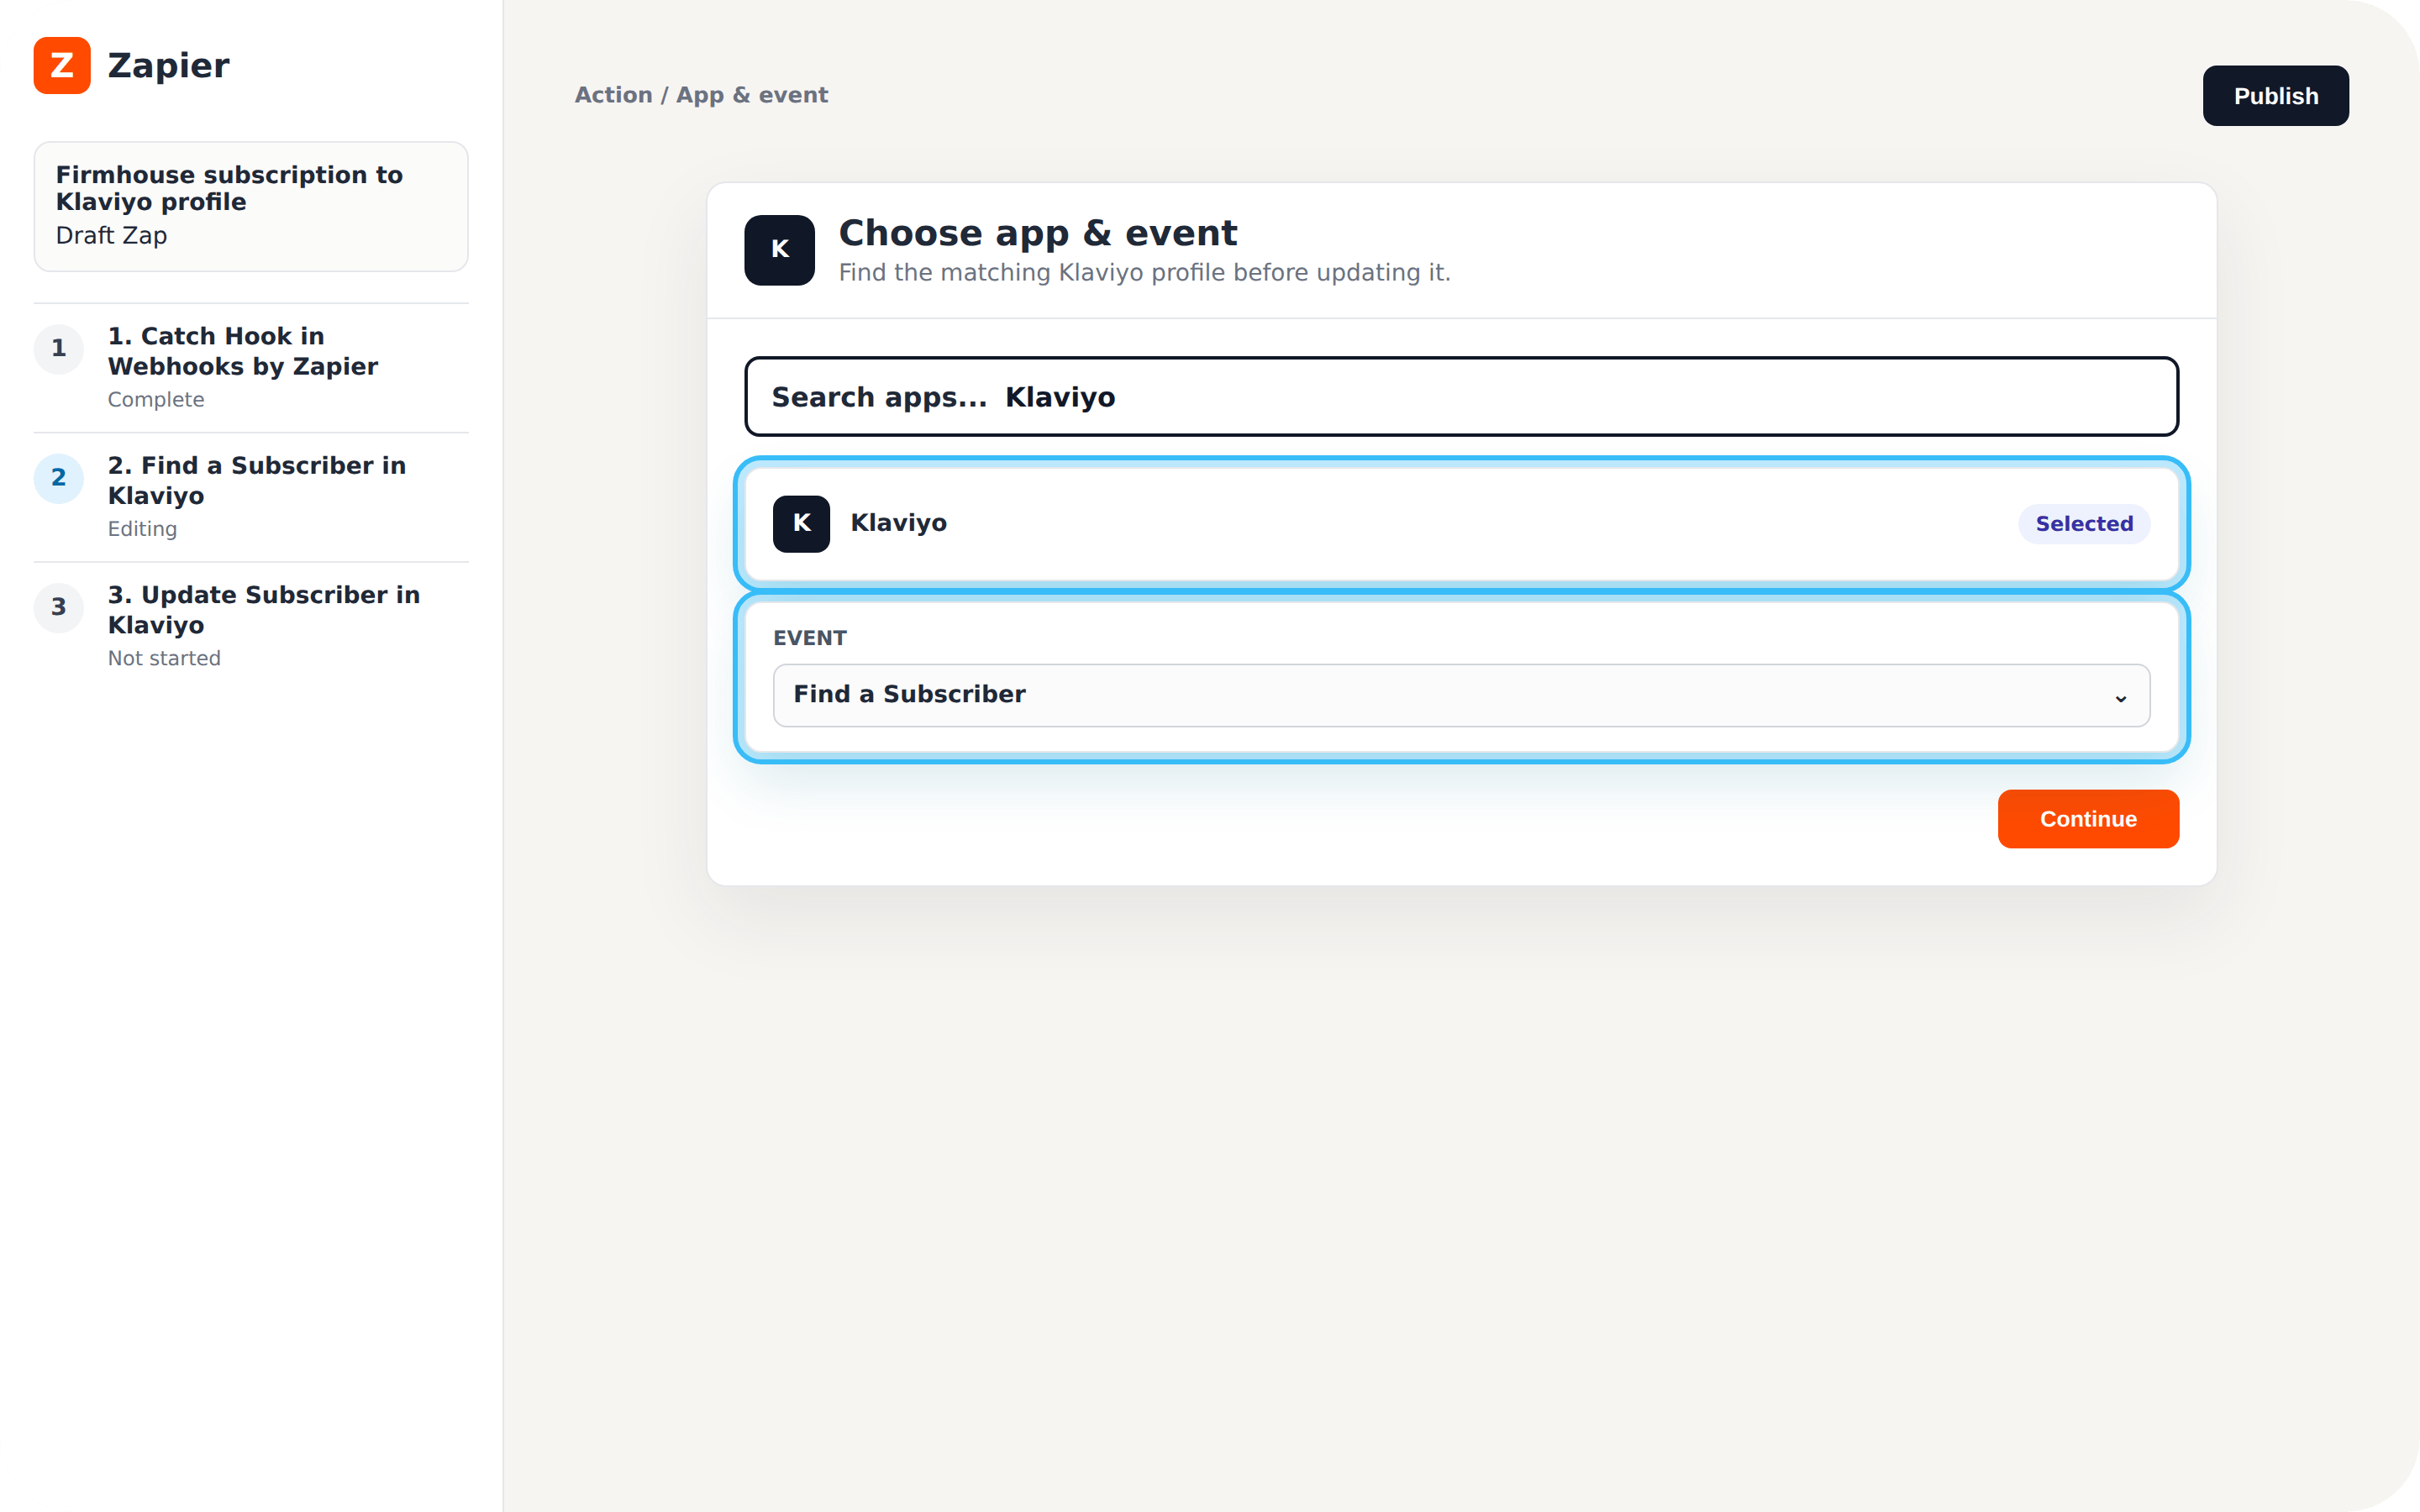
2. Search for the Klaviyo app and select **Klaviyo**.
3. Click the **Event** dropdown menu, select **Find a subscriber** and click **Continue**.
4. Click **Continue** to proceed to the next stage which is setting up an action.
## Set Up Zap Action
After setting up the Zap trigger correctly and passing the test, the next step is to add actions to your Zap. You will be adding two action steps: finding a subscriber in Klaviyo and updating the subscriber in Klaviyo.
### Add Find a Subscriber Event
#### Steps
1. In your Zap editor, click on the **plus \[+] icon** underneath the Zap trigger to add a new action.
2. Search for the Klaviyo app and select **Klaviyo**.
3. Click the **Event** dropdown menu, select **Find a subscriber** and click **Continue**.
 ### Connect Your Klaviyo Account
#### Steps
1. If you already have an account connected to Zapier for the Klaviyo app, select it from the account menu.
2. If not, you will be asked to connect your Klaviyo account. Click on the **Sign in** button and you will be taken to a pop up page requesting your Klaviyo **public and private API keys** to allow Zapier access to your Klaviyo account.
3. Sign in to your Klaviyo app and copy/create your API keys from **Account Settings**.
4. Copy and paste the API keys on the specified fields in the pop up page and click **Yes, Continue**.
### Set Up the Find Subscriber Action
#### Steps
1. Now your Klaviyo account is connected with Zapier. Click **Continue** to set up the action. This step sets up the data you want to send over to Klaviyo. You will see dropdown menus and form fields to fill in.
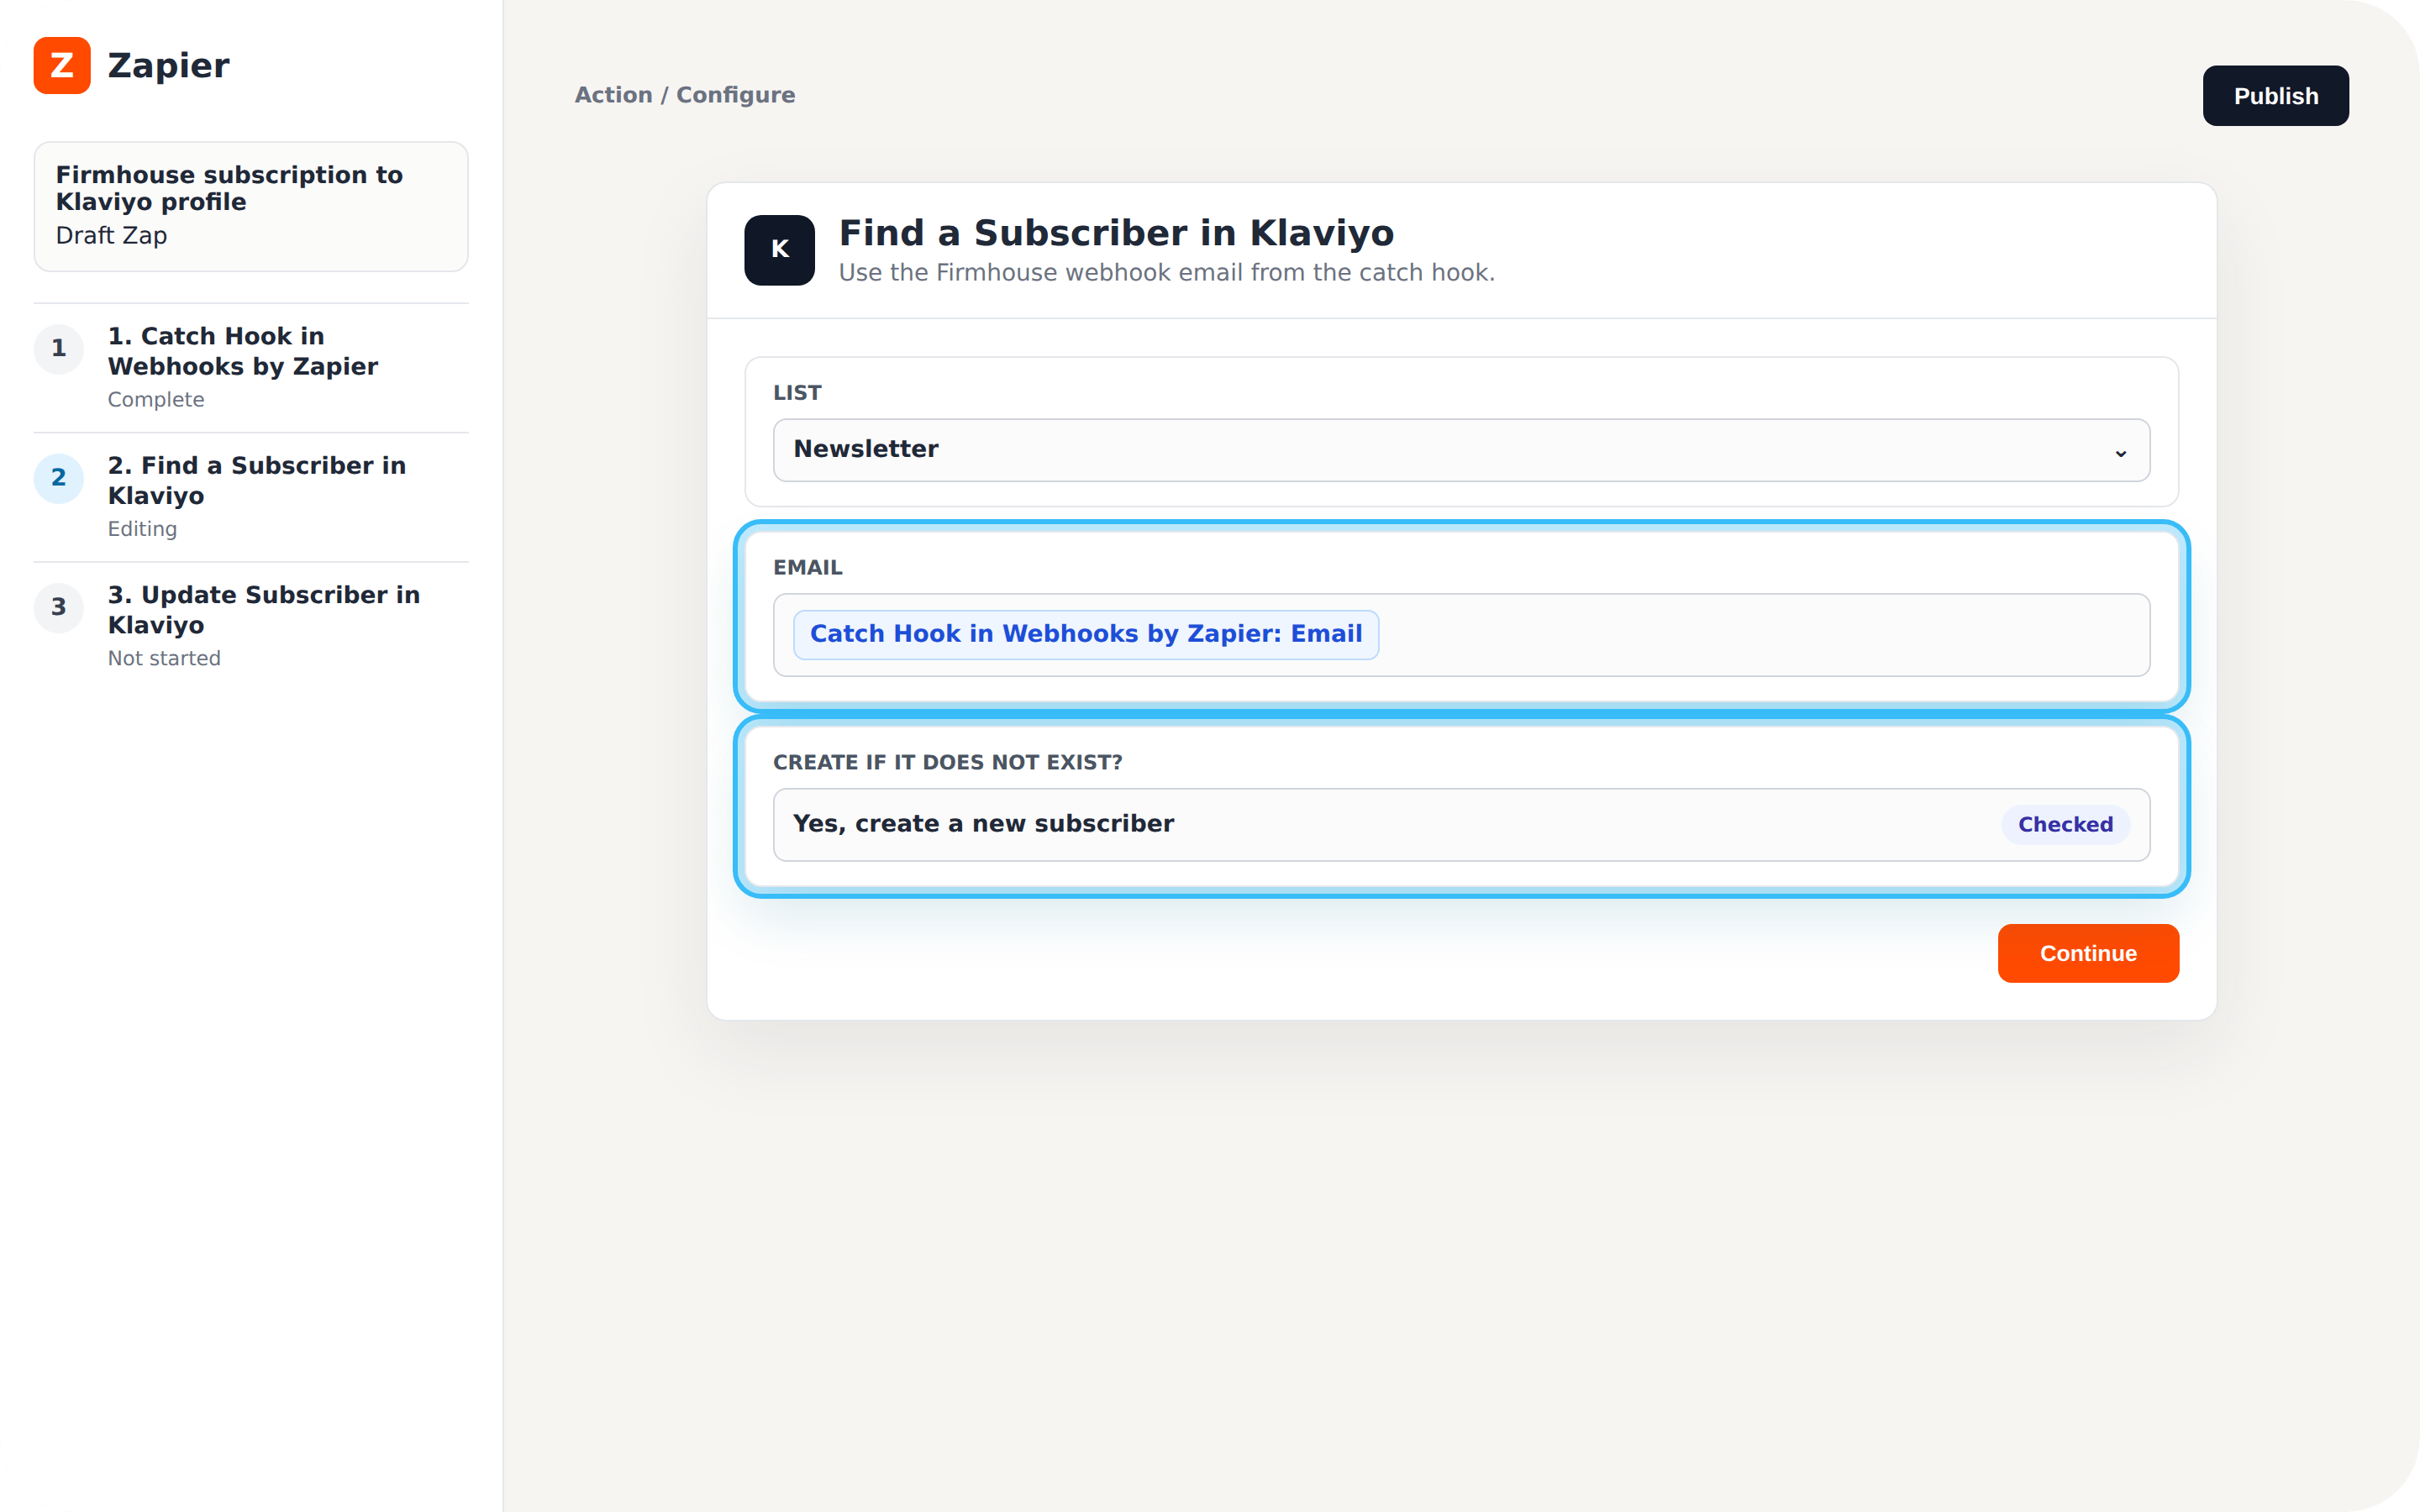
2. Click on the dropdown menu of the **List** field (required), select **List** and choose **Newsletter** as your option.
3. Click on the **Email** field (required), then click on **Catch Hook in Webhooks by Zapier** dropdown menu and select **Email** to insert data.
4. Note that the data displayed in the dropdown of **Catch Hook in Webhooks by Zapier** will depend on the information passed by your outgoing webhook from Firmhouse. For this tutorial, we used Email, First and Last name, Event and id. By default Zapier will display the first three data items; click **Show all options** to display all the data.
5. You will also find an optional **Create a new record if the search doesn't find anything** checkbox.
6. Select the **Create \[item] if it doesn't exist yet?** checkbox.
7. Fill in the fields with the values you want to use for the new record.
8. Click **Continue**.
### Connect Your Klaviyo Account
#### Steps
1. If you already have an account connected to Zapier for the Klaviyo app, select it from the account menu.
2. If not, you will be asked to connect your Klaviyo account. Click on the **Sign in** button and you will be taken to a pop up page requesting your Klaviyo **public and private API keys** to allow Zapier access to your Klaviyo account.
3. Sign in to your Klaviyo app and copy/create your API keys from **Account Settings**.
4. Copy and paste the API keys on the specified fields in the pop up page and click **Yes, Continue**.
### Set Up the Find Subscriber Action
#### Steps
1. Now your Klaviyo account is connected with Zapier. Click **Continue** to set up the action. This step sets up the data you want to send over to Klaviyo. You will see dropdown menus and form fields to fill in.
2. Click on the dropdown menu of the **List** field (required), select **List** and choose **Newsletter** as your option.
3. Click on the **Email** field (required), then click on **Catch Hook in Webhooks by Zapier** dropdown menu and select **Email** to insert data.
4. Note that the data displayed in the dropdown of **Catch Hook in Webhooks by Zapier** will depend on the information passed by your outgoing webhook from Firmhouse. For this tutorial, we used Email, First and Last name, Event and id. By default Zapier will display the first three data items; click **Show all options** to display all the data.
5. You will also find an optional **Create a new record if the search doesn't find anything** checkbox.
6. Select the **Create \[item] if it doesn't exist yet?** checkbox.
7. Fill in the fields with the values you want to use for the new record.
8. Click **Continue**.
 ### Test the Find Subscriber Action
Click on **Test action** to see if your action works as expected.
### Add Update Subscriber Event
In the next steps, you will add another action step to the workflow.
#### Steps
1. Click on the **plus \[+] icon** to add a new action.
2. Search for the Klaviyo app and select it.
3. In the **choose app & event** dropdown menu, choose an **Event** by clicking on the Event field, select **Update subscriber**, and click **Continue**.
### Choose Account
#### Steps
1. Click **Choose account** dropdown and select your Klaviyo account which will be listed in the dropdown menu.
2. Click **Continue** to set up the action.
### Set Up the Update Subscriber Action
#### Steps
1. Click **Set up action** to display the different fields to fill in.
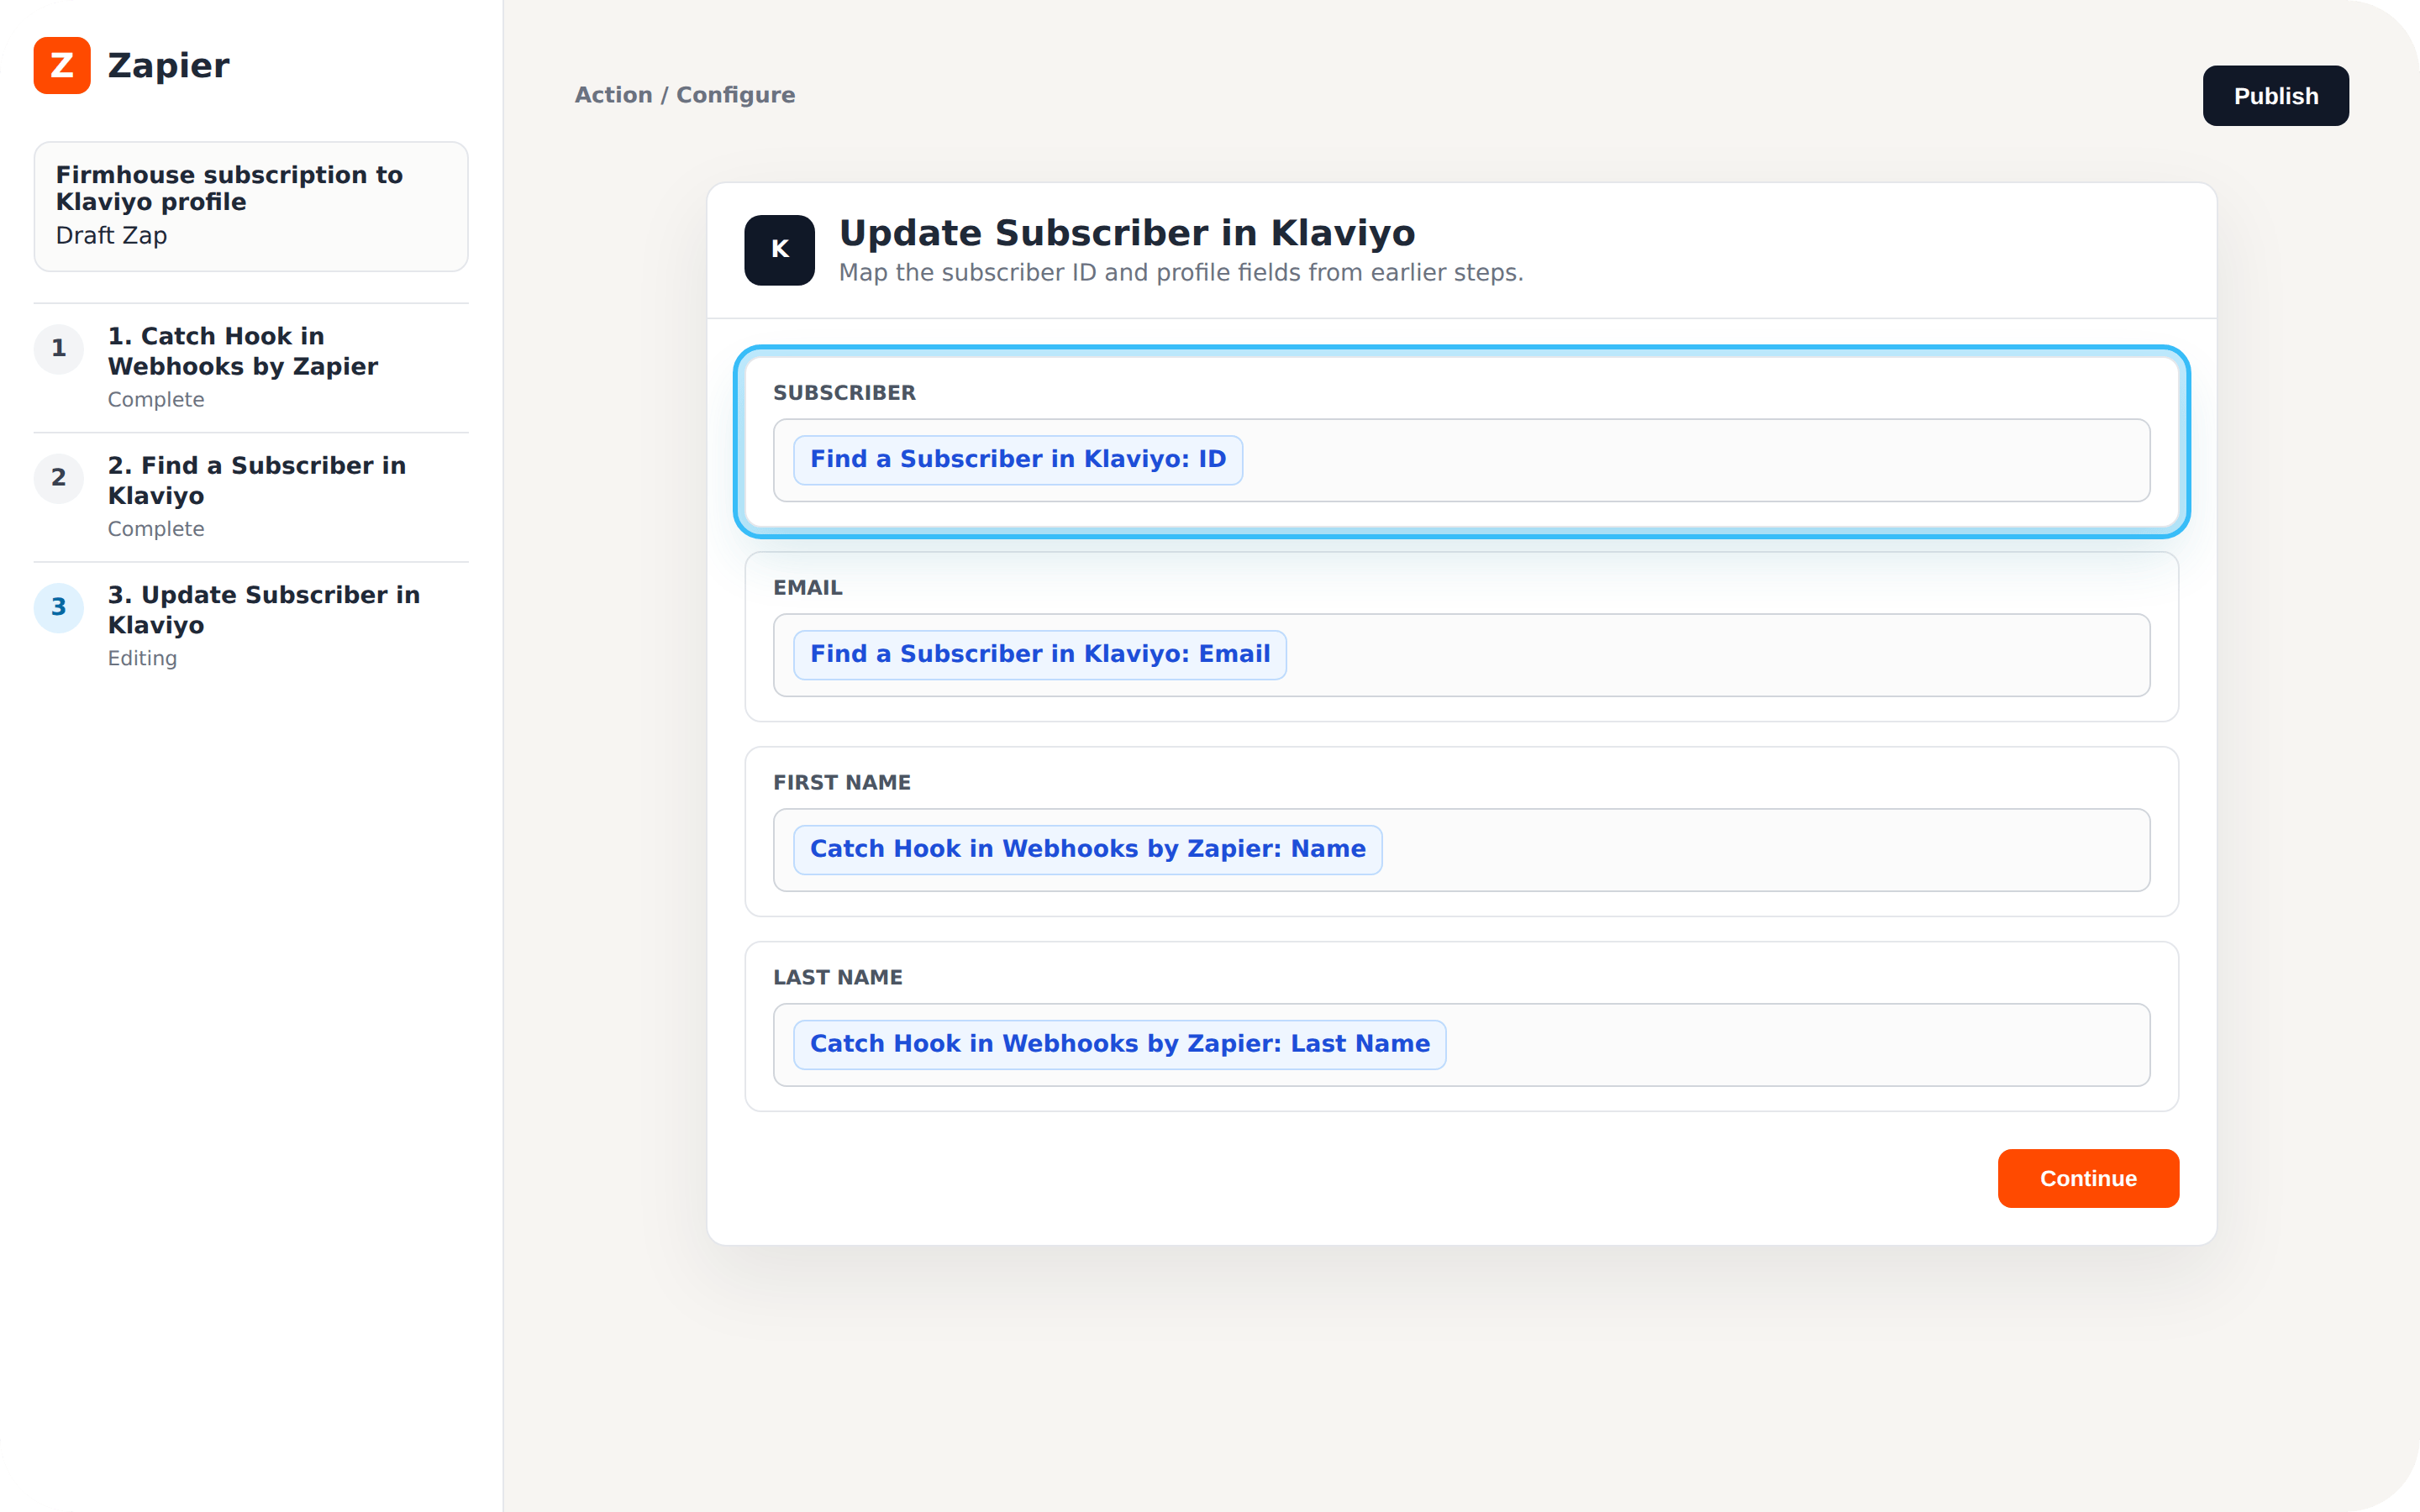
2. Click on the **Subscriber** field and then click the **Custom** tab in the dropdown menu.
3. Click on **Find a Subscriber in Klaviyo** to expand it and select **ID**.
4. Click outside the dropdown box to exit the **Subscriber** field in order to enter other fields.
5. Click on the **Email** field, then click on **Find a Subscriber in Klaviyo** dropdown menu and select **Email**.
6. Follow the same process for **First name** and **Last name** fields.
7. Click **Continue**.
### Test the Find Subscriber Action
Click on **Test action** to see if your action works as expected.
### Add Update Subscriber Event
In the next steps, you will add another action step to the workflow.
#### Steps
1. Click on the **plus \[+] icon** to add a new action.
2. Search for the Klaviyo app and select it.
3. In the **choose app & event** dropdown menu, choose an **Event** by clicking on the Event field, select **Update subscriber**, and click **Continue**.
### Choose Account
#### Steps
1. Click **Choose account** dropdown and select your Klaviyo account which will be listed in the dropdown menu.
2. Click **Continue** to set up the action.
### Set Up the Update Subscriber Action
#### Steps
1. Click **Set up action** to display the different fields to fill in.
2. Click on the **Subscriber** field and then click the **Custom** tab in the dropdown menu.
3. Click on **Find a Subscriber in Klaviyo** to expand it and select **ID**.
4. Click outside the dropdown box to exit the **Subscriber** field in order to enter other fields.
5. Click on the **Email** field, then click on **Find a Subscriber in Klaviyo** dropdown menu and select **Email**.
6. Follow the same process for **First name** and **Last name** fields.
7. Click **Continue**.
 ### Test and Publish
#### Steps
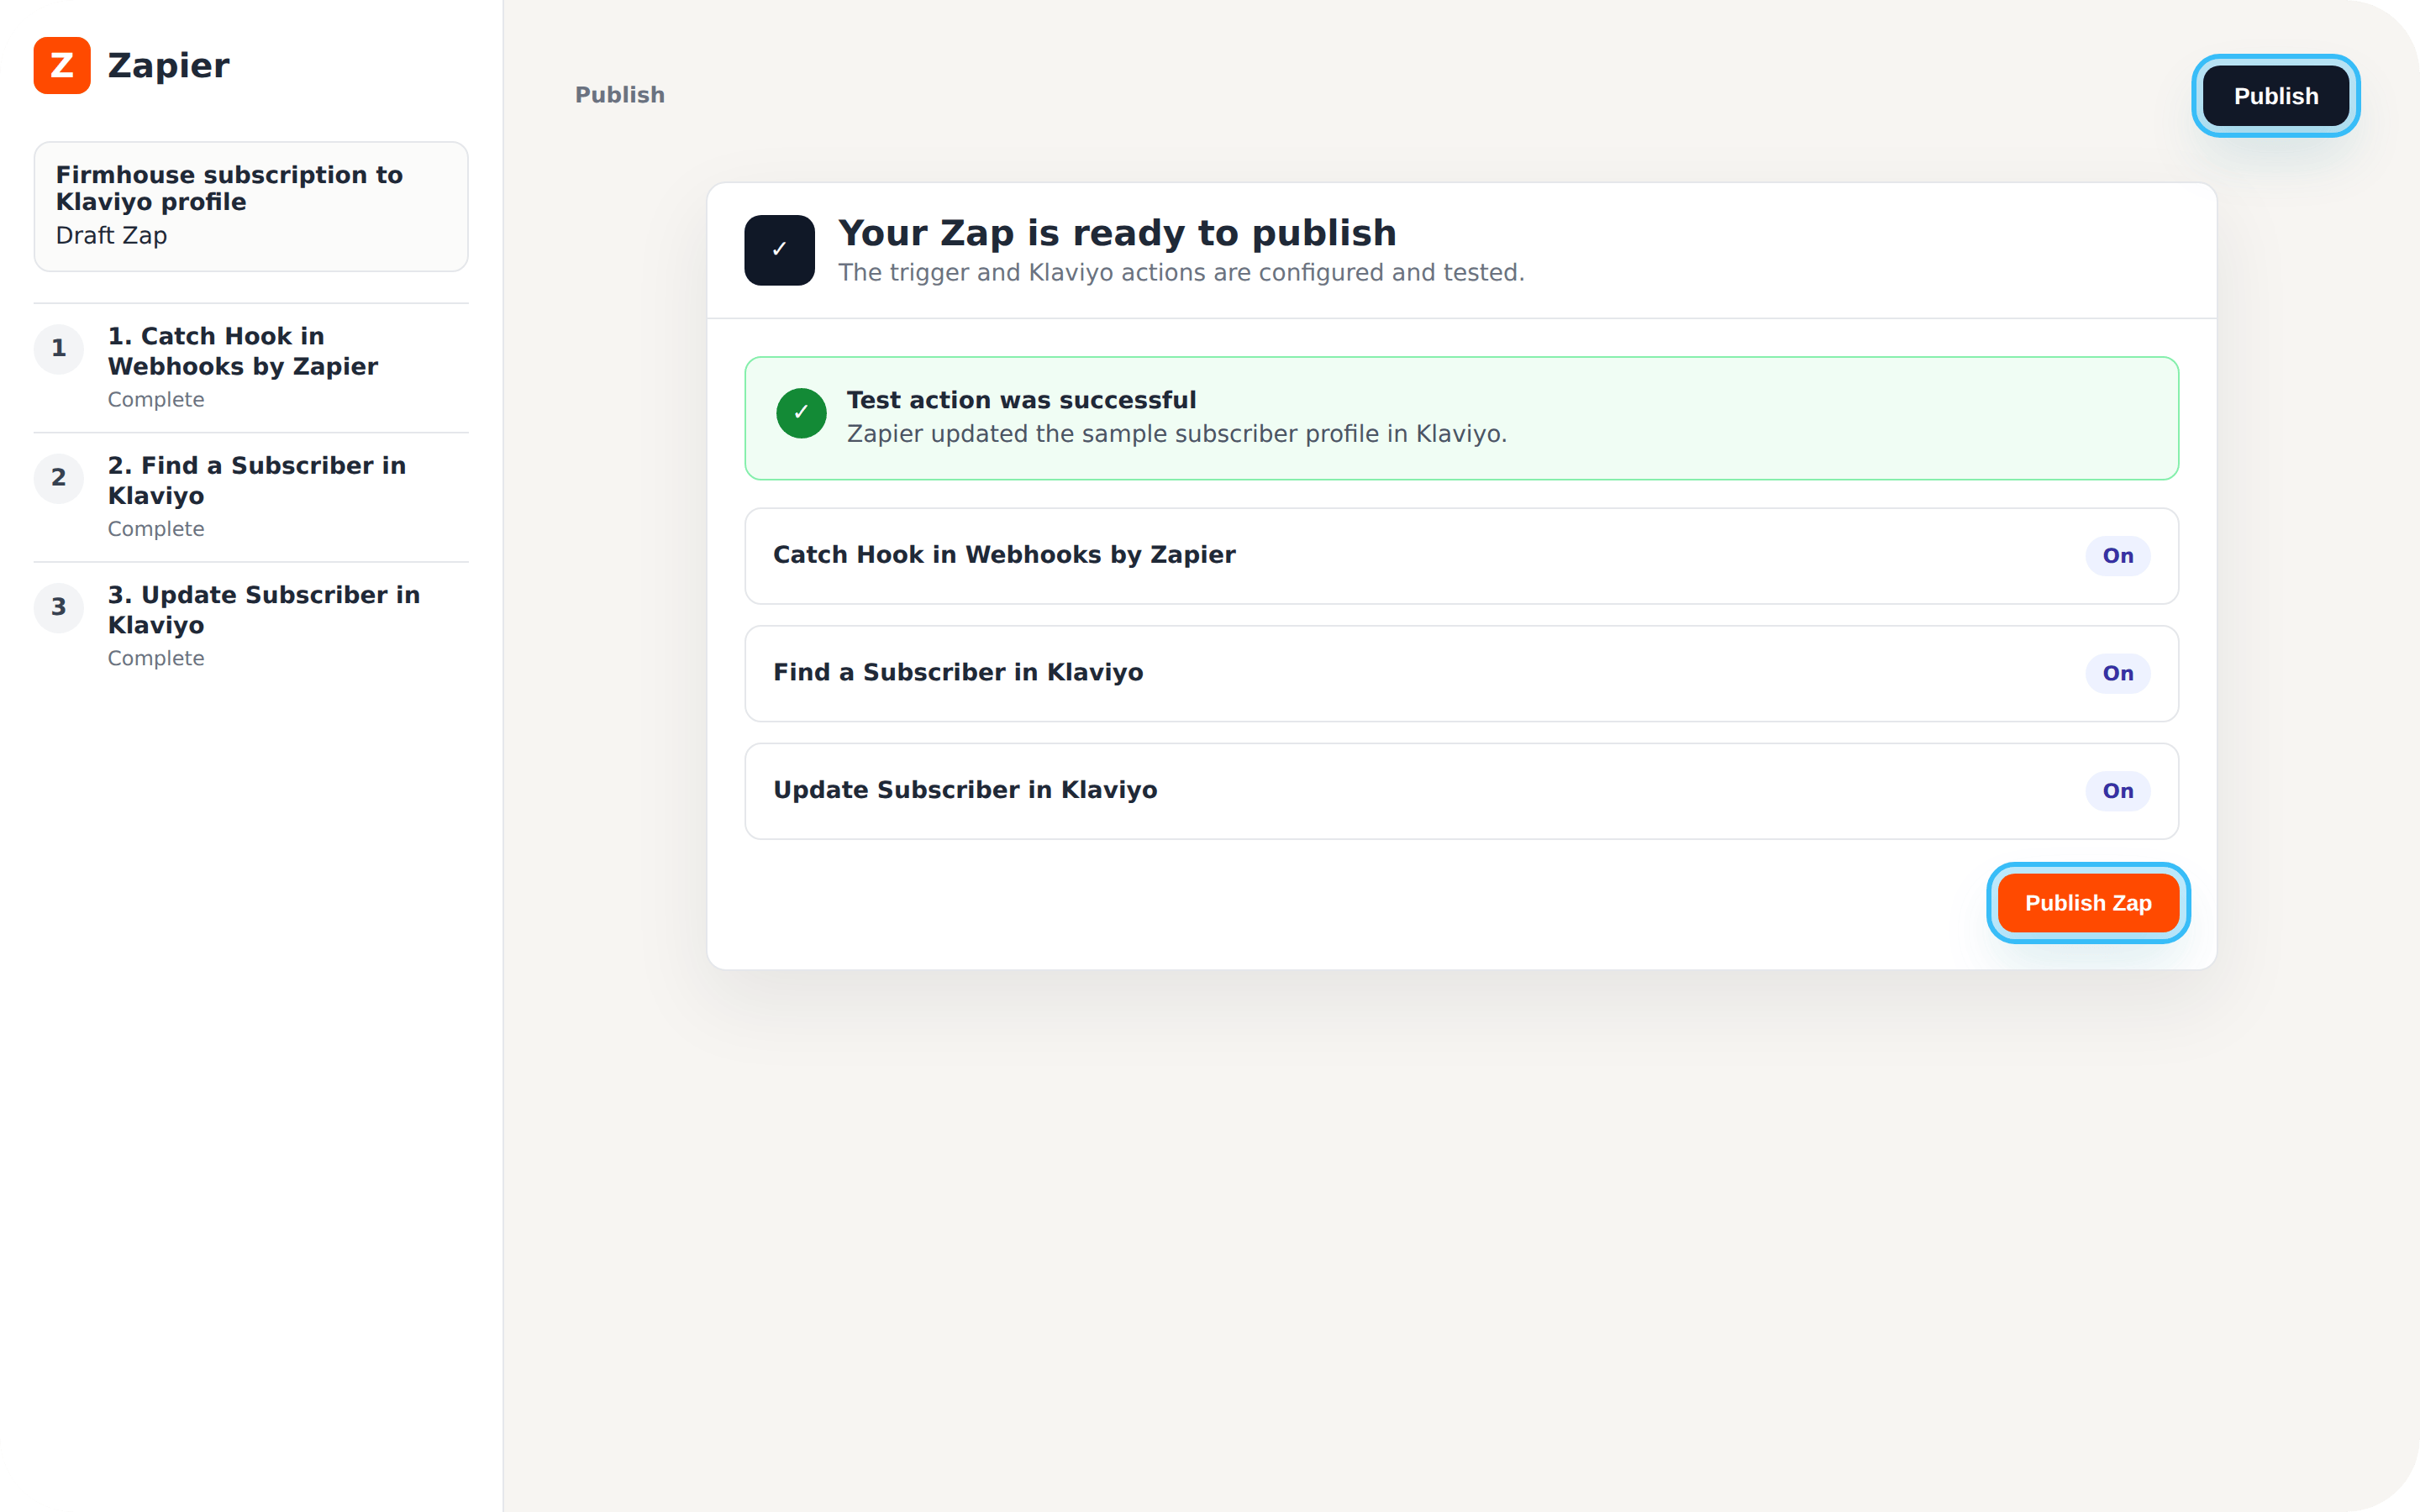
1. To test your Zap action, create an updated subscriber and click on **Test action**. If everything is done correctly, your test will pass and you can now publish your Zap.
2. Click **Publish** to automate your workflow.
### Test and Publish
#### Steps
1. To test your Zap action, create an updated subscriber and click on **Test action**. If everything is done correctly, your test will pass and you can now publish your Zap.
2. Click **Publish** to automate your workflow.
 ## Related Articles
* [Use Klaviyo to Send Email Notifications](/configure/customer-communication/using-klaviyo)
* [Adding, Managing, and Removing Webhooks](/configure/integrations/webhooks)
## Related Articles
* [Use Klaviyo to Send Email Notifications](/configure/customer-communication/using-klaviyo)
* [Adding, Managing, and Removing Webhooks](/configure/integrations/webhooks)