- Manual
- Focum
- Identity verification
- Duplication
- Enabling acceptance checks for your project
- Creating acceptance checks
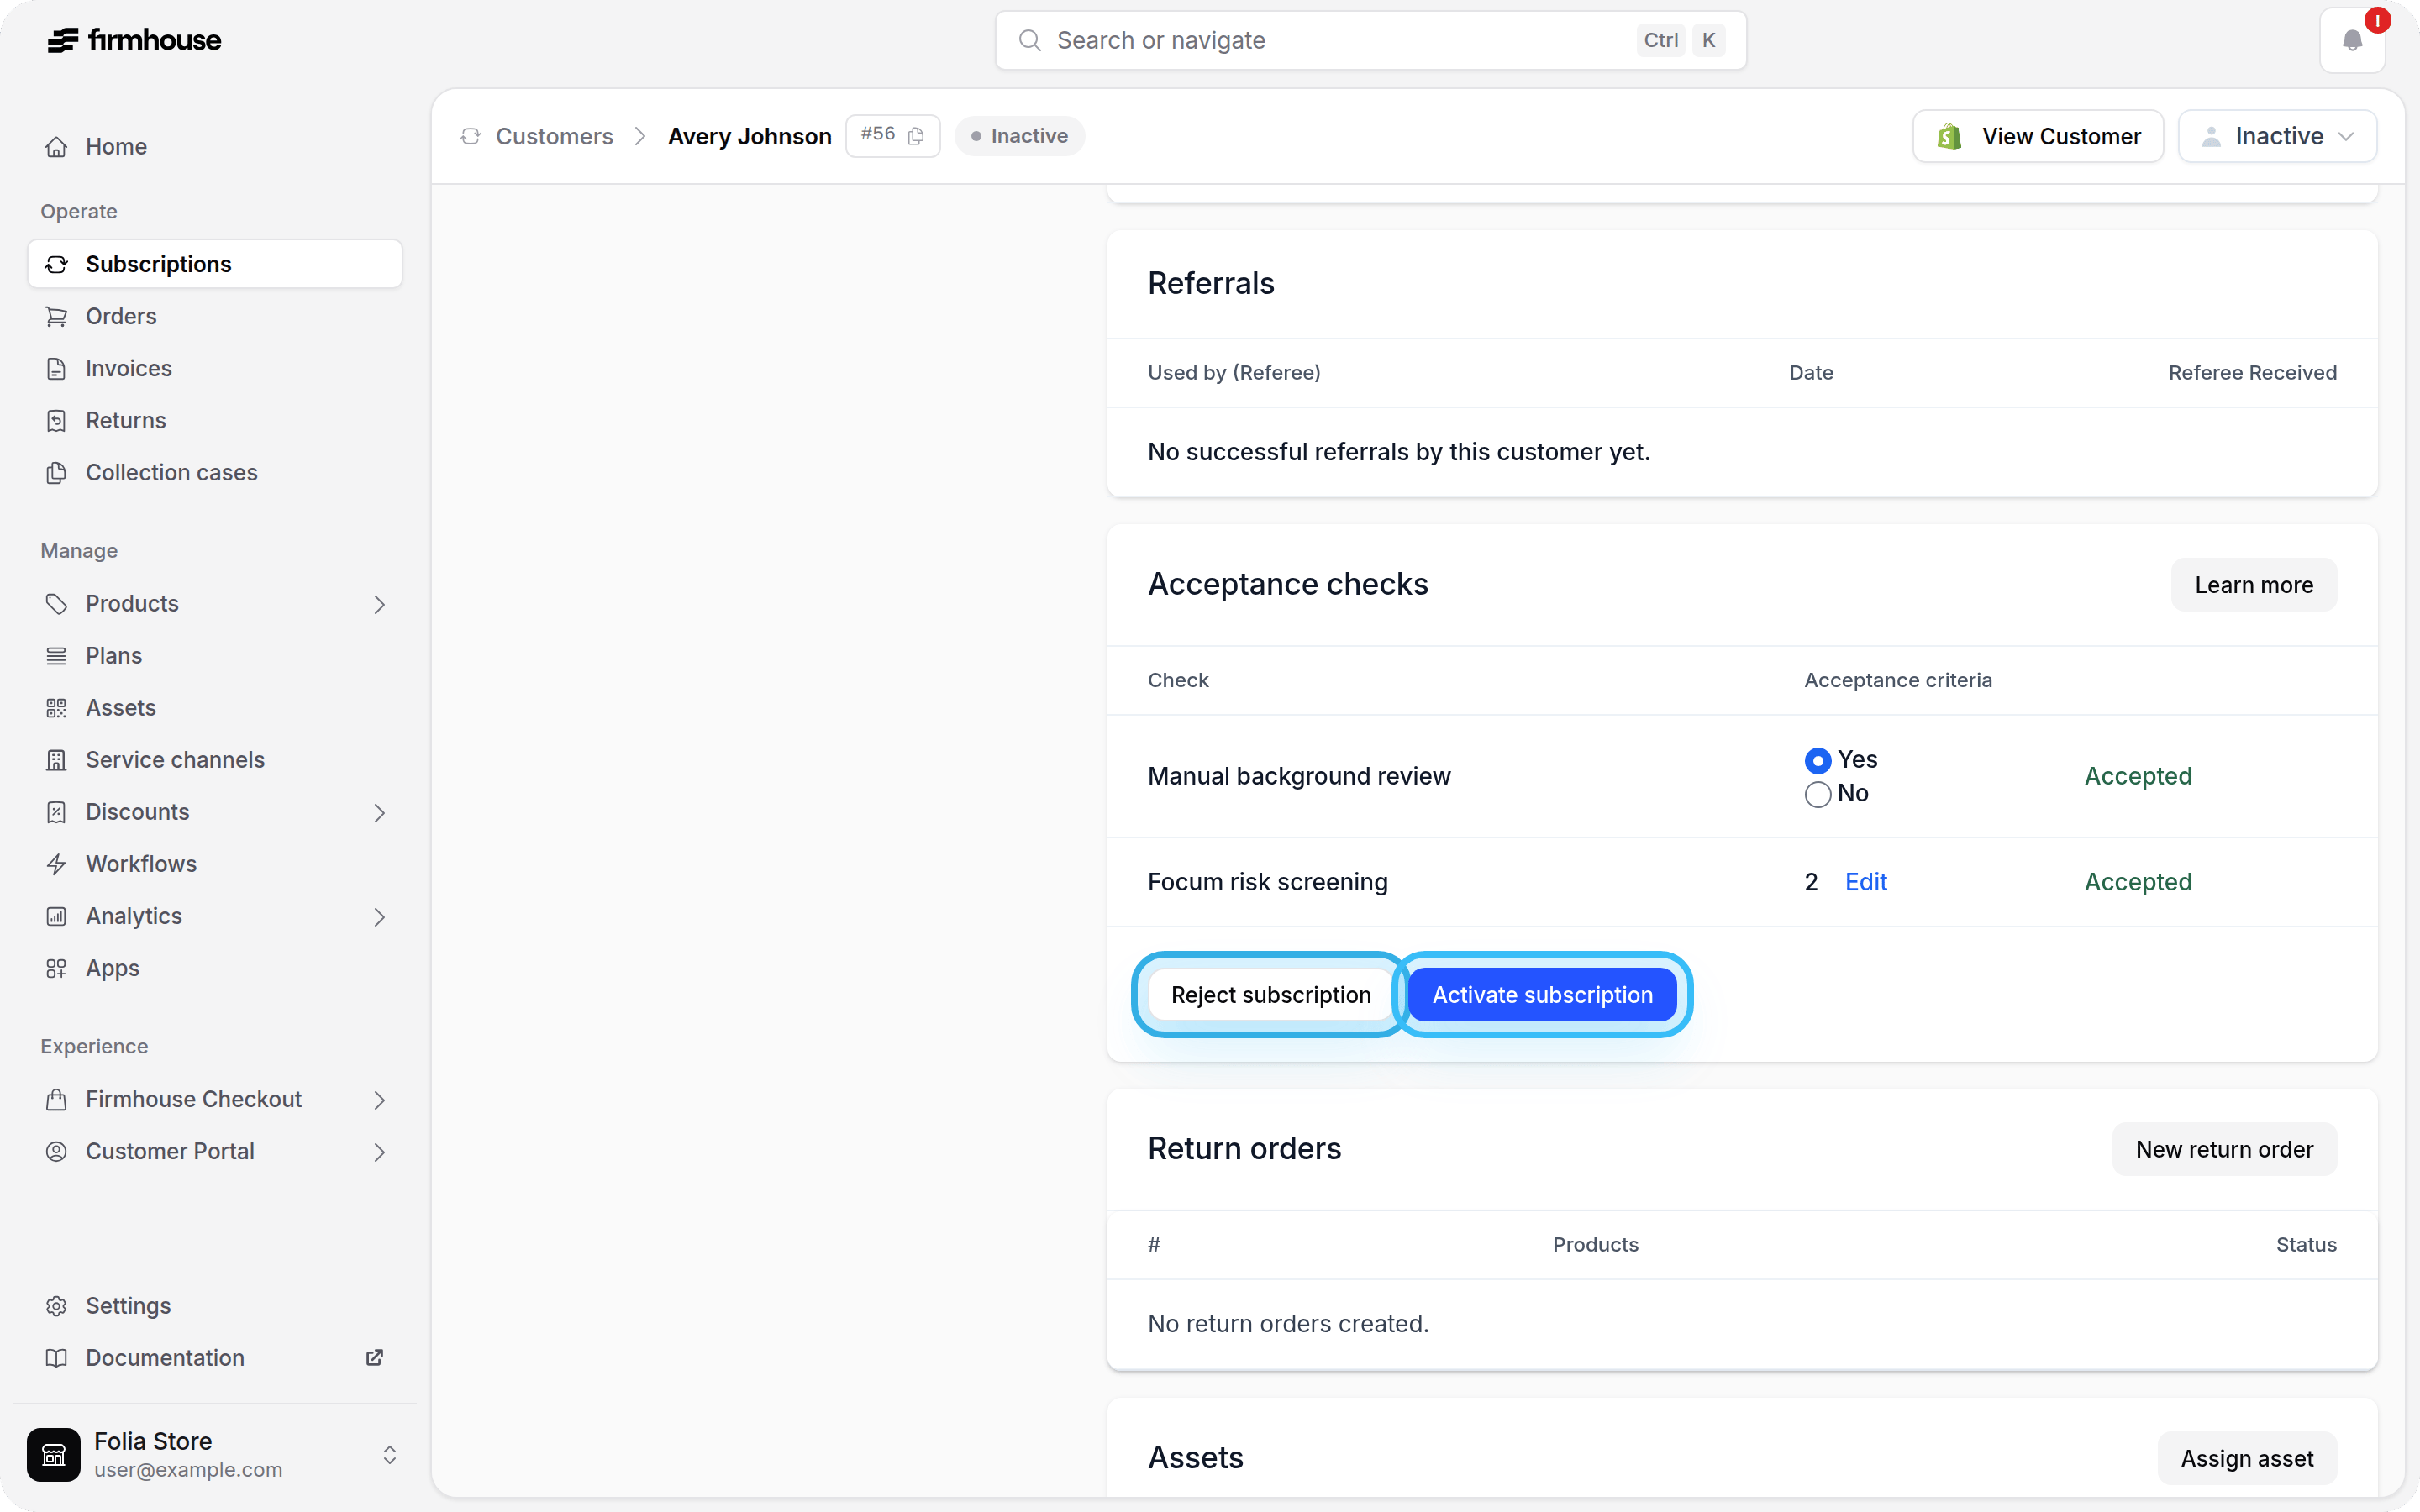
- Activating customers once your checks have been set up
Enabling acceptance checks for your project
First you have to enable manual review for your project. Head over to Subscription Model Settings and scroll down to Acceptance checks. Make sure to set it up as follows: Under Activation Strategy, select Manual activation.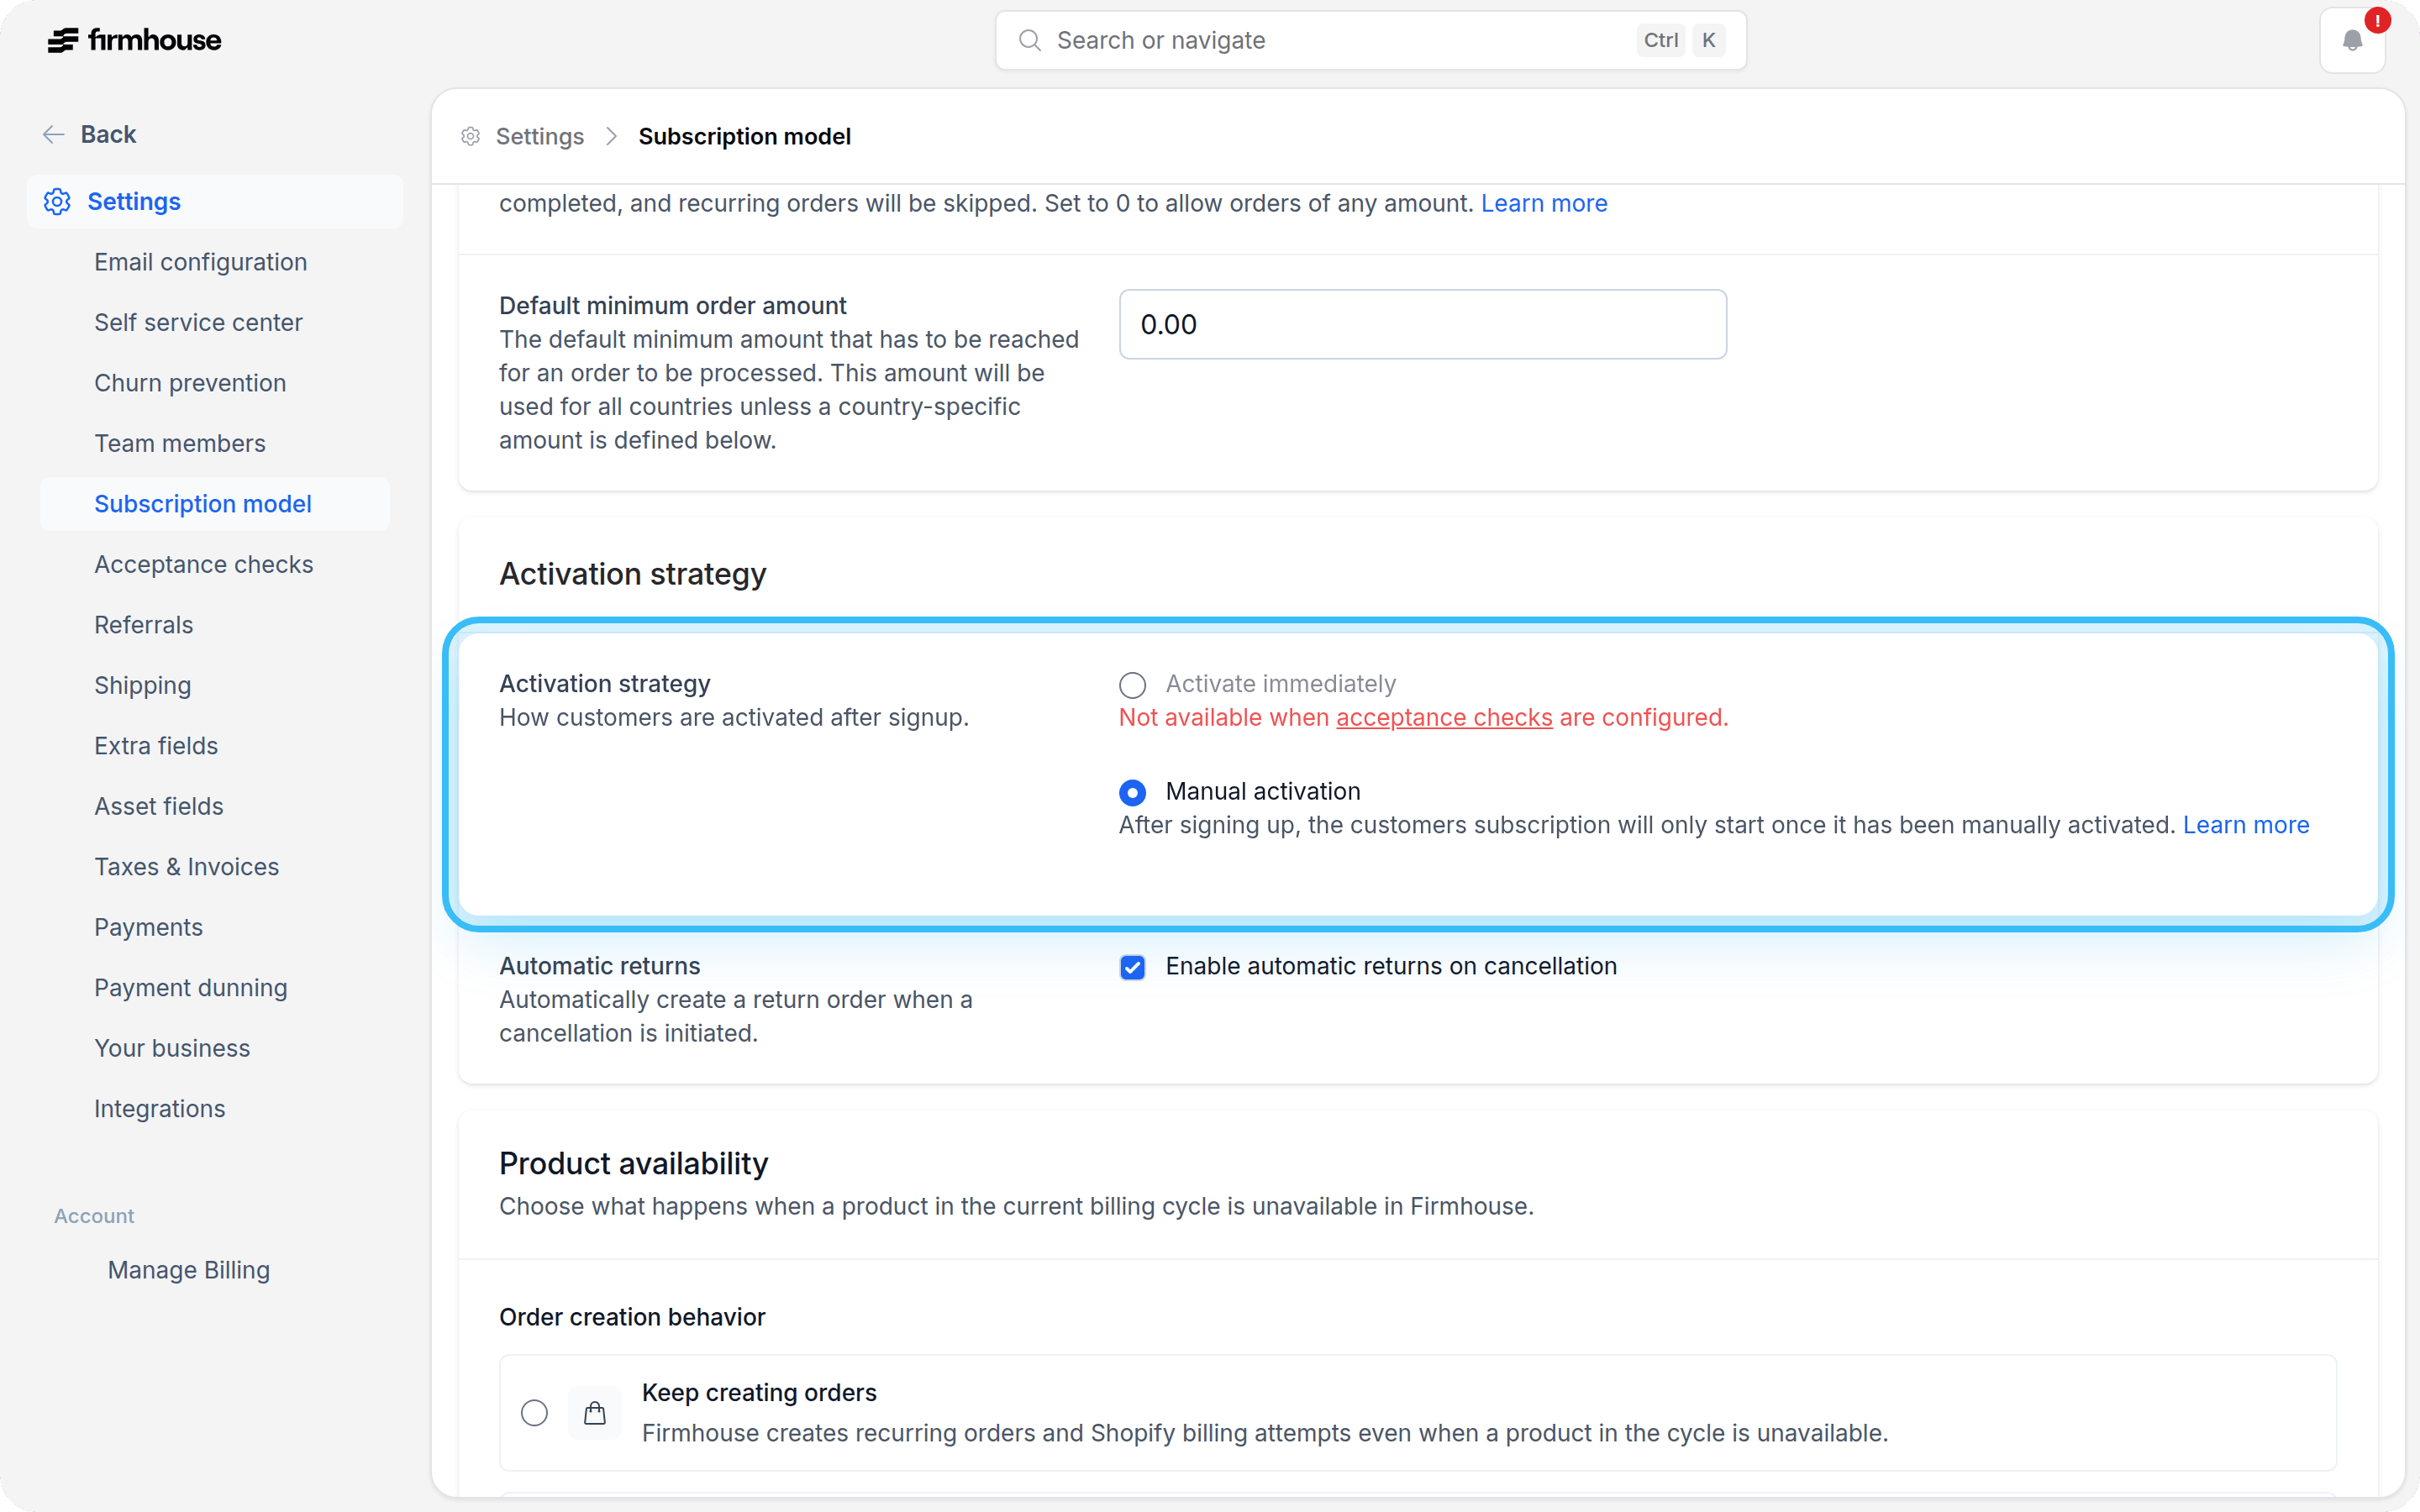
Good to know:See Acceptance Checks for more details on how acceptance checks work in Firmhouse.
- Acceptance checks can run at different moments in the signup flow.
- Focum acceptance checks can run either during signup or after signup and initial payment, depending on the timing option you choose.
- Checks that run during signup are validated before the customer can complete signup and initial payment.
- Checks that run after signup become visible on the customer details page after the customer has signed up and paid.
- Even when you use automated checks, you still need to manually activate or reject customers.
Creating your acceptance check
Once you have enabled acceptance checks, you will see a menu in the sidebar called Acceptance checks. There you can create your acceptance checks.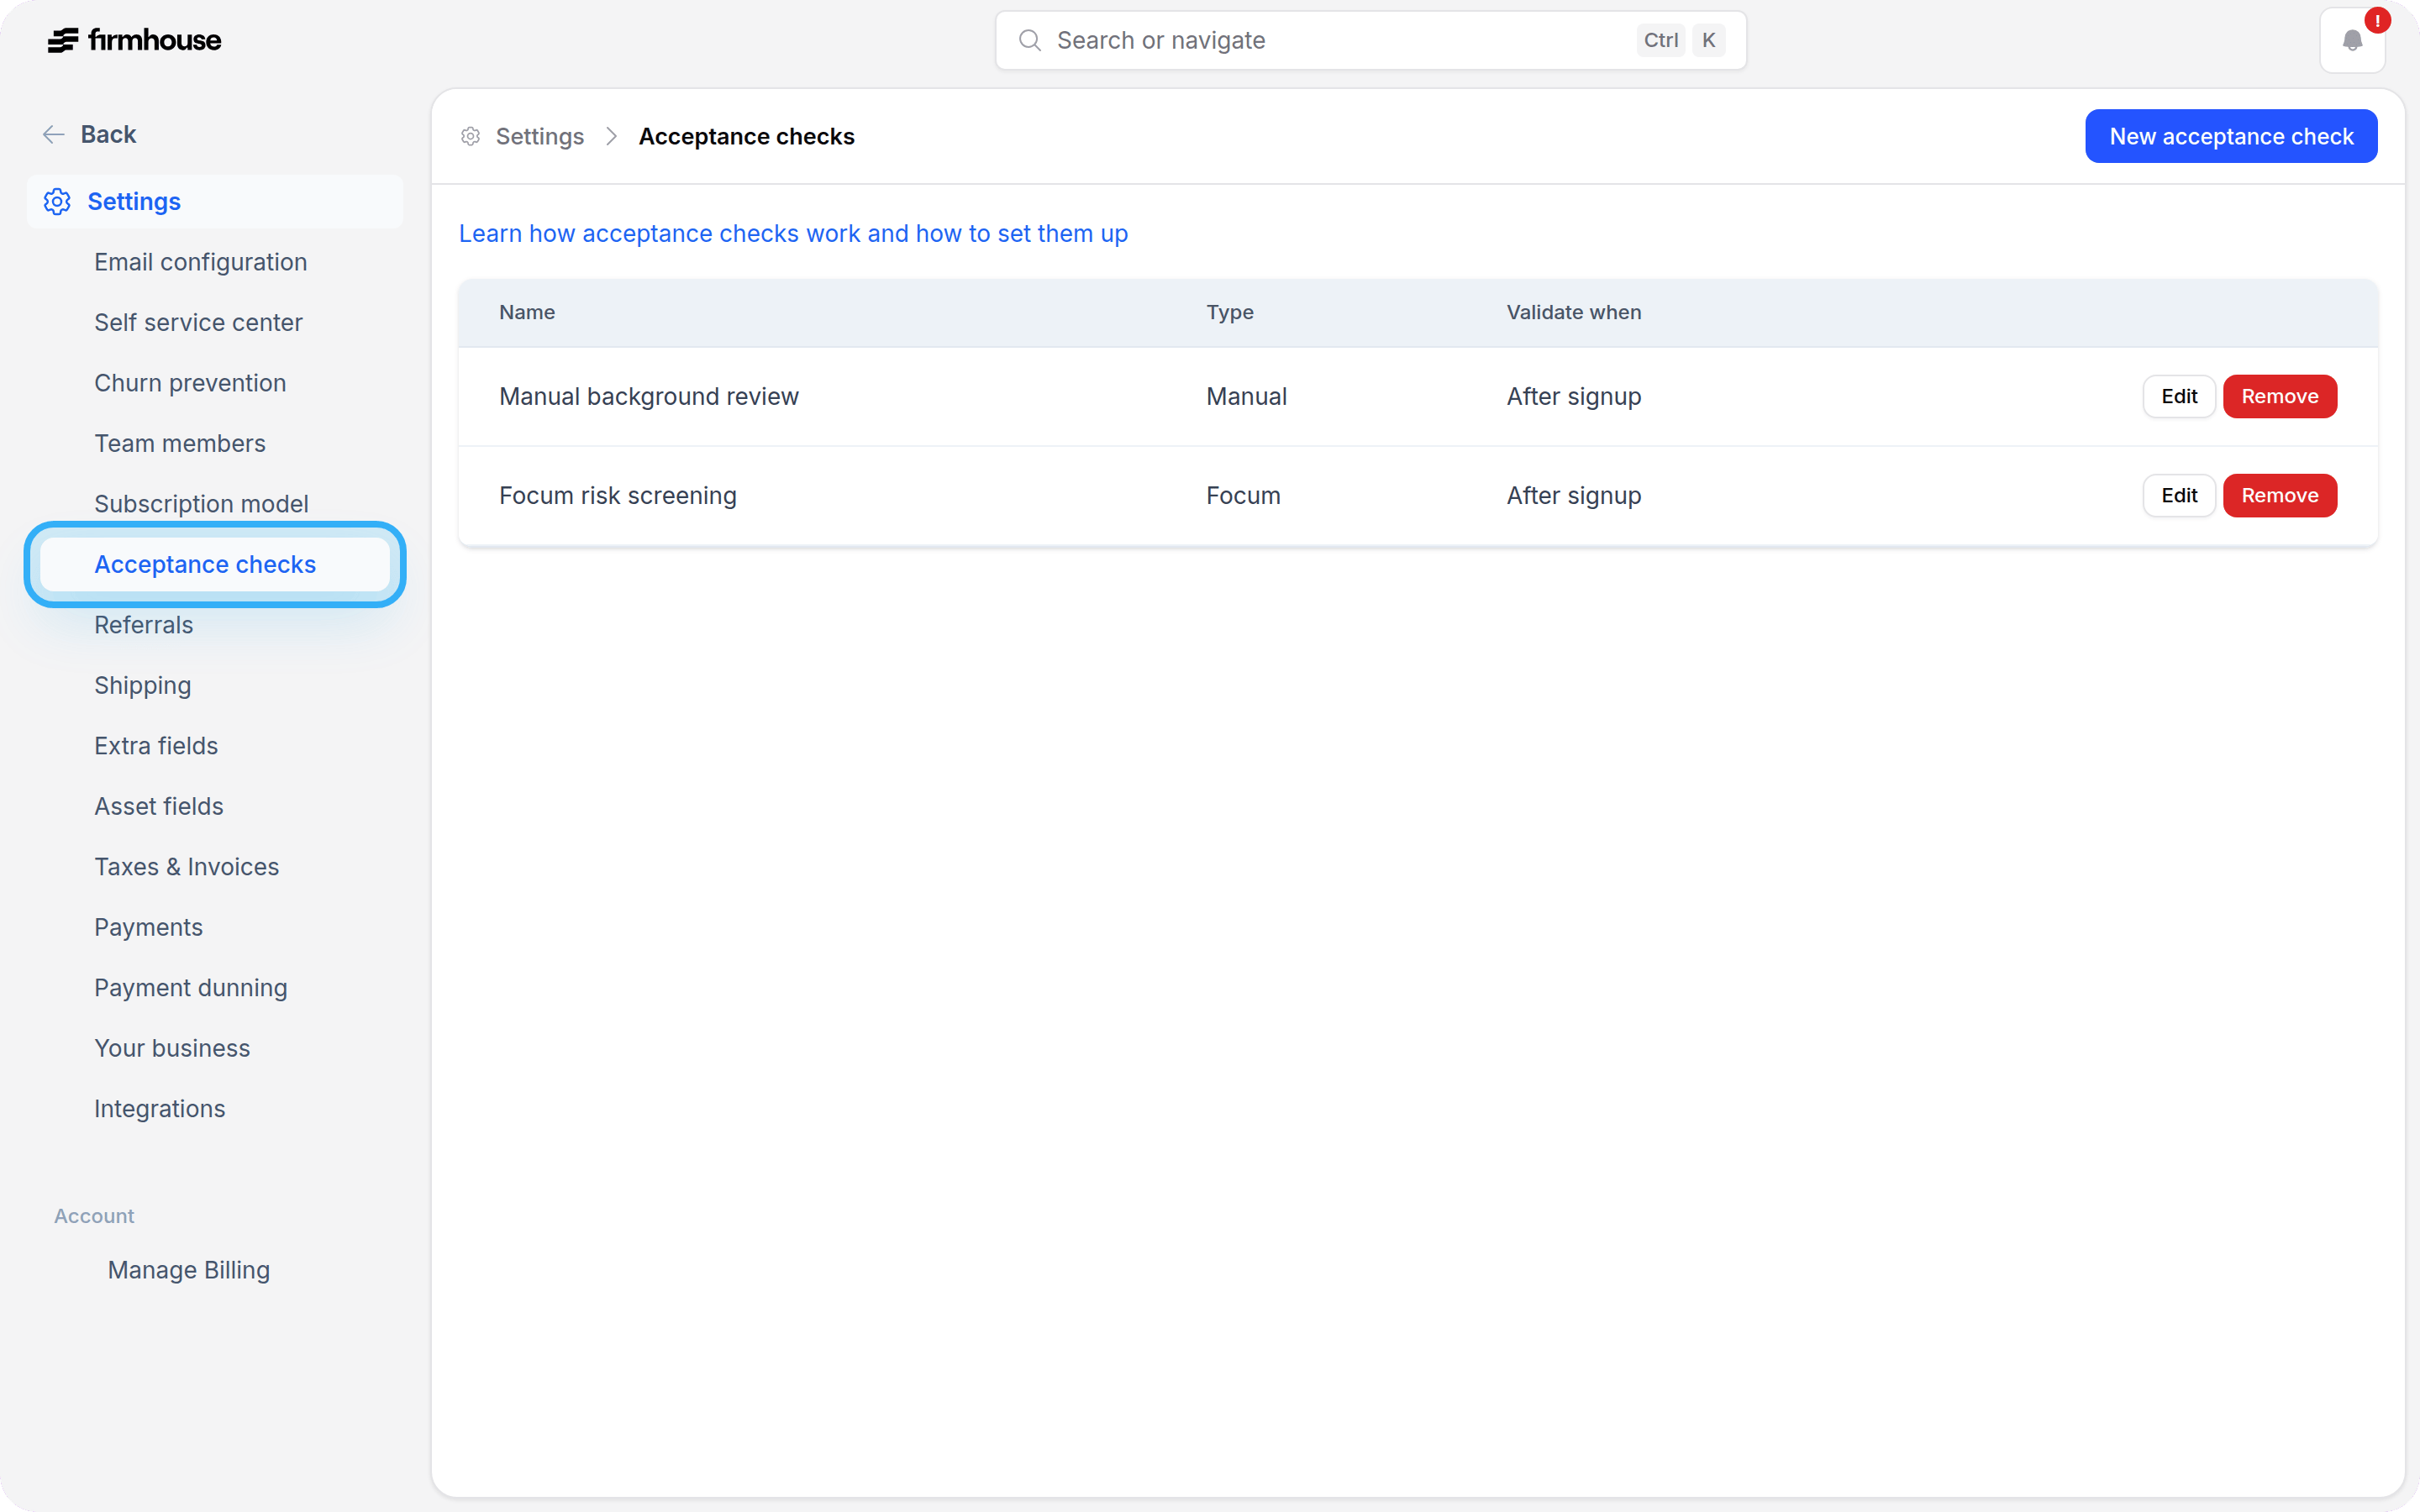
Decide what kind of acceptance check to set up
First you want to decide what kind of check to create: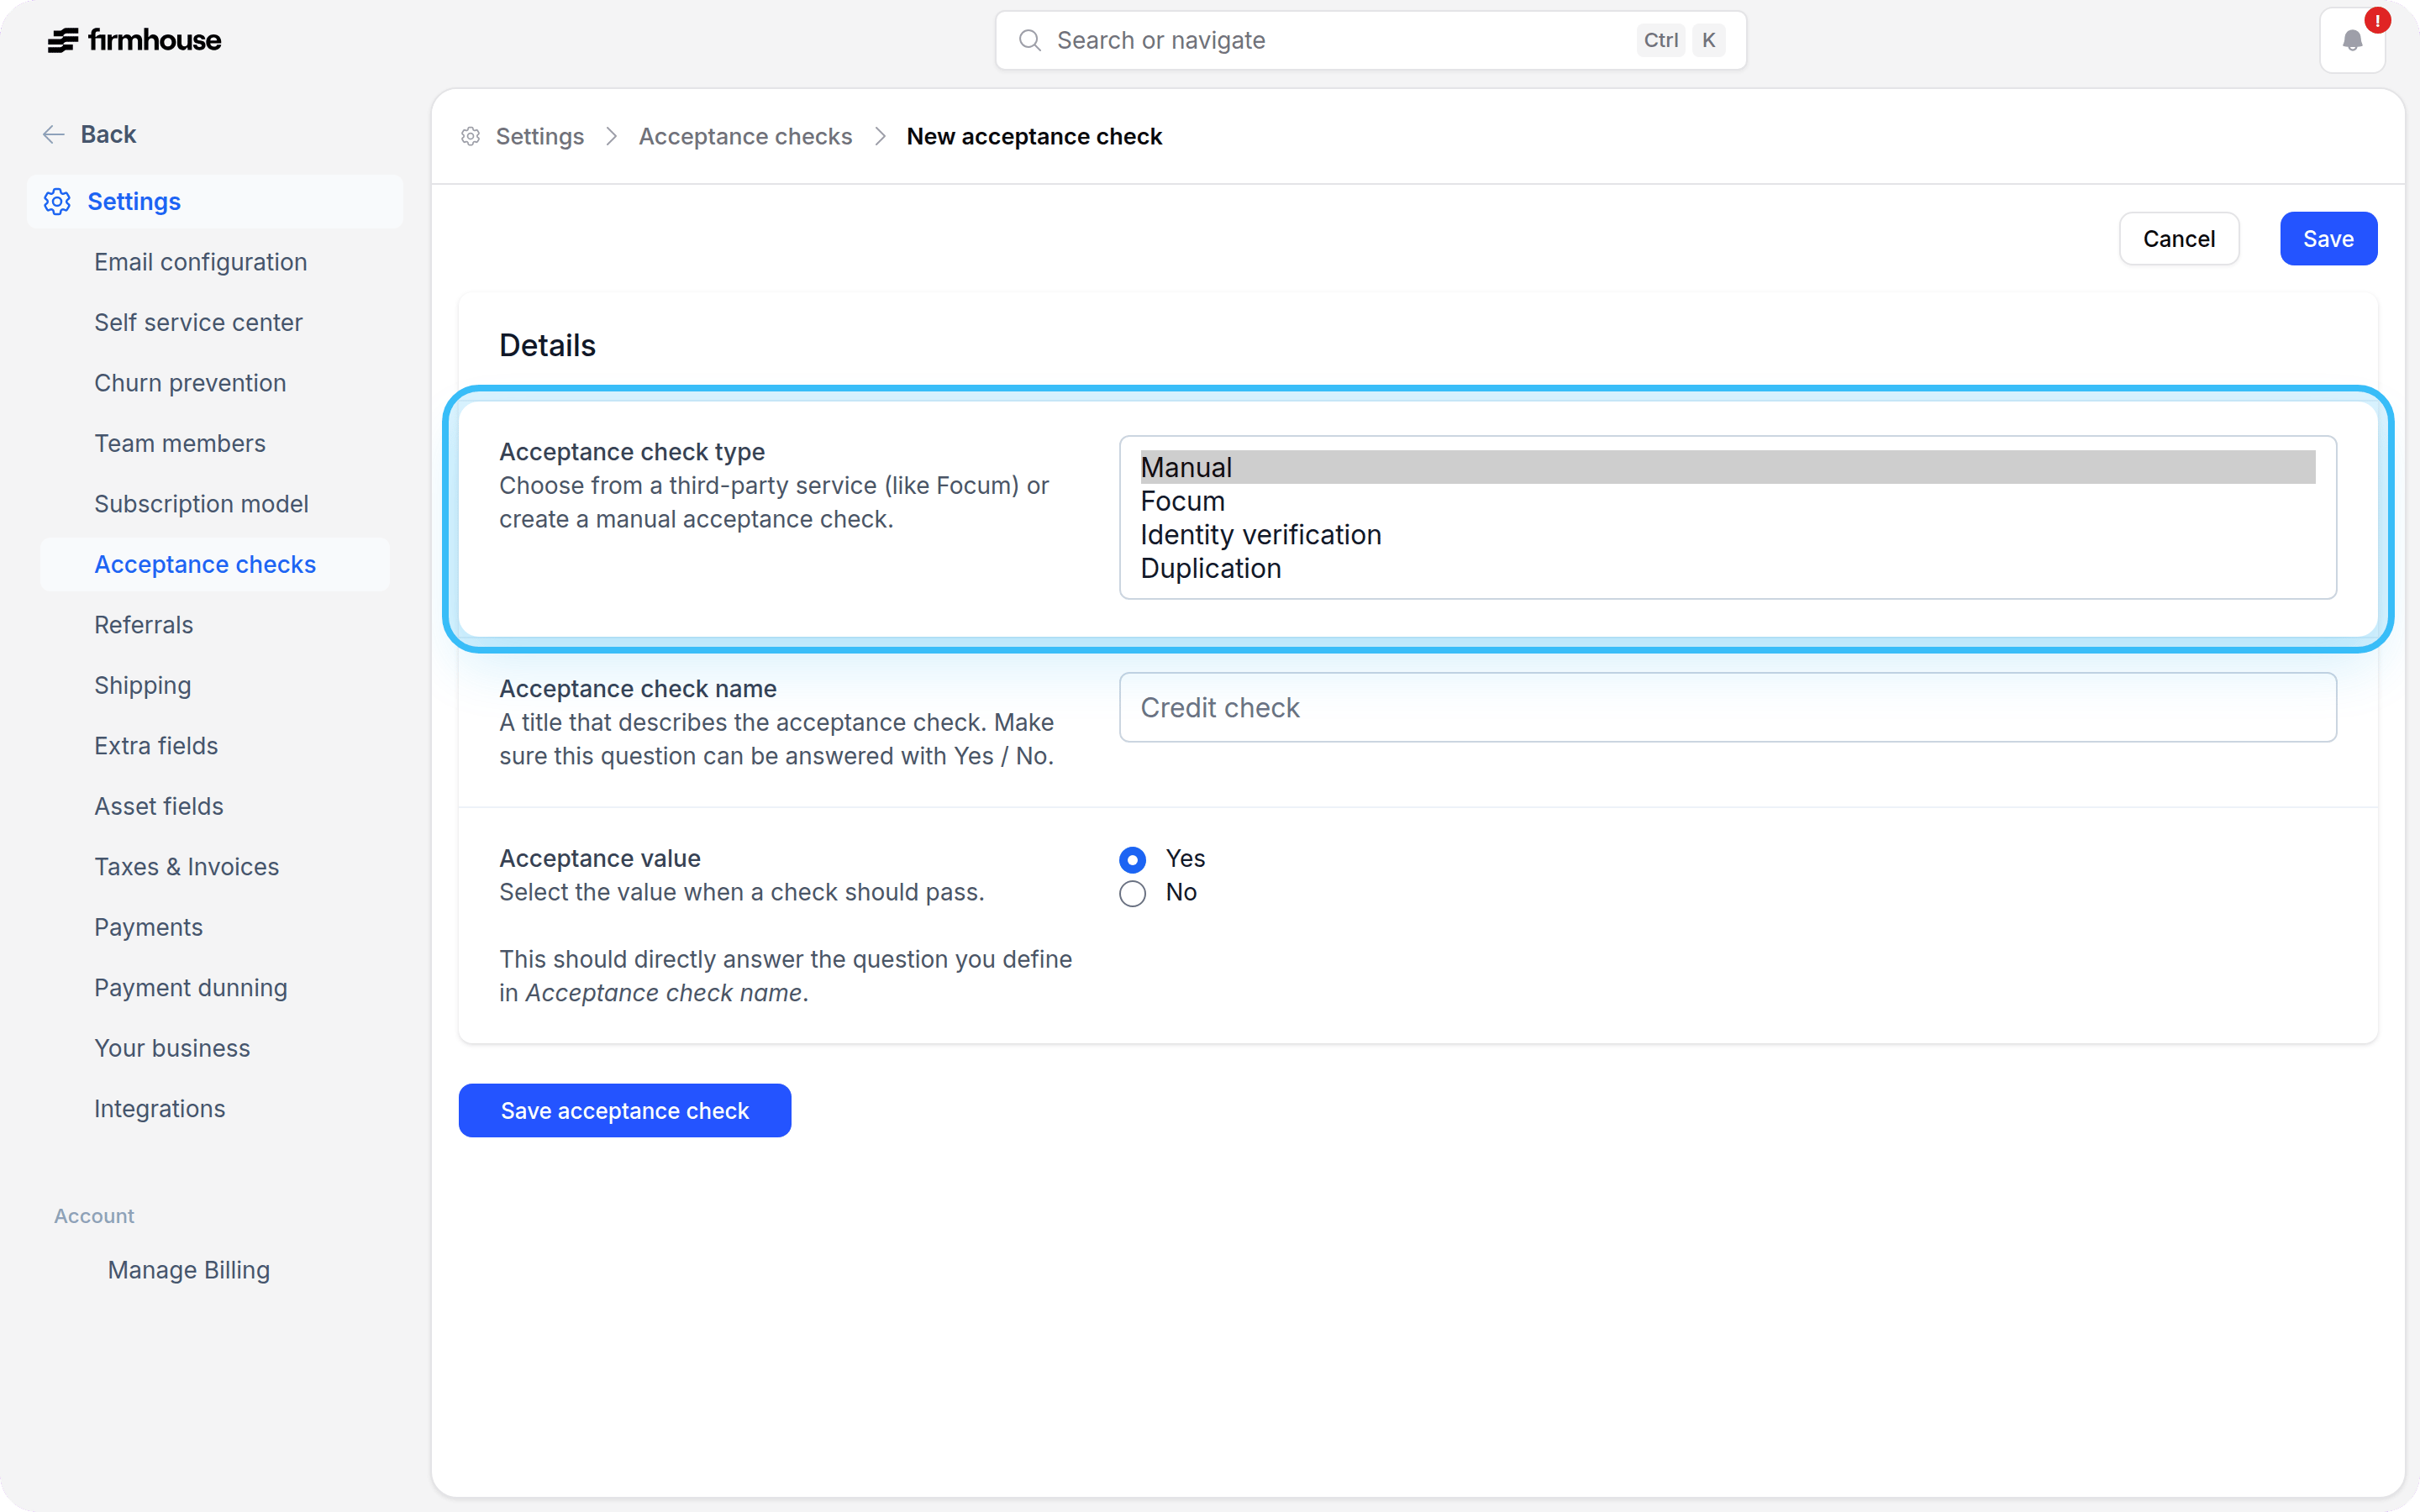
Setting up a manual acceptance check
There’s not much you need to do here. Give the check a name and decide what Acceptance value should make the customer pass. Examples:- “Is on internal blocklist?” -> Set to No
- “Passed manual screening?” -> Set to Yes

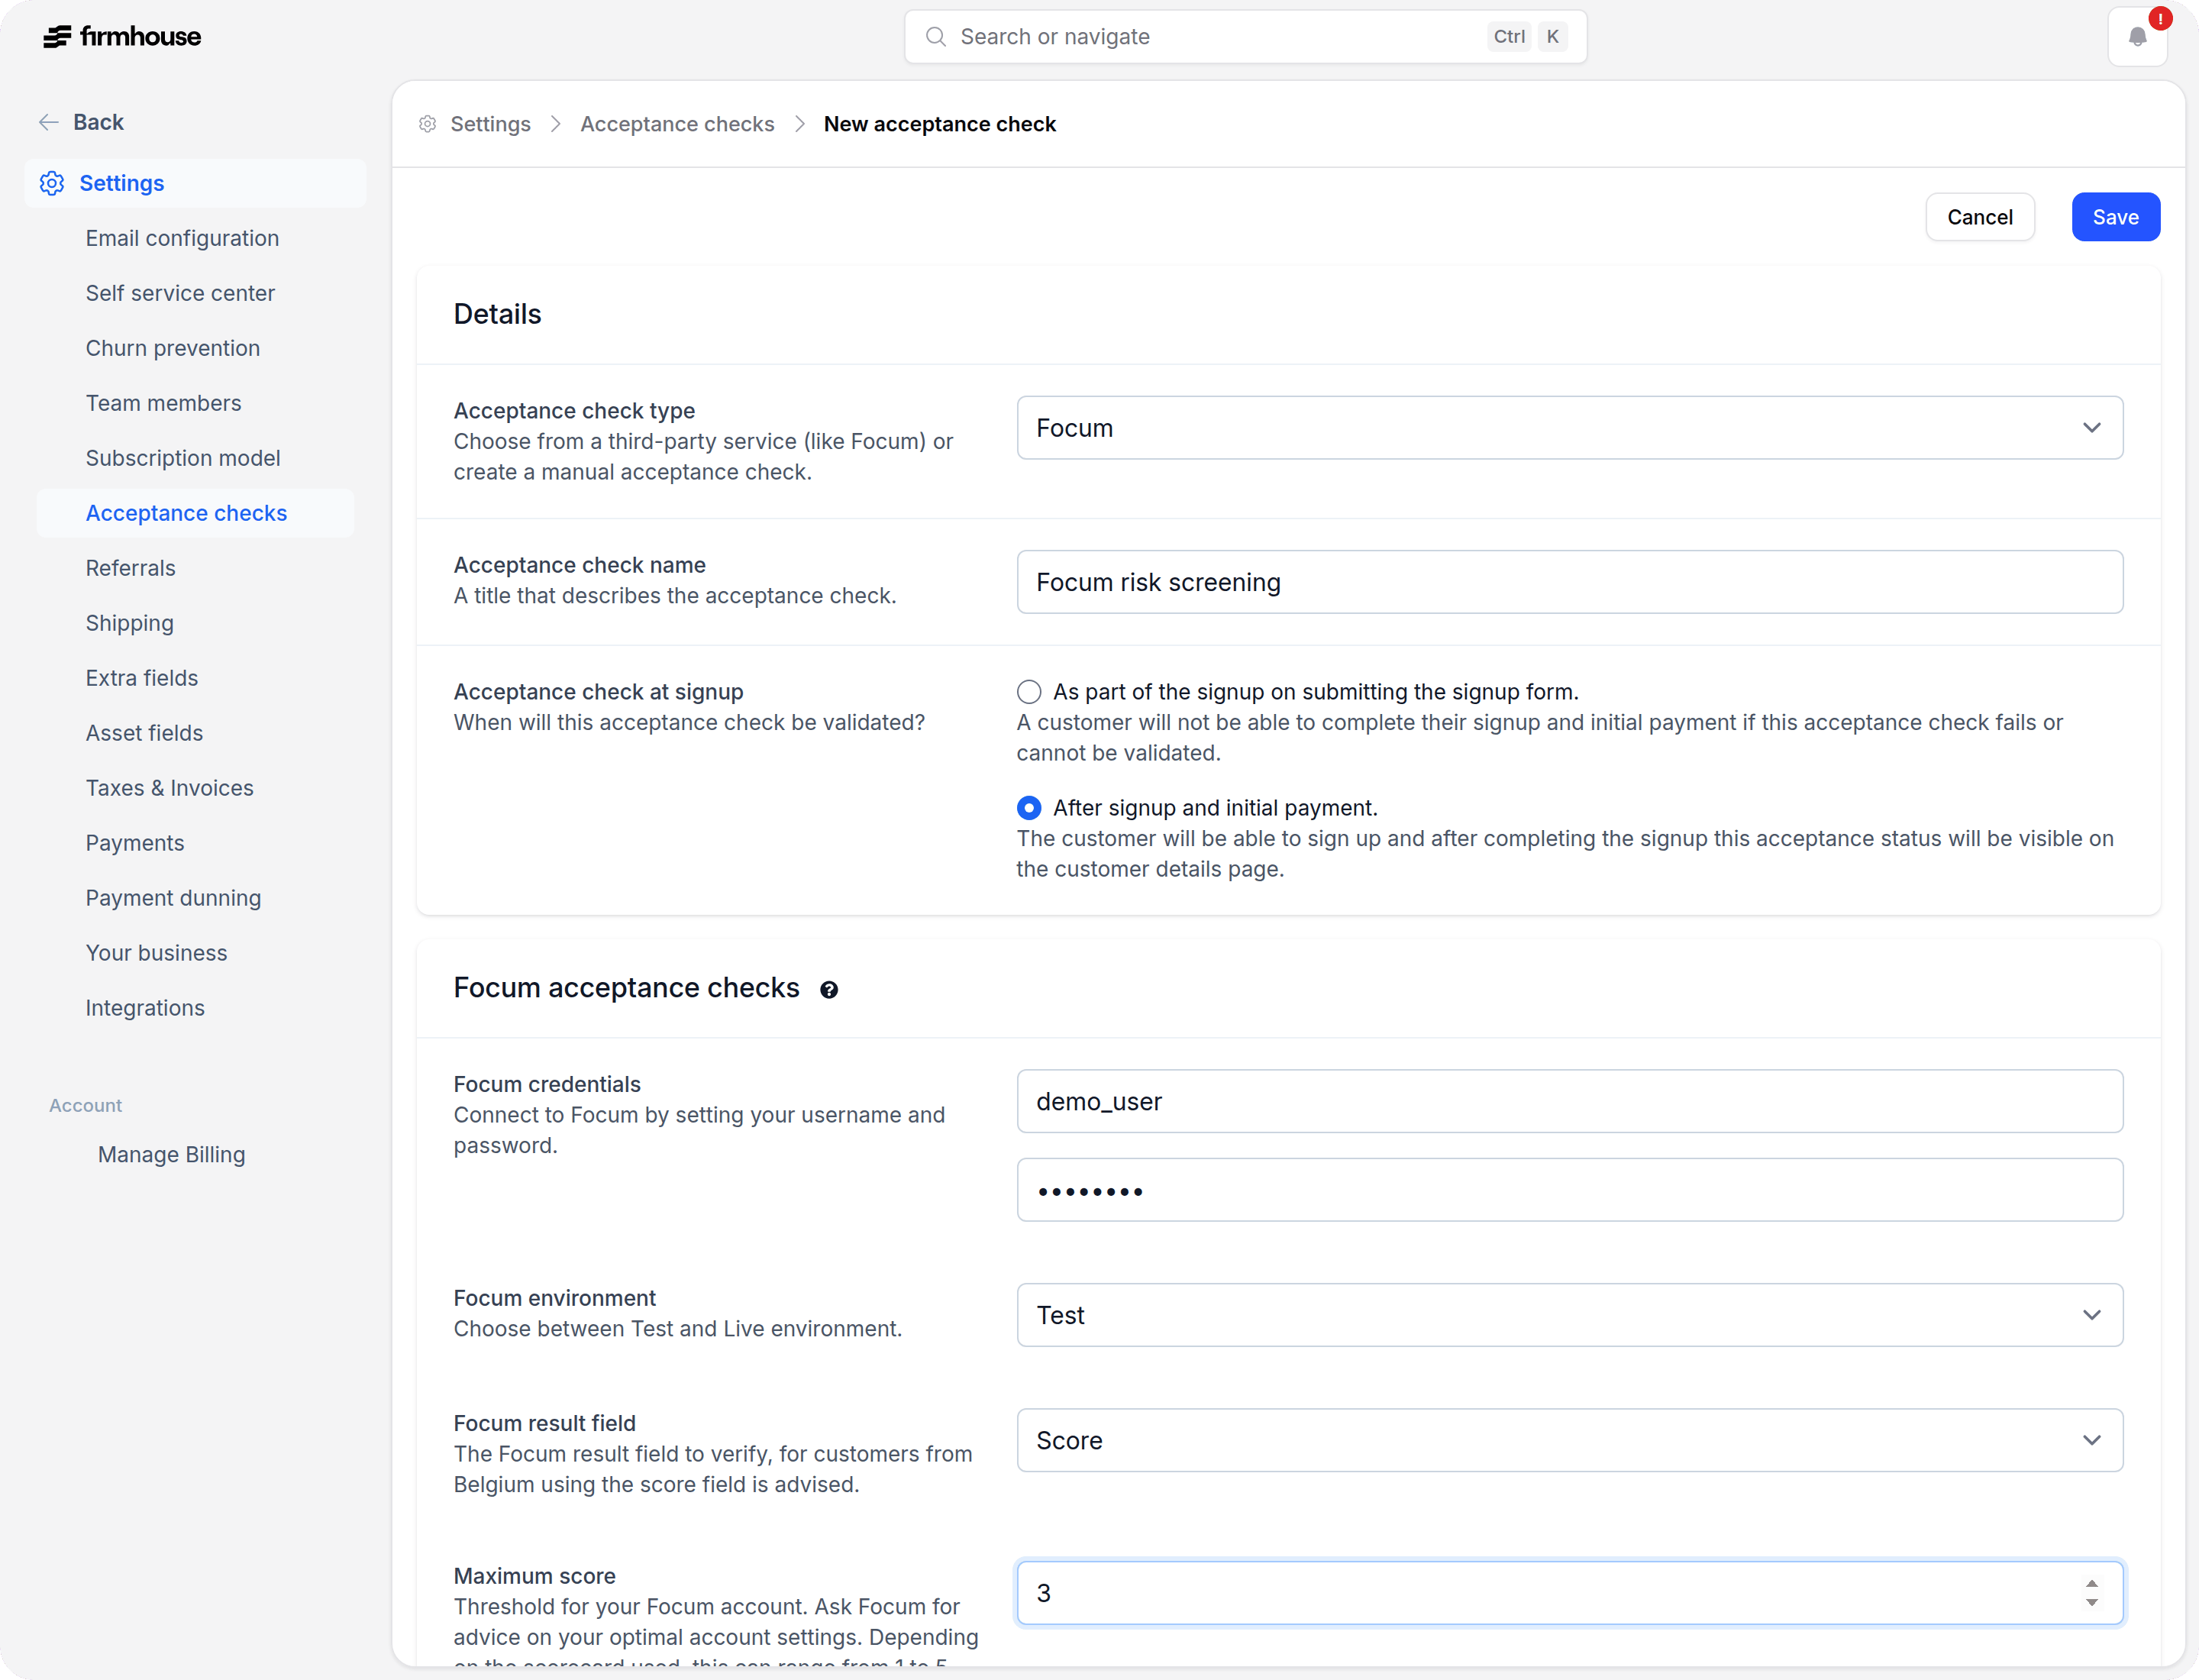
Setting up an acceptance check with Focum
When creating a Focum acceptance check, configure the following fields:- Focum credentials: Connect to Focum by entering your username and password.
- Focum environment: Choose whether to use the Test or Live environment.
- Focum result field: Select the result field that should be checked. For customers from Belgium, using the score field is advised.
- Score threshold: Set the threshold that determines whether a customer passes the check. Depending on your configuration, this may be shown as Maximum score or Minimum score in the UI.
- Acceptance check at signup: Choose when the check should run.
- As part of the signup on submitting the signup form. The customer will not be able to complete signup and initial payment if this check fails or cannot be validated.
- After signup and initial payment. The customer can complete signup first, and the acceptance check result will become visible on the customer details page afterwards.
If you wish to use Focum, please reach out to Firmhouse Support to verify your configuration settings.
Setting up an identity verification acceptance check
Before creating this check, make sure you have configured your identity verification provider in Firmhouse. To set up an identity verification acceptance check:- Click New acceptance check
- Select Identity verification as the acceptance check type
- Give the check a clear name, such as
Identity verified - Select your Identity verification service provider
- Click Save acceptance check
Setting up a duplication acceptance check
To set up a duplication acceptance check:- Click New acceptance check
- Select Duplication as the acceptance check type
- Give the check a clear name
- Choose the Duplication field you want to validate
- Set the Maximum subscription duplicates
- Click Save acceptance check
Combining acceptance checks
You can add as many acceptance checks as you want. Every customer will have to pass all relevant acceptance checks before they can be activated. If you combine checks with different timing, the checks configured for signup are validated during signup, while checks configured after signup are shown on the customer details page after the customer’s initial payment. In this example setup, there would first be an automated check performed by Focum. A customer will then have to pass an additional manual check before they can be activated: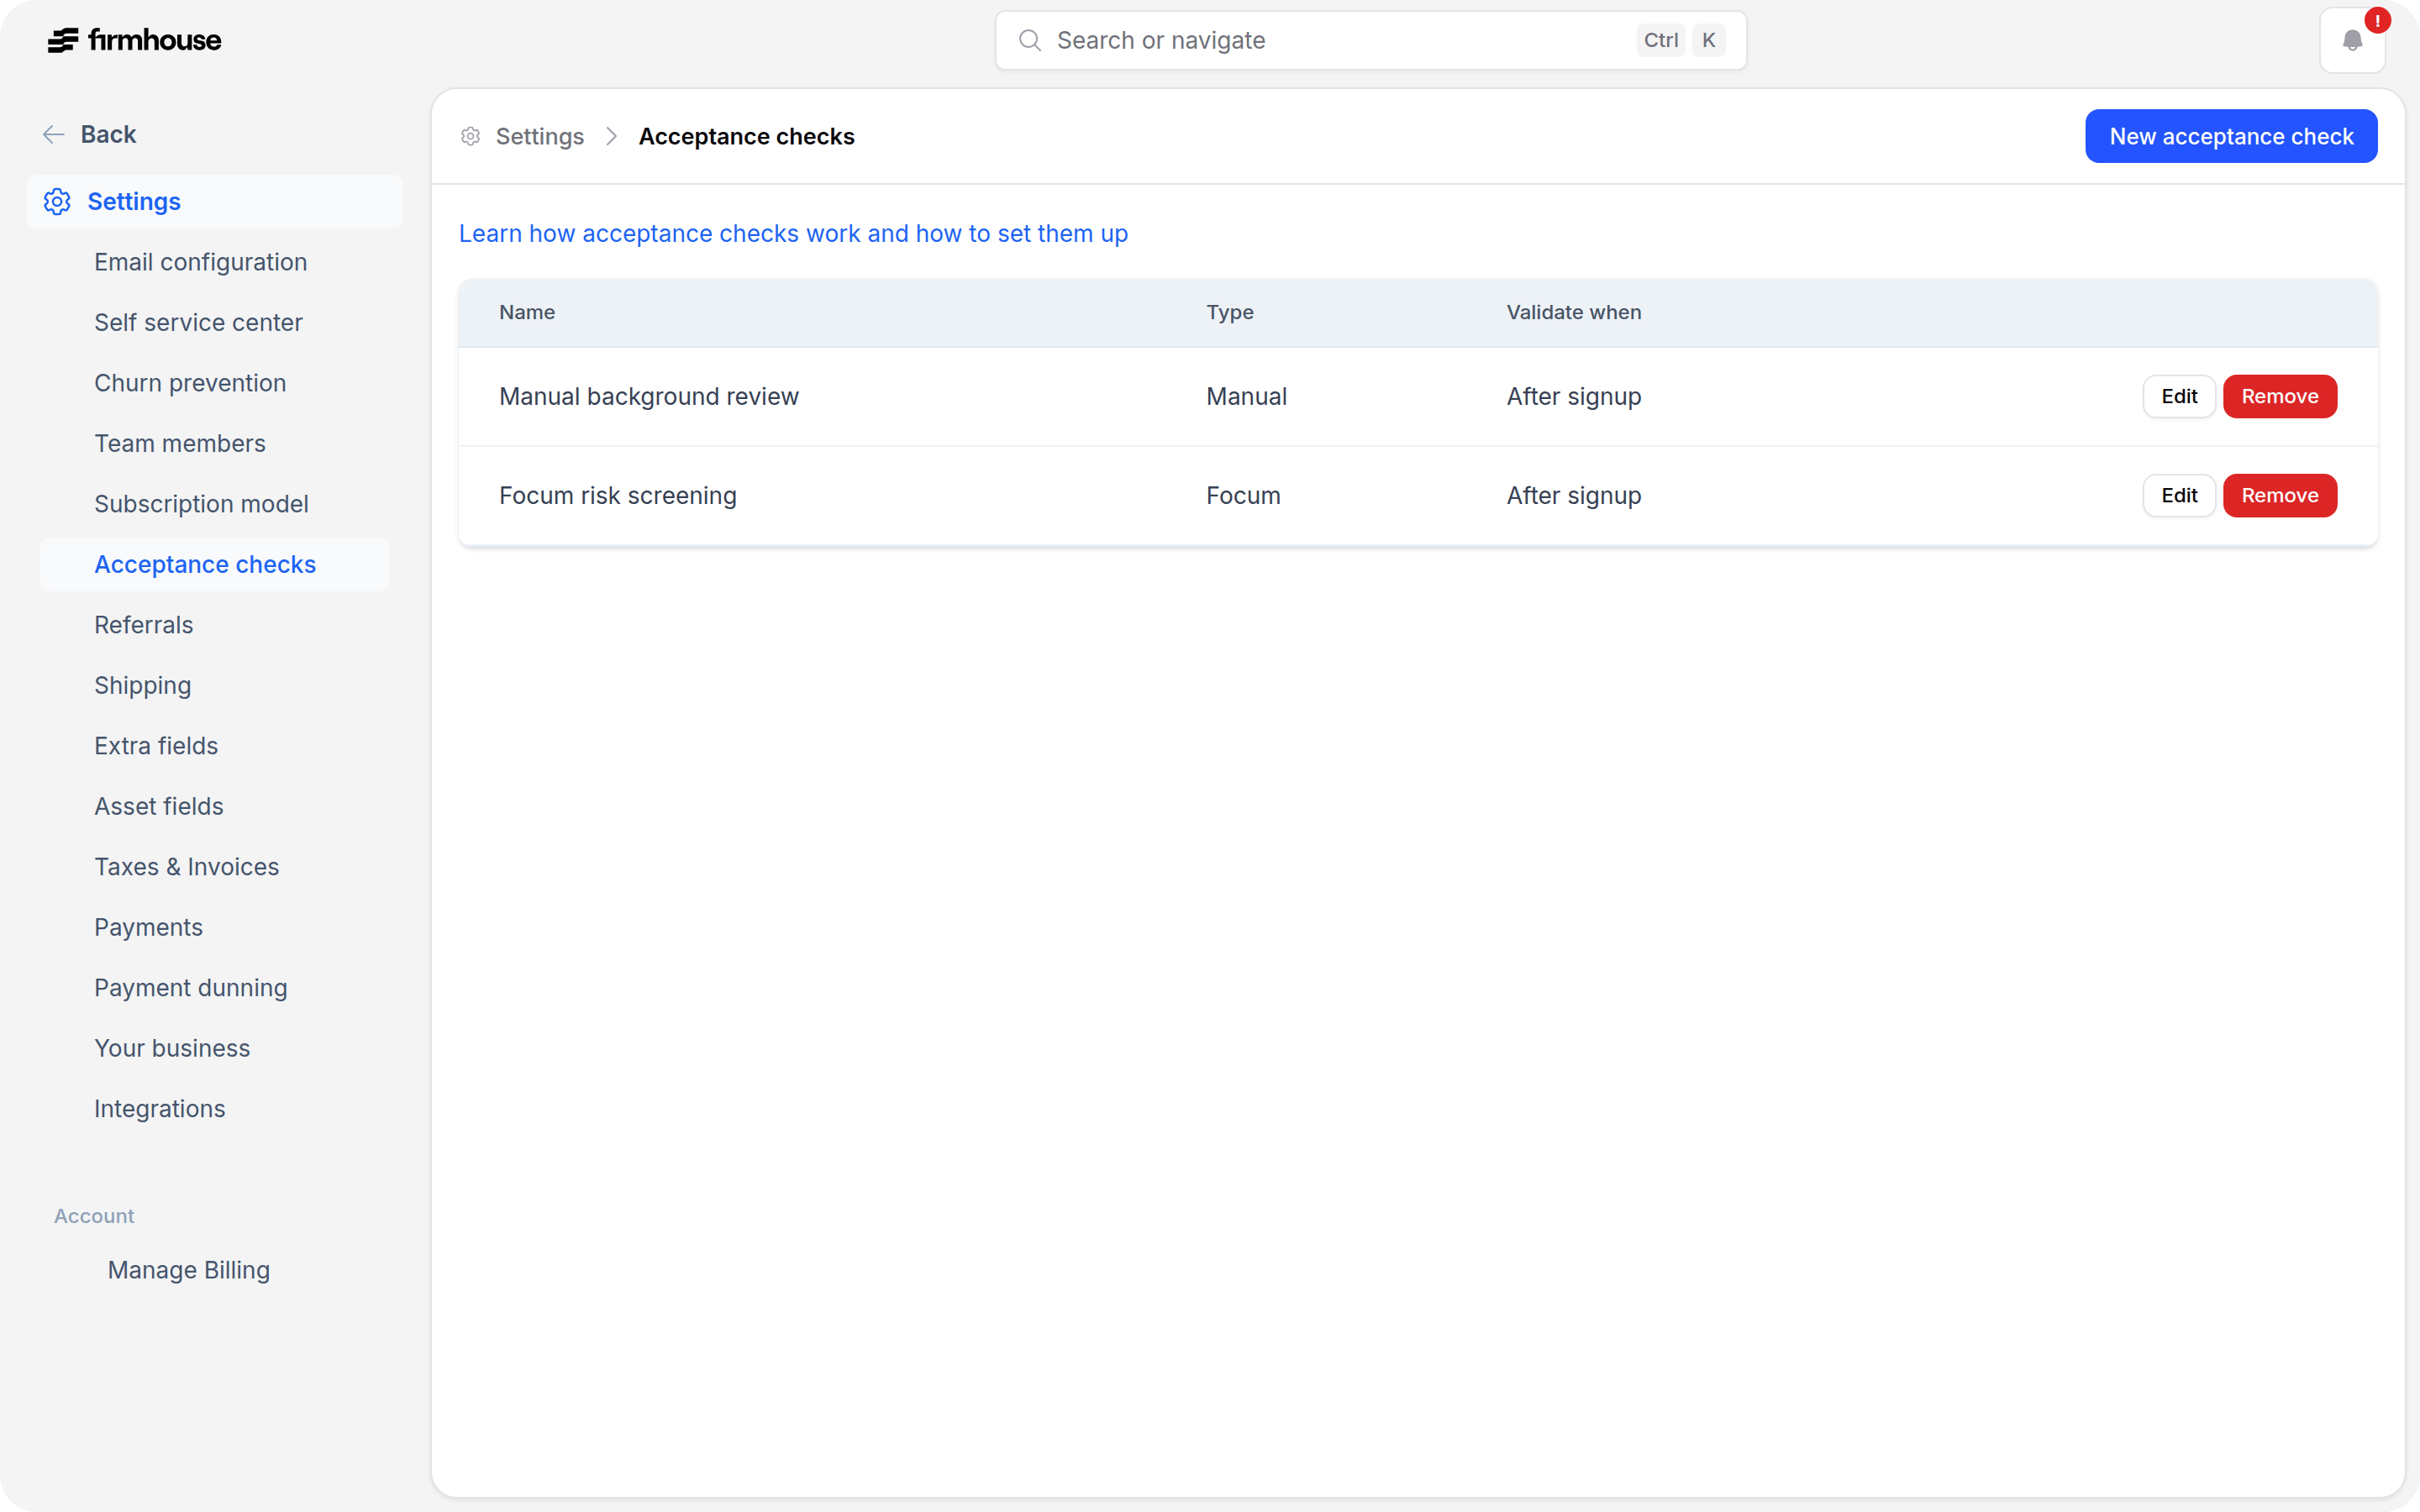
Good to know: If you add a new check, it will only be performed on new signups. Existing customers will not be affected.
Removing an acceptance check
Use the Remove button to remove an acceptance check. Please note that doing so will also remove all previously gathered acceptance check values on customers.Activating customers
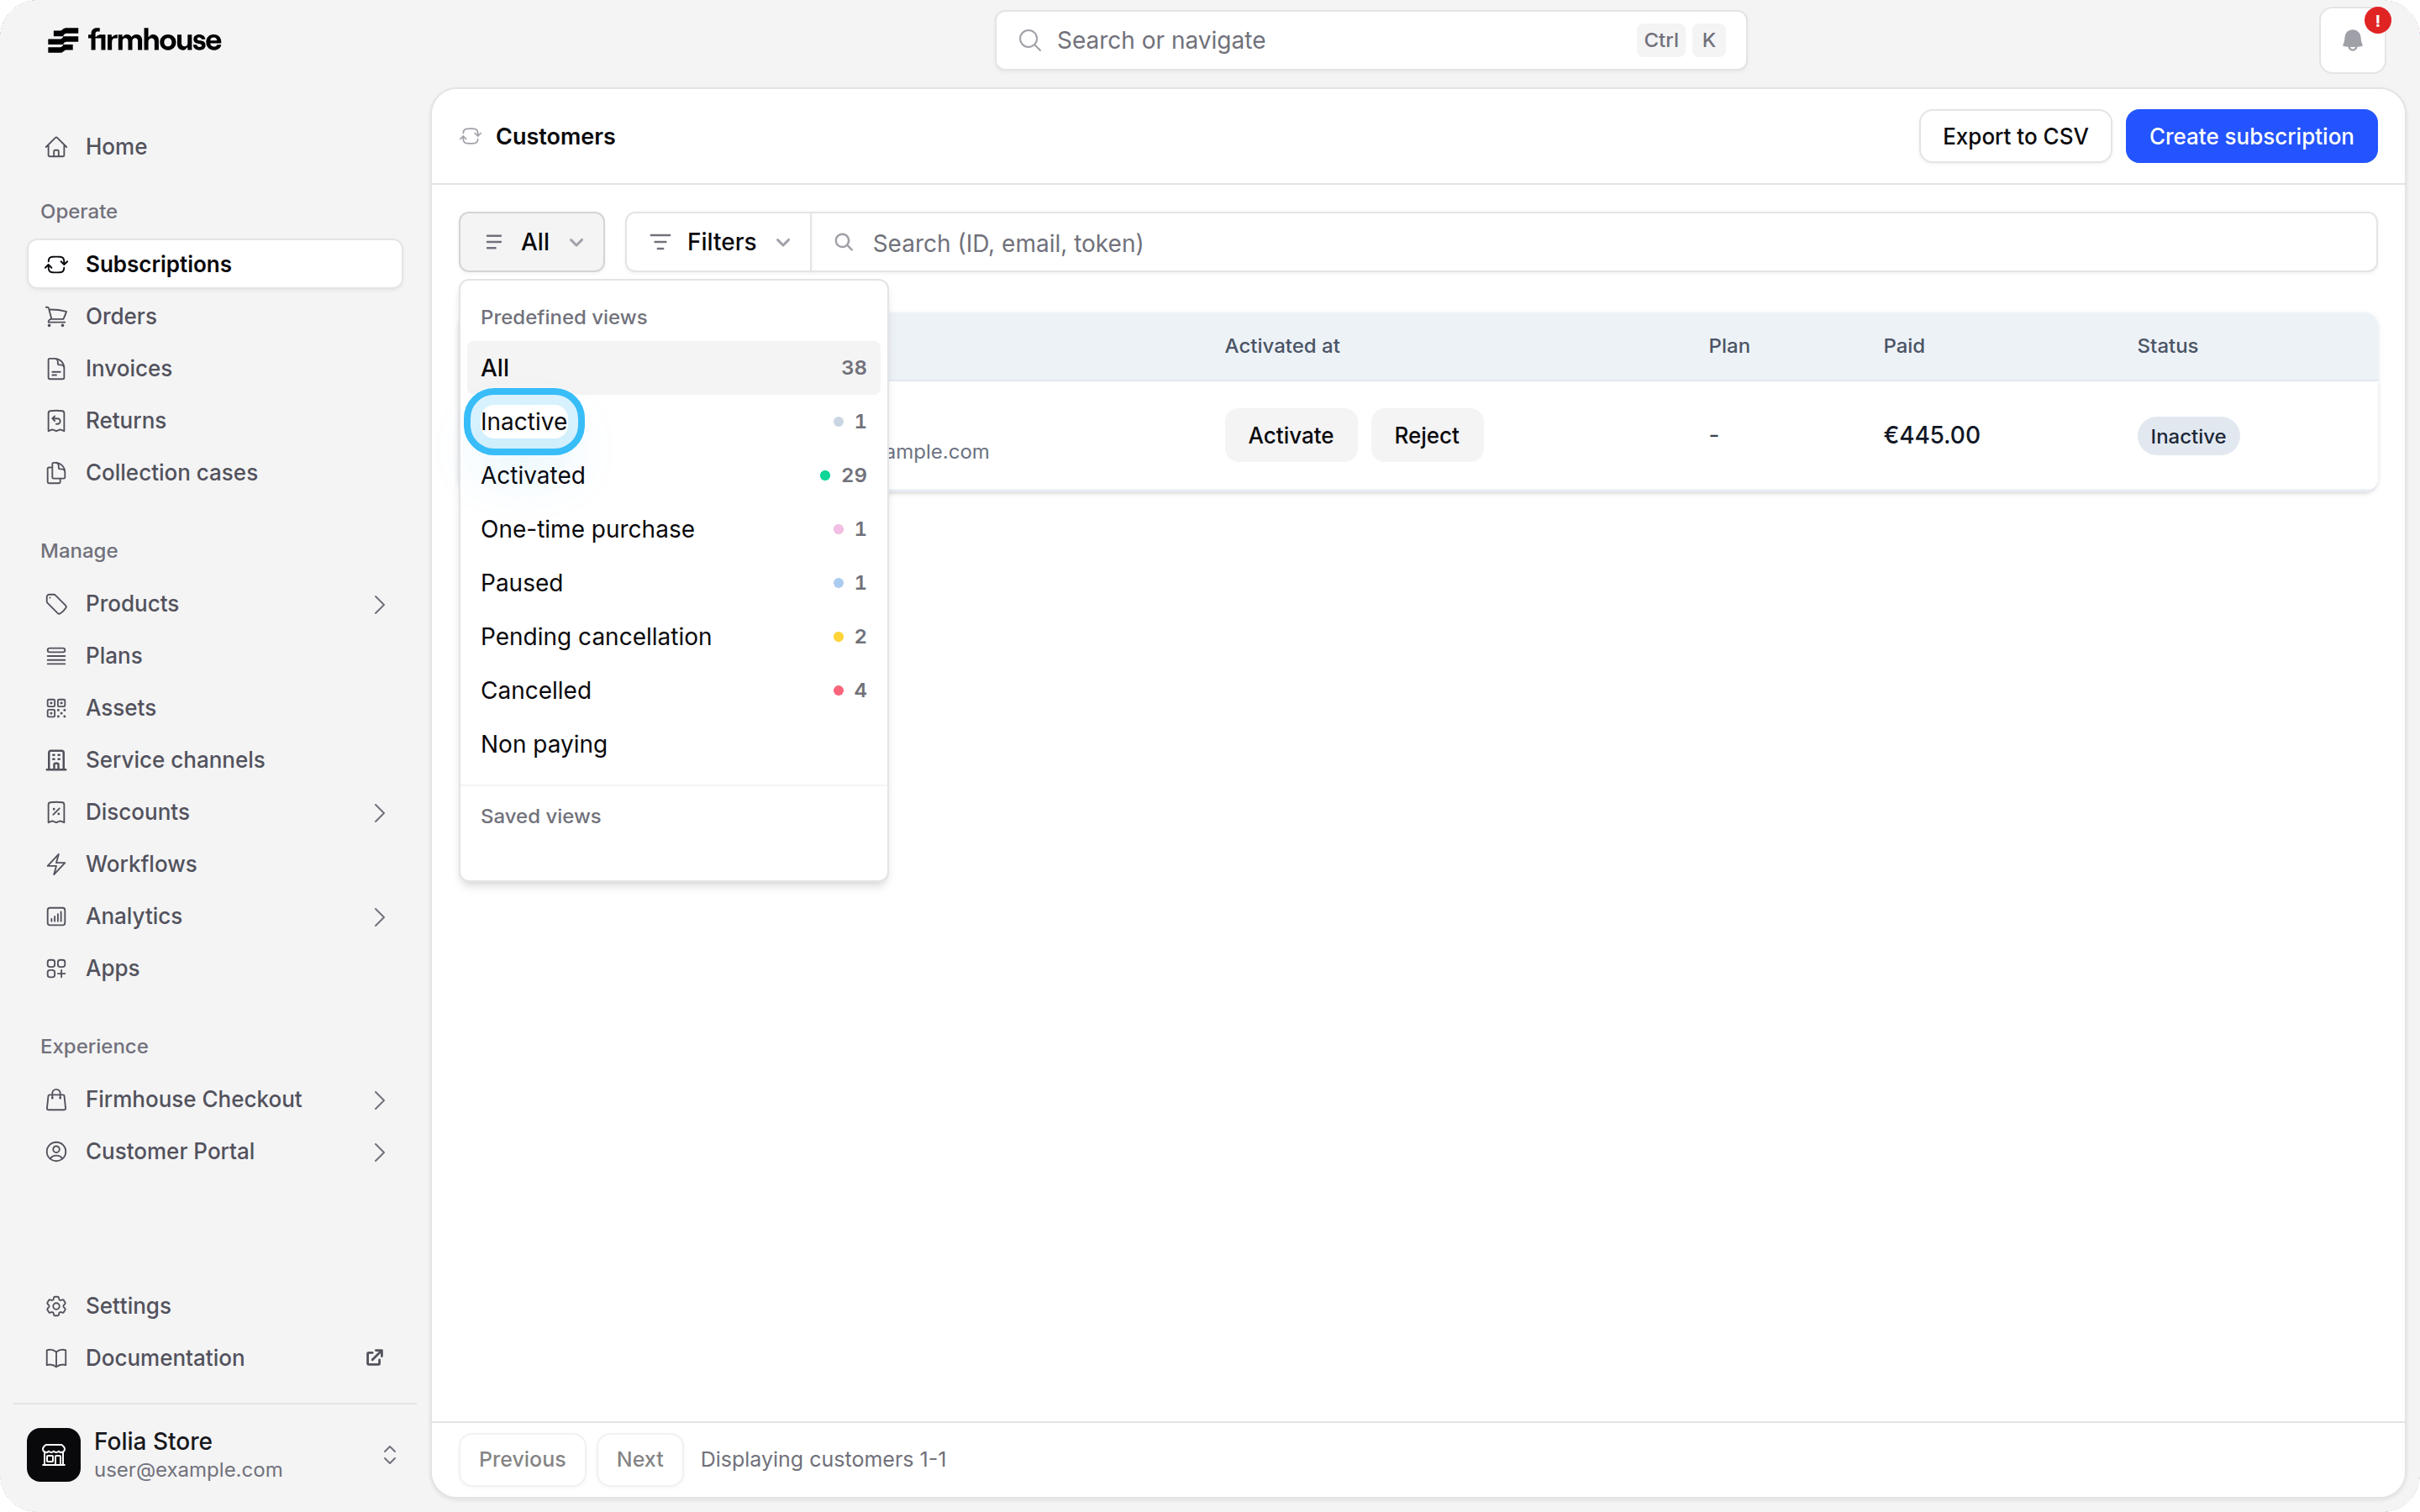
Once a new signup comes in, locate it in your Customers view. You can tell that a customer still needs review if the status is set to Inactive.Pro tip: Use the filter above the table to only display customers that are Inactive.