Create an Empty Pipedream Workflow
First, in Pipedream you’ll create a placeholder workflow that has its own URL to receive webhook requests. Later you will add steps to this workflow which will calculate the purchase price and set it on the specific asset.Steps
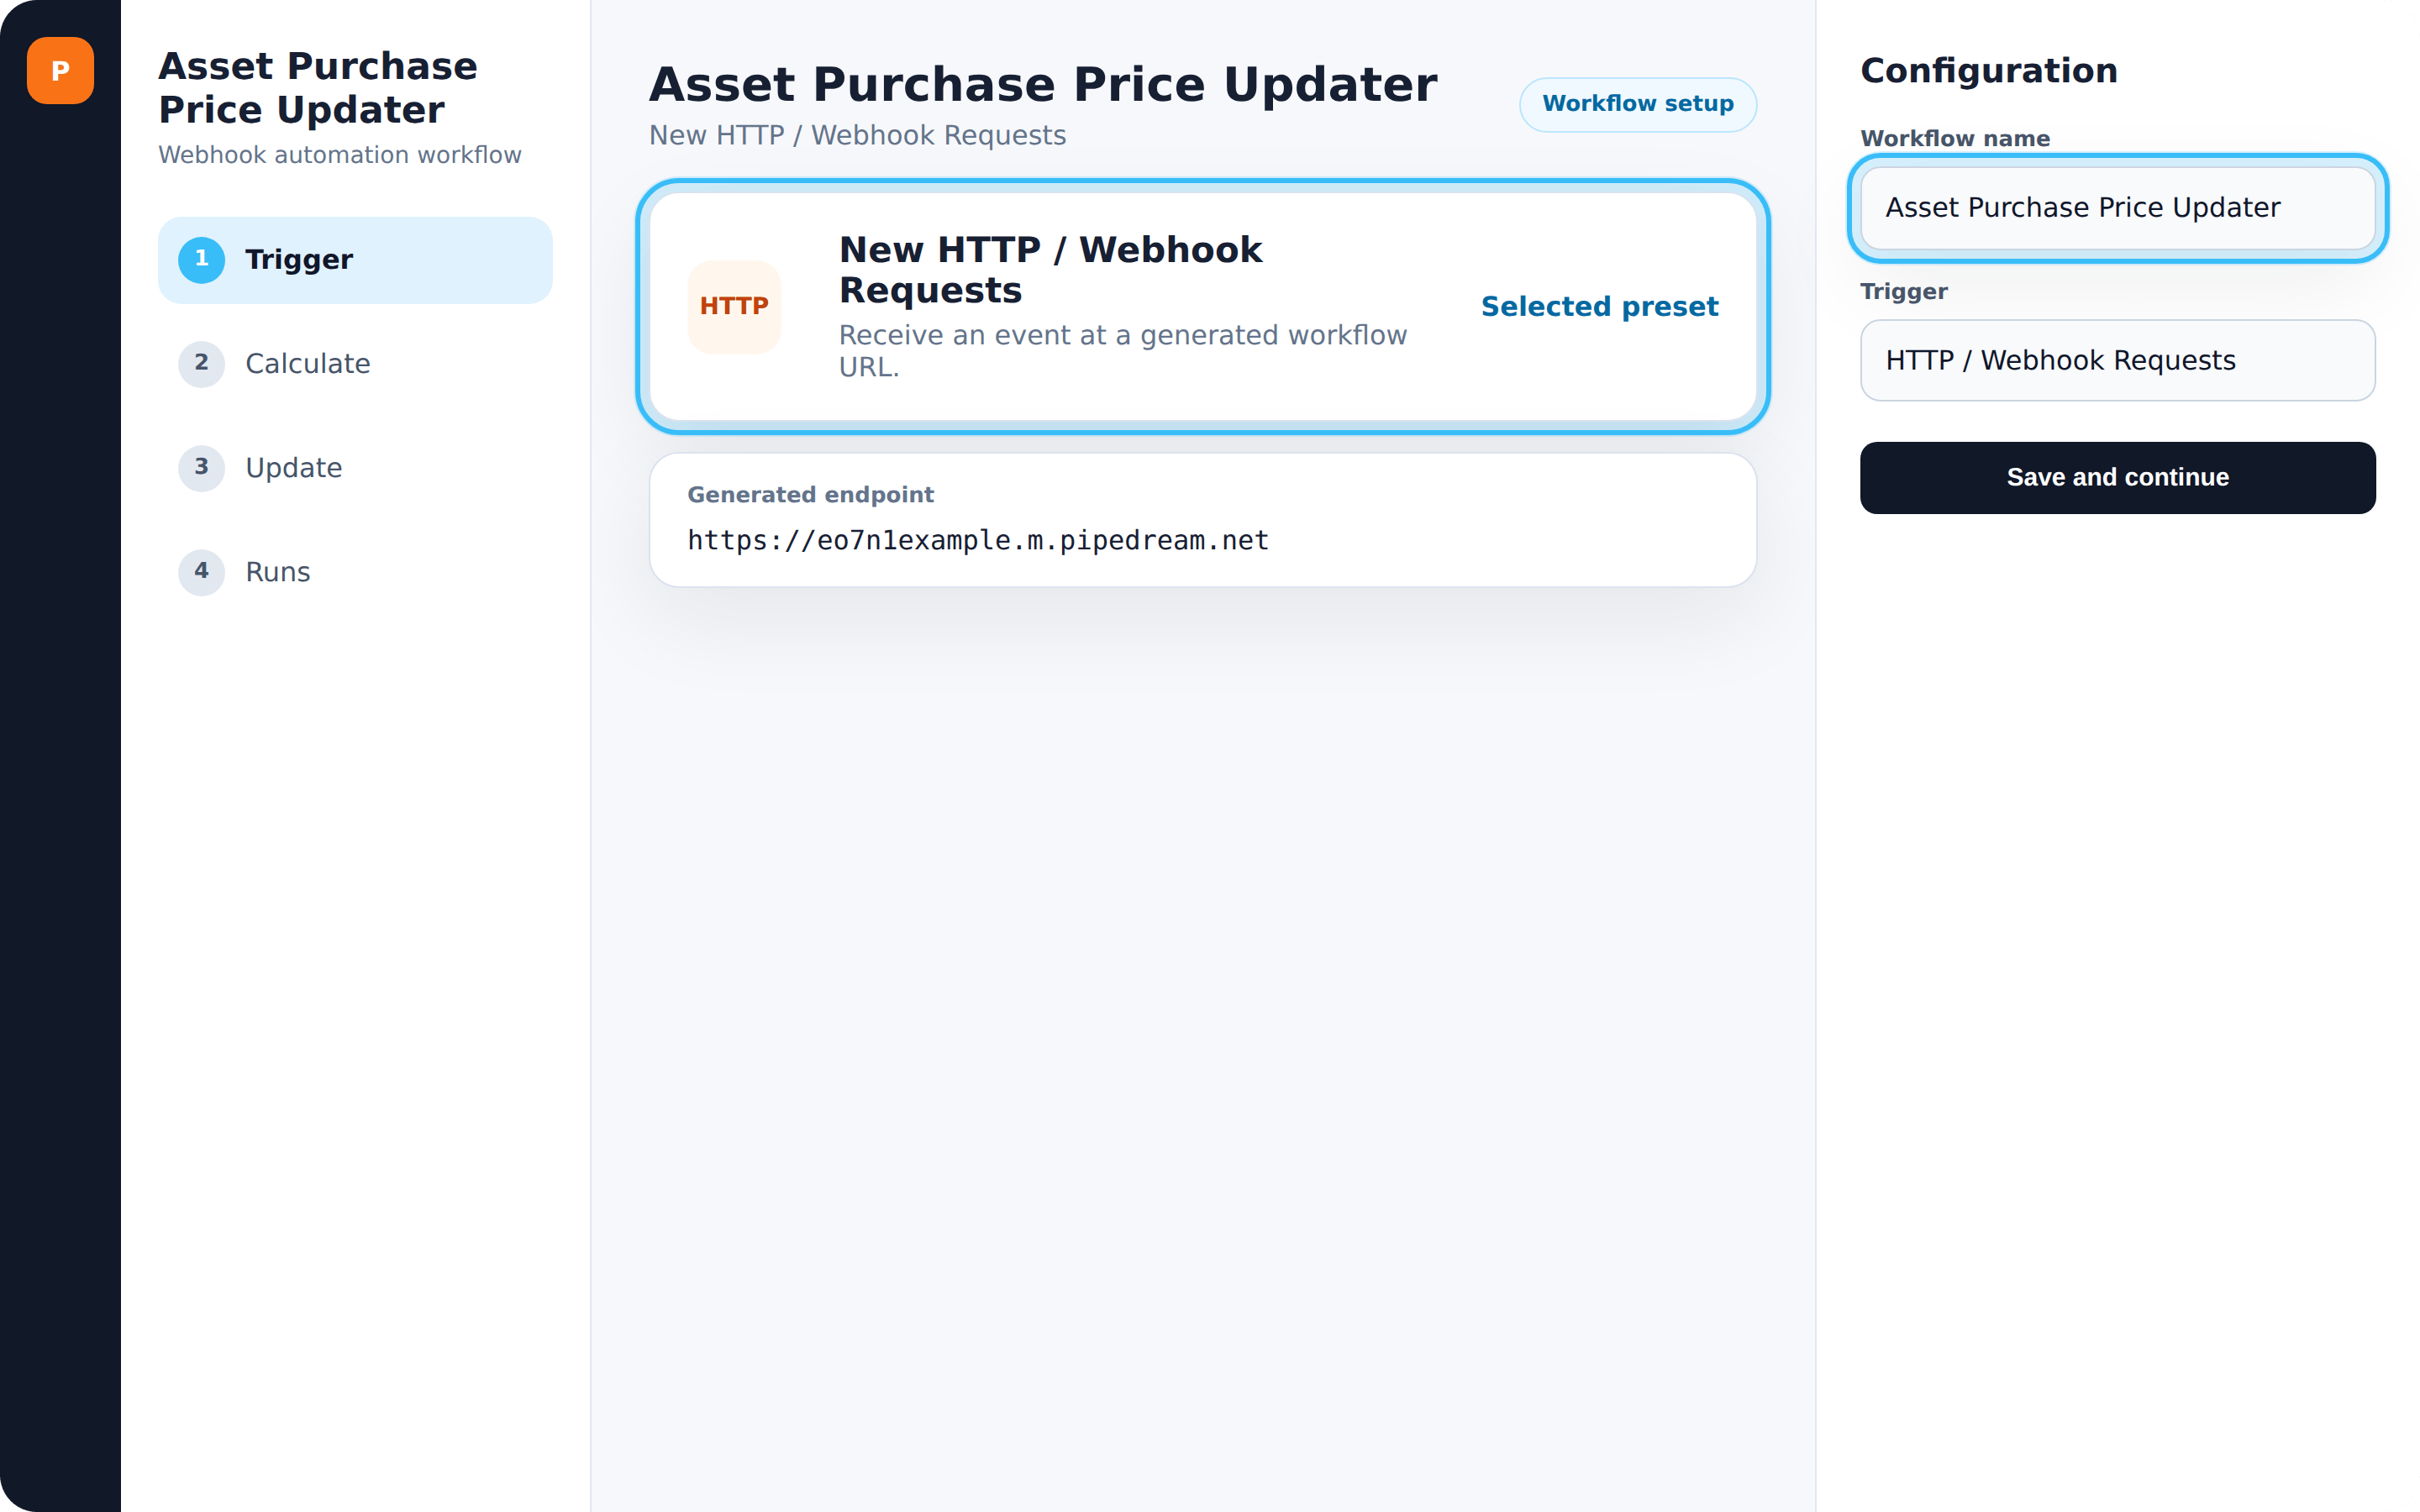
- In Pipedream, click New to create a new workflow
- On the right, choose New HTTP / Webhook Requests from the list of presets
- On the top-left, rename your workflow from Untitled workflow to Asset Purchase Price Updater
- Click Save and continue
https://xxx.m.pipedream.net/).
Create Firmhouse Webhooks
Now that you have the empty Pipedream workflow placeholder on a URL, you can configure webhooks in Firmhouse and point them to Pipedream. You’ll create two webhooks: one for when an asset is assigned to a customer, and one when a customer is charged for their periodic invoice.Create the Asset Assigned Webhook
Steps
- In Firmhouse, navigate to Apps in the sidebar
- Find the Webhooks app and click Configure
- Click New outgoing webhook on the top-right
- Enter a name for the webhook, such as Asset purchase - Asset assigned
- In the Endpoint url field, enter the URL obtained from creating the Pipedream workflow in the previous section
- Leave Authentication type on None
- From the Event dropdown, choose Asset assigned
- In the Template field, paste the following snippet:
- Click Save to save the outgoing webhook
Create the Invoice Invoiced Webhook
Repeat the above steps to create the second webhook with these changes:- Enter a Name for the webhook: Asset purchase - Invoice invoiced
- From the Event dropdown, choose Invoice invoiced
- Keep Authentication type and the Template the same as for the Asset assigned webhook
Add a Price Calculation Step in Pipedream
Return to the Pipedream workflow to add a step that calculates the purchase price for the customer to purchase their asset.Steps
- In Pipedream, open your workflow and click Edit on the top-right if you’re not in Edit mode
- Click the [+] button to add a new step
- In the Add a step menu, choose the Node item
- In the next step, choose the Run Node code option
- In the code editor, clear out the existing content and paste in the contents from: calculate_asset_purchase_price_from_map.js
- Click Test to save the code and continue configuring your pricing
- In the configuration pane, set RecurringInvoicesCount to
{{steps.trigger.event.body.invoicesCount}} - In the PricesMap field, modify the mapping between the number of months and the purchase price you want to offer. There is already a default mapping with 5 months. You can update the prices, or add or remove months. The highest value will always be picked as purchase price if the customer’s trial month exceeds what you’ve configured
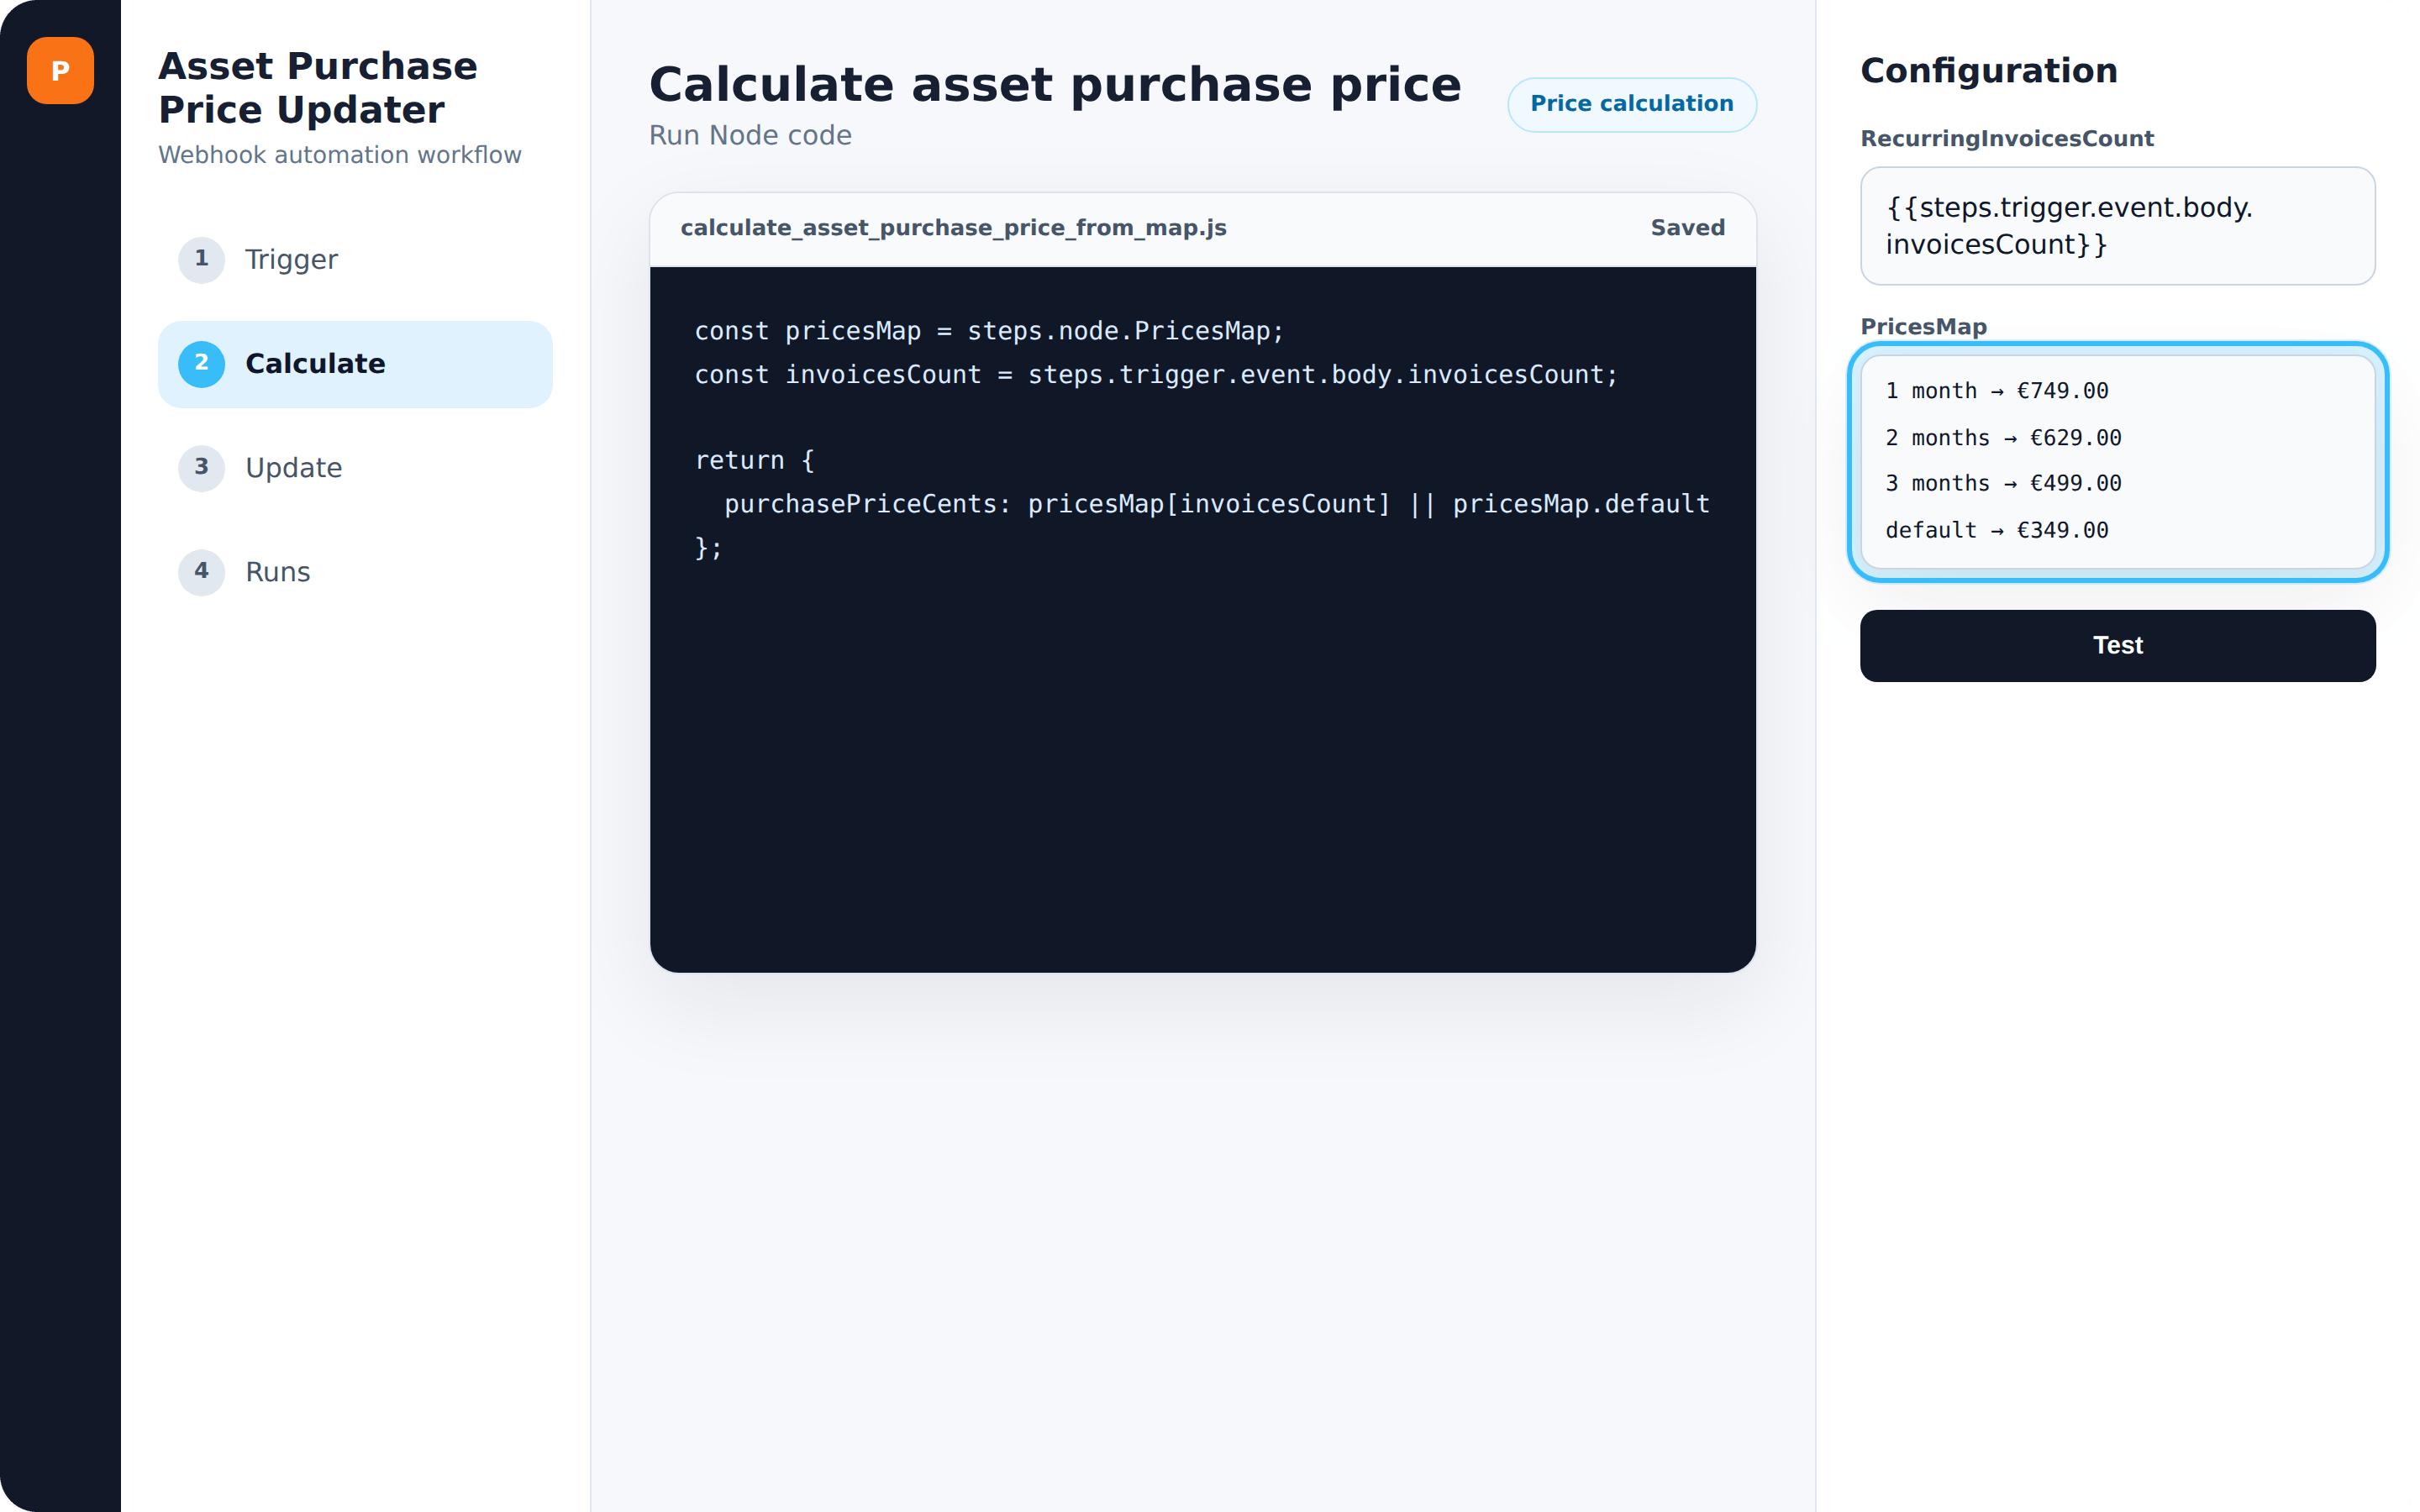
- Press Test again to save the changes
Add a Price Updating Step in Pipedream
Add another step to the Pipedream workflow that calls the Firmhouse API to update the purchase price on the relationship between the asset and the subscriber.Steps
- In Pipedream, open your workflow and click Edit on the top-right if needed
- Click the [+] button to add a new step
- In the Add a step menu, choose the Node item
- Choose the Run Node code option
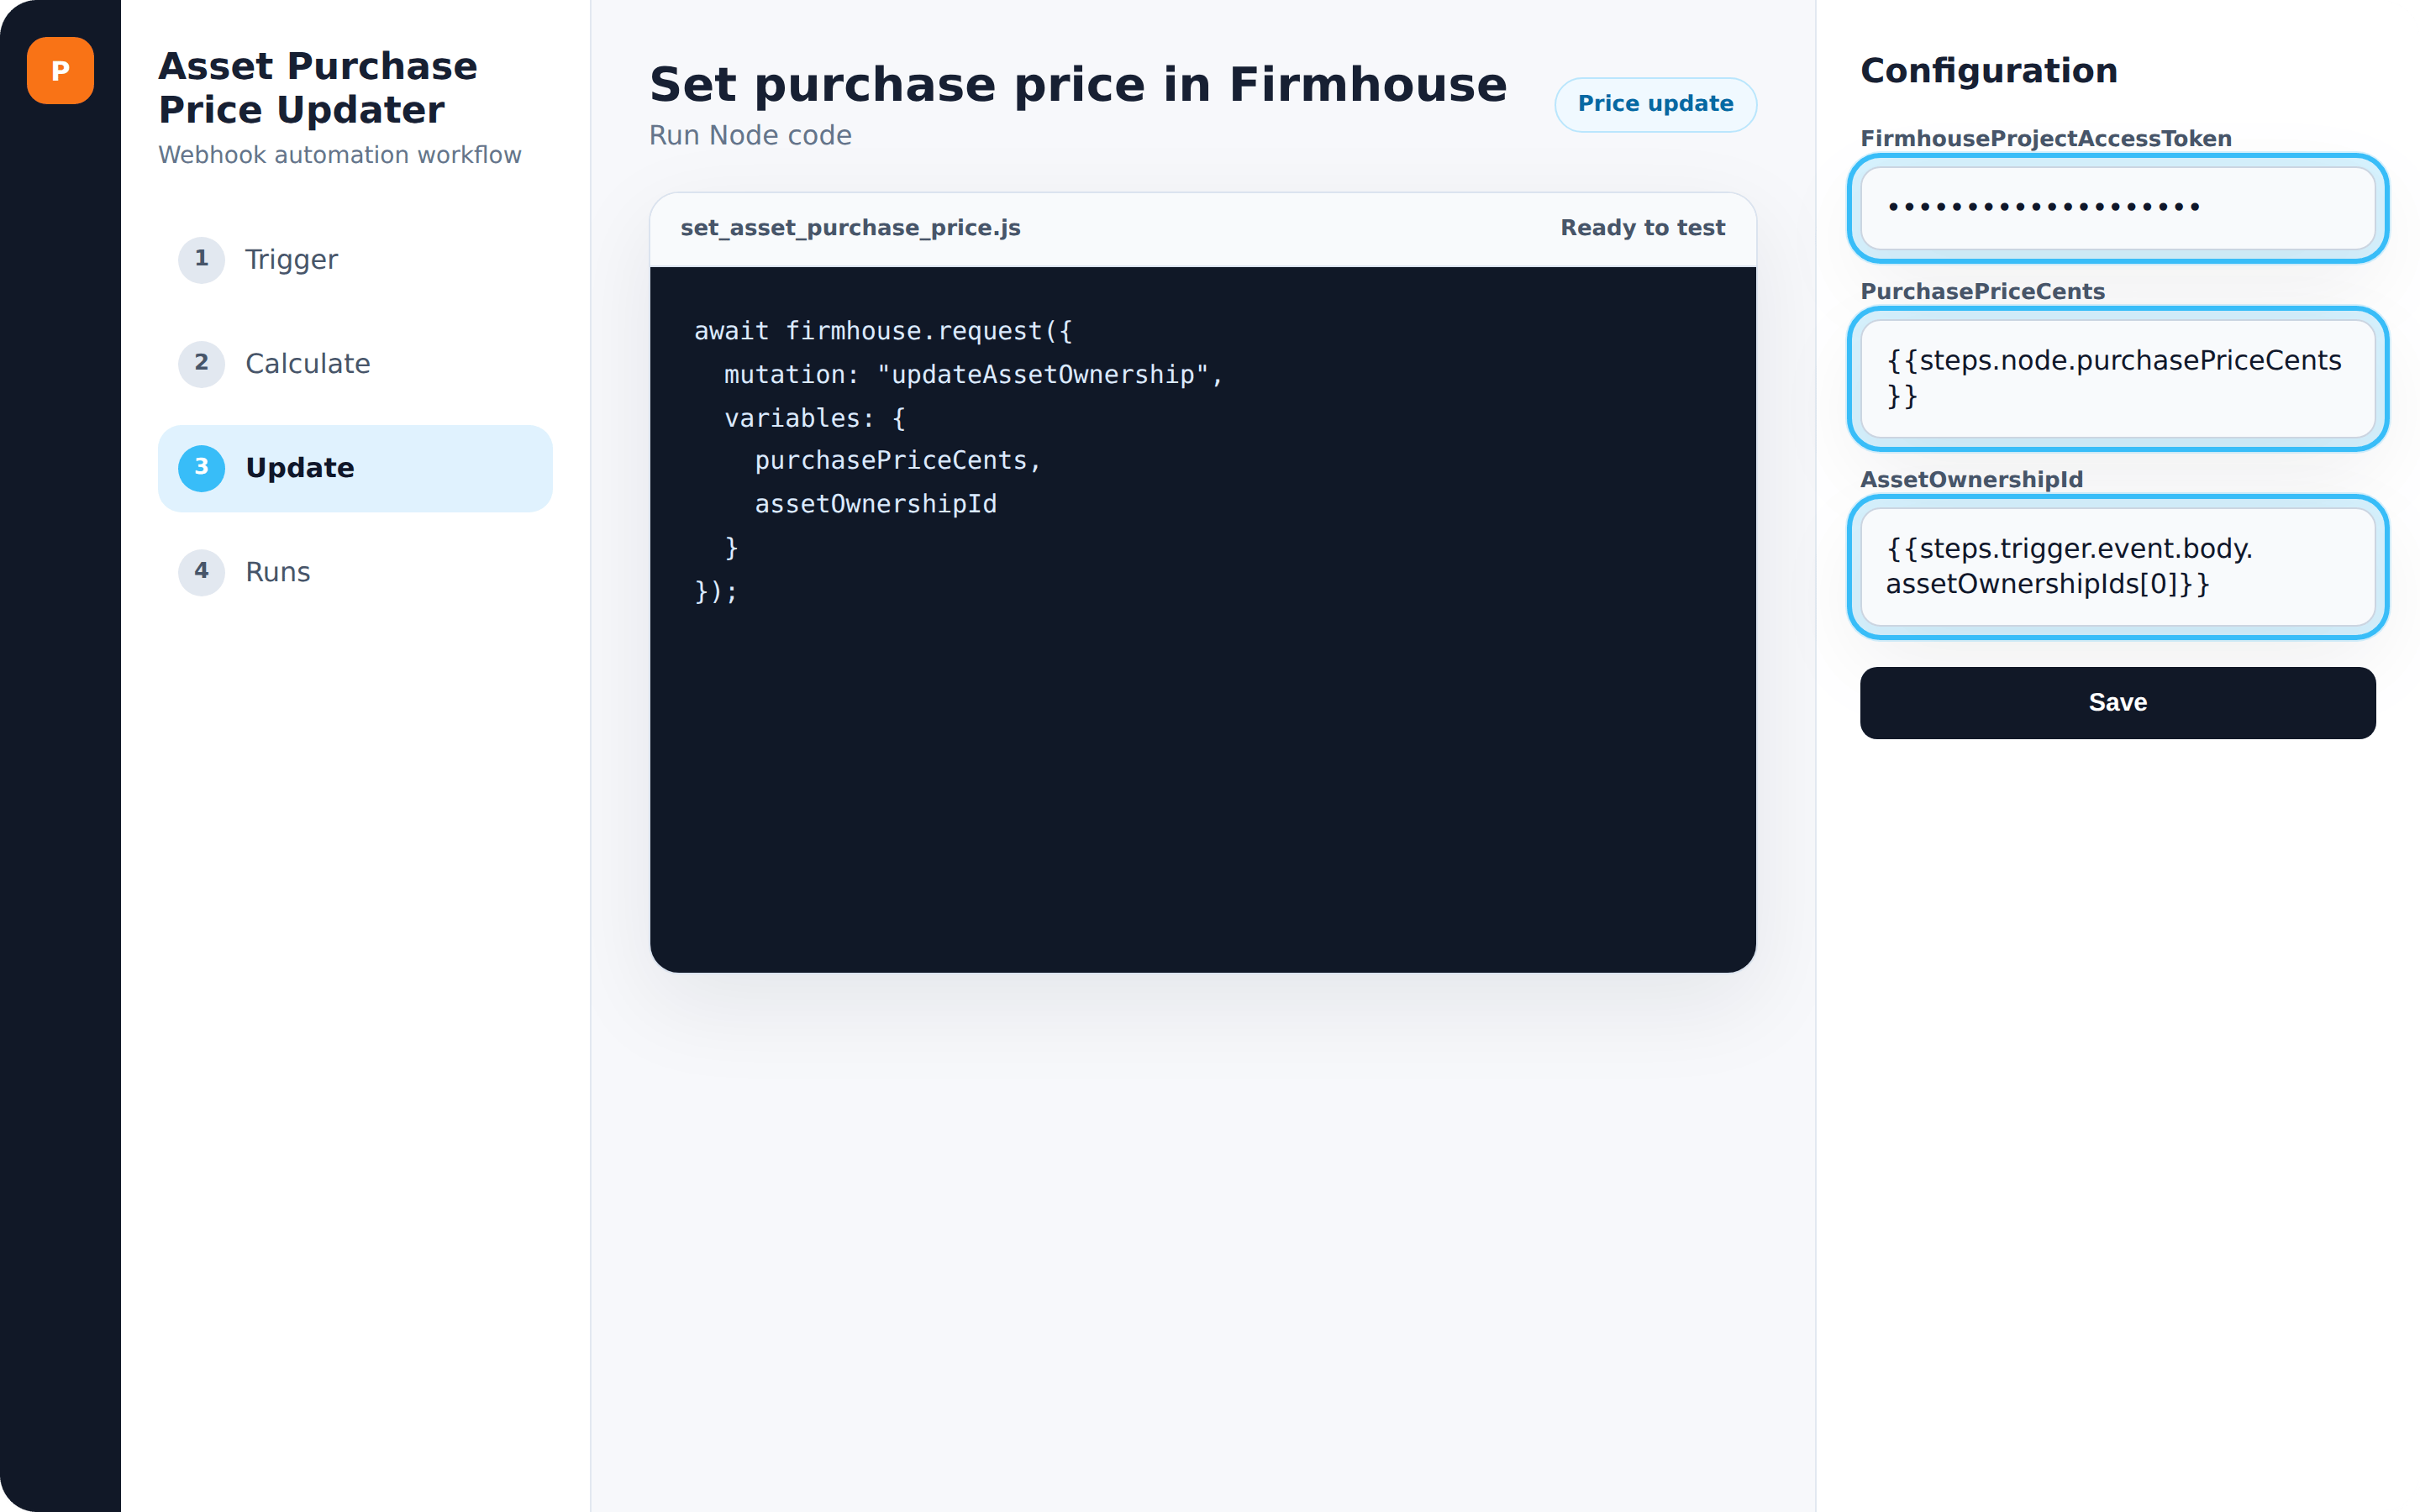
- In the code editor, clear out the existing content and paste in the contents from: set_asset_purchase_price.js
- Click Test to save the code and continue configuring this step
- In the configuration pane, set FirmhouseProjectAccessToken to an Access Token with Write access type that you can generate in your Firmhouse project under Settings > Integrations
- Leave the FirmhouseApiUrl field as is
- Set PurchasePriceCents to
{{steps.node.purchasePriceCents}} - Set AssetOwnershipId to
{{steps.trigger.event.body.assetOwnershipIds[0]}}
- Click Save to store and test the configuration. At this point you may see error messages because the workflow was tested manually without the webhook variables
- On the top-right in the Pipedream workflow editor, click Deploy and confirm the dialog that warns about errors
Test and Confirm the Automation
Test the complete price updating setup to ensure everything works correctly.Steps
- Create an asset for the product you want to offer a purchase flow for
- Perform a checkout of your product as you normally would to create a test customer
- Navigate to the new test customer in the Firmhouse portal and assign them the asset you just created
- Go to the workflow in Pipedream to see if the webhook triggered an execution

- If everything went correctly, there should be a task execution with a green checkmark. If you see a red exclamation mark icon, something is not correctly set up in the workflow. If you don’t see any task execution, the webhook may not be enabled or configured correctly
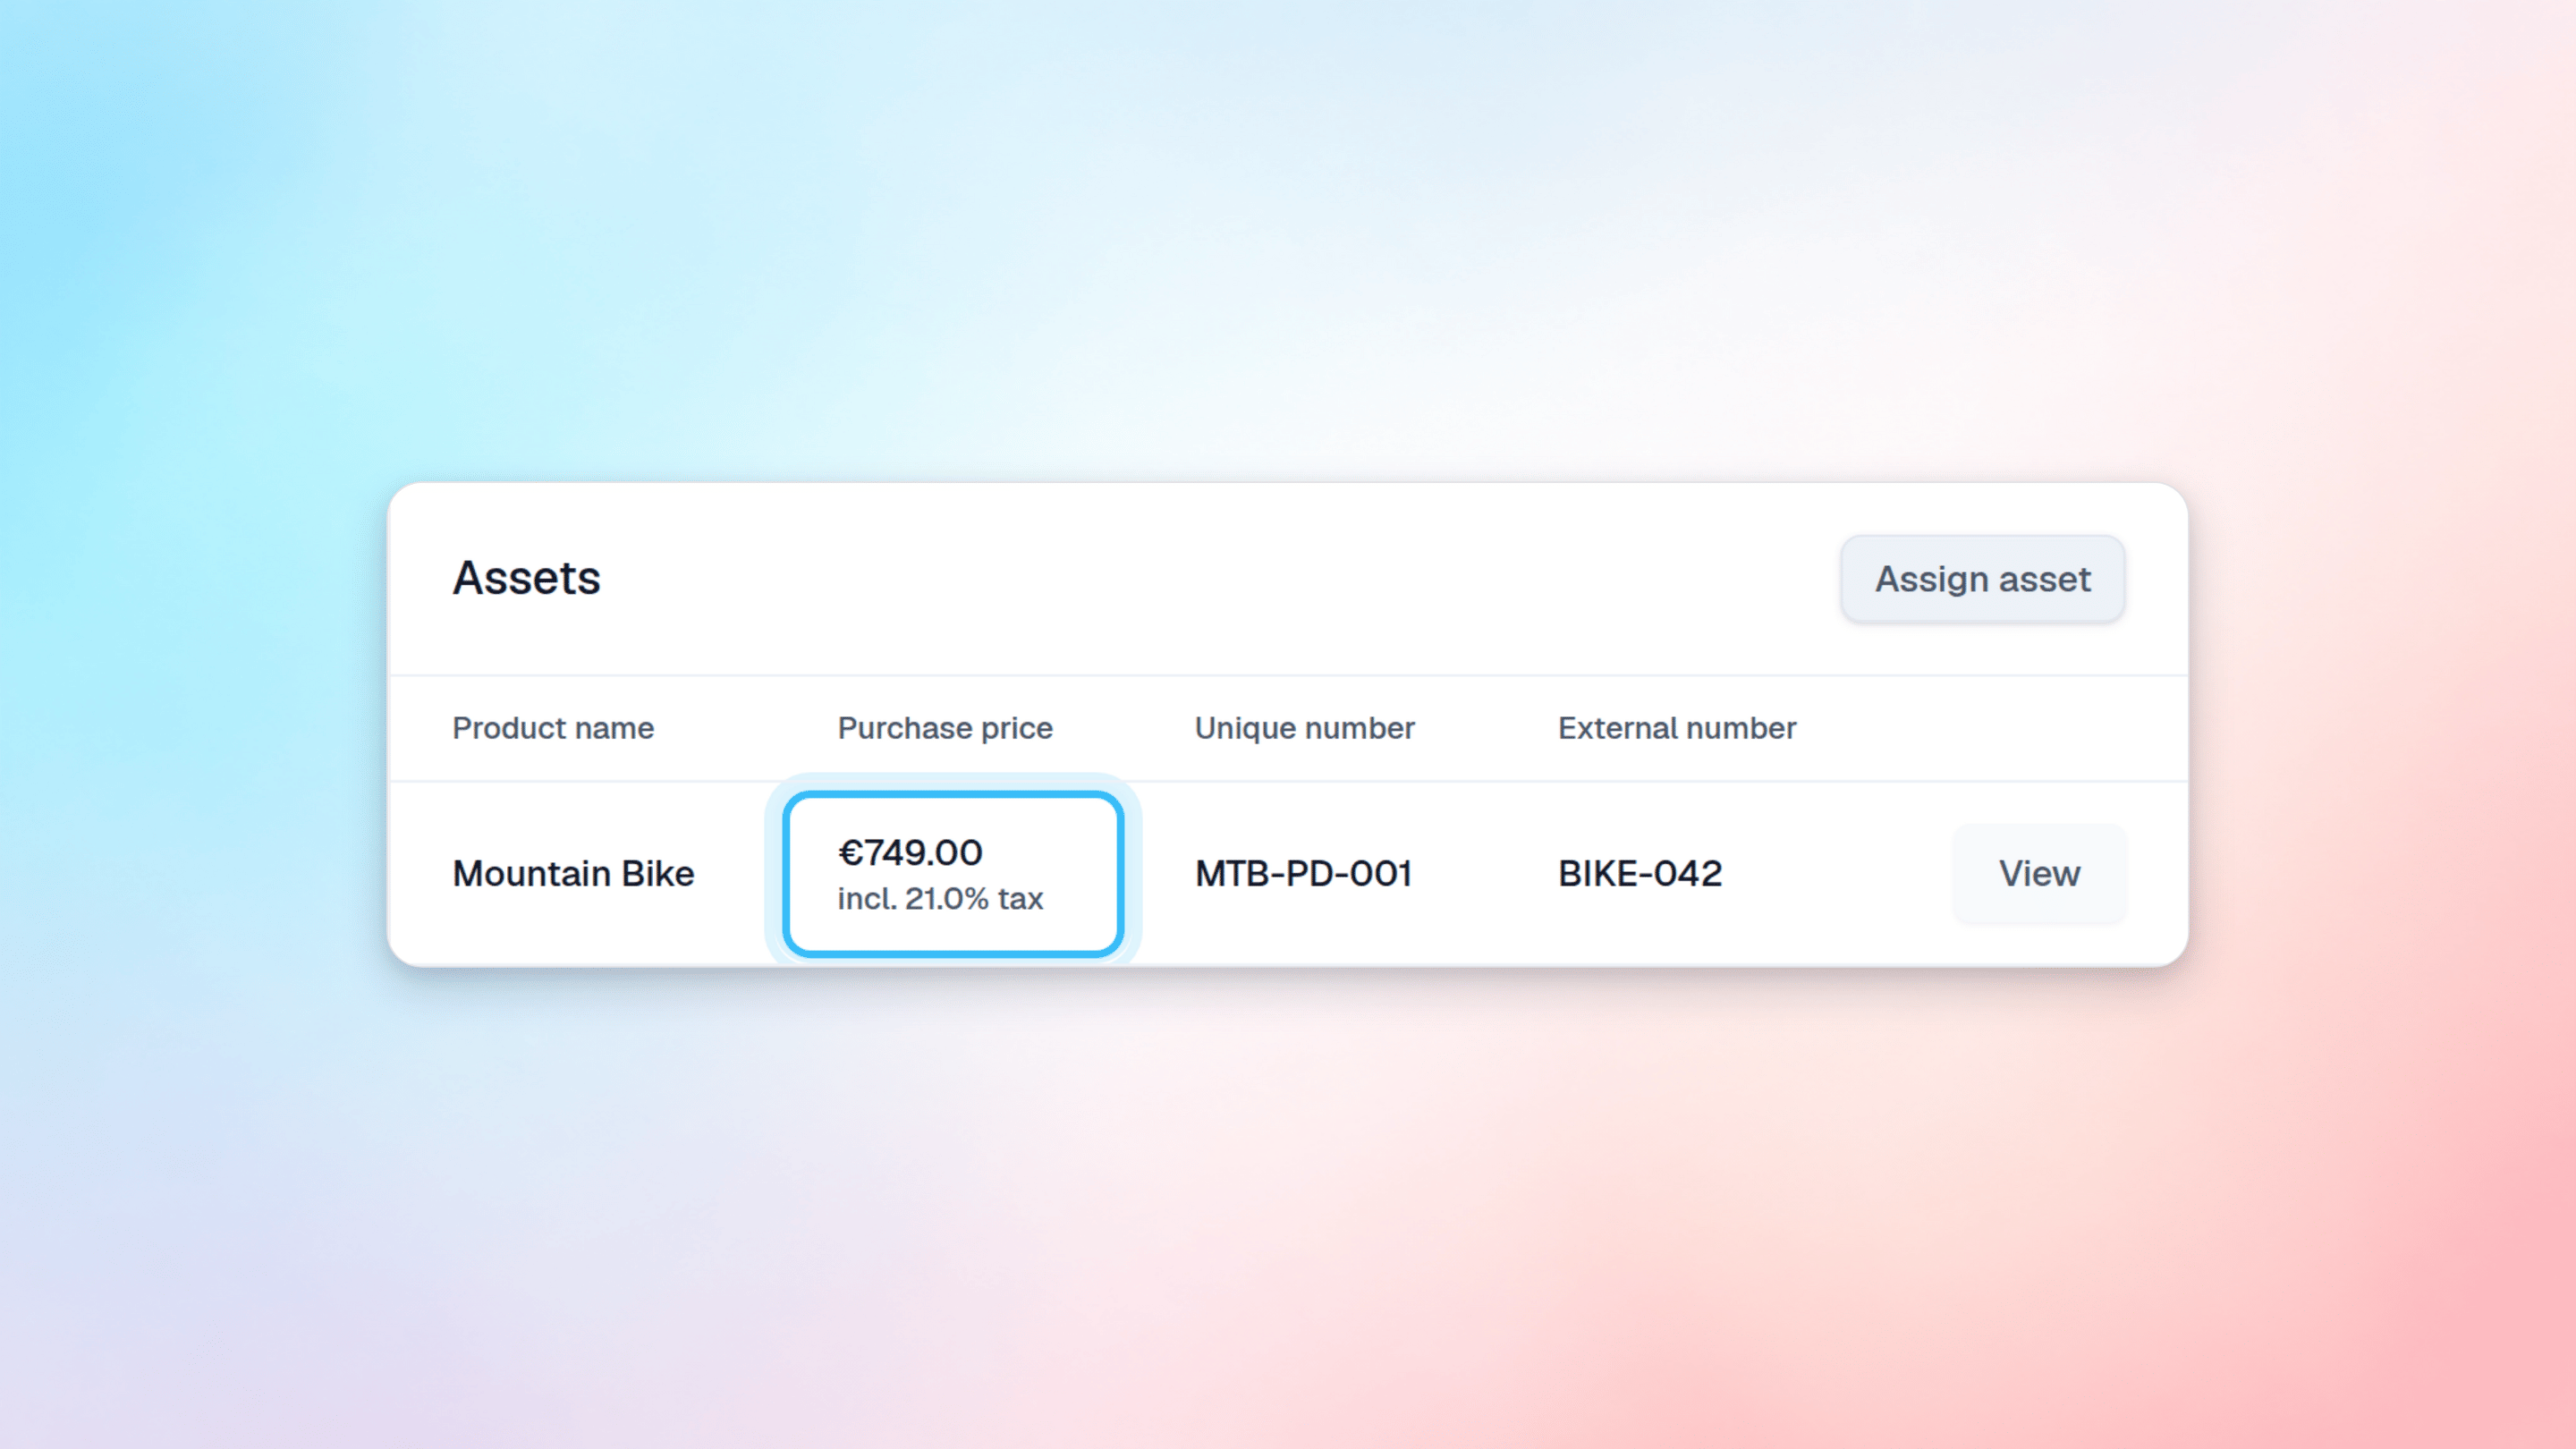
- If successful, you should see the new purchase price visible in the assets overview on the customer