

Step 1: Create the Metaobject Definition
First, create a metaobject definition in your Shopify admin under Settings > Metafields and metaobjects > Metaobject definitions > add definition- Name:
Firmhouse Selling Plan Metadata - Type:
firmhouse_selling_plan_metadata
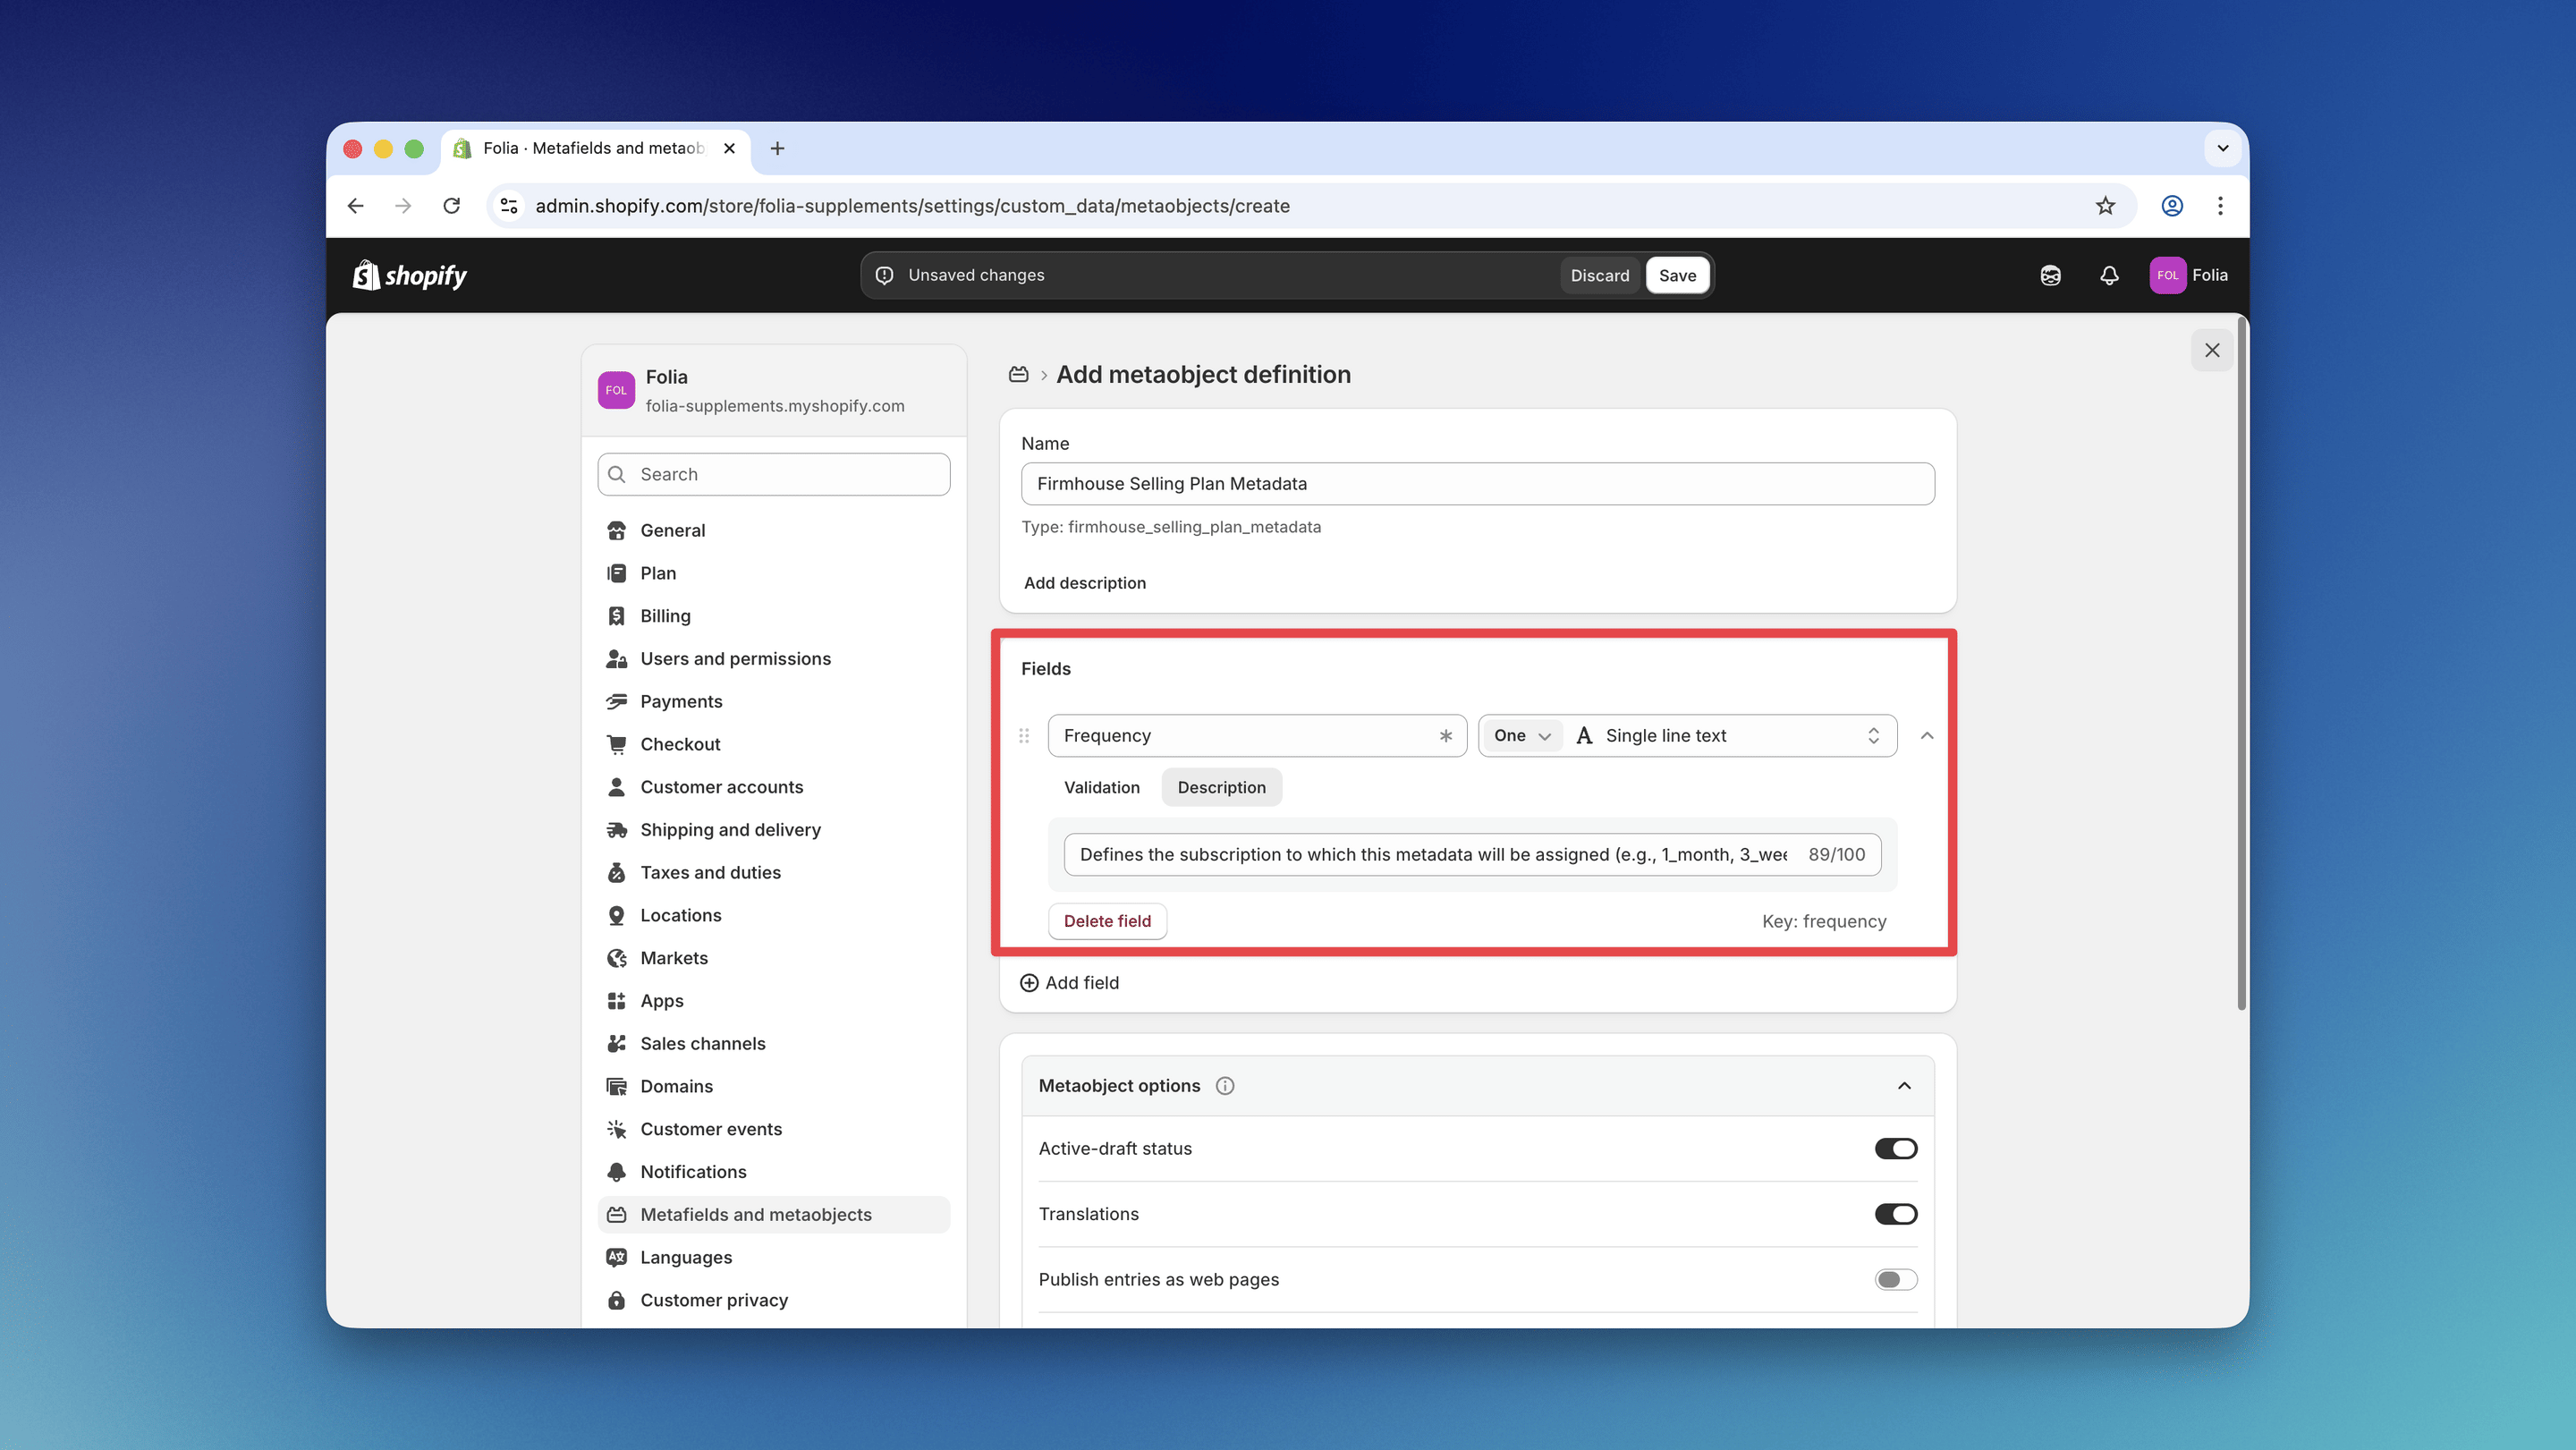
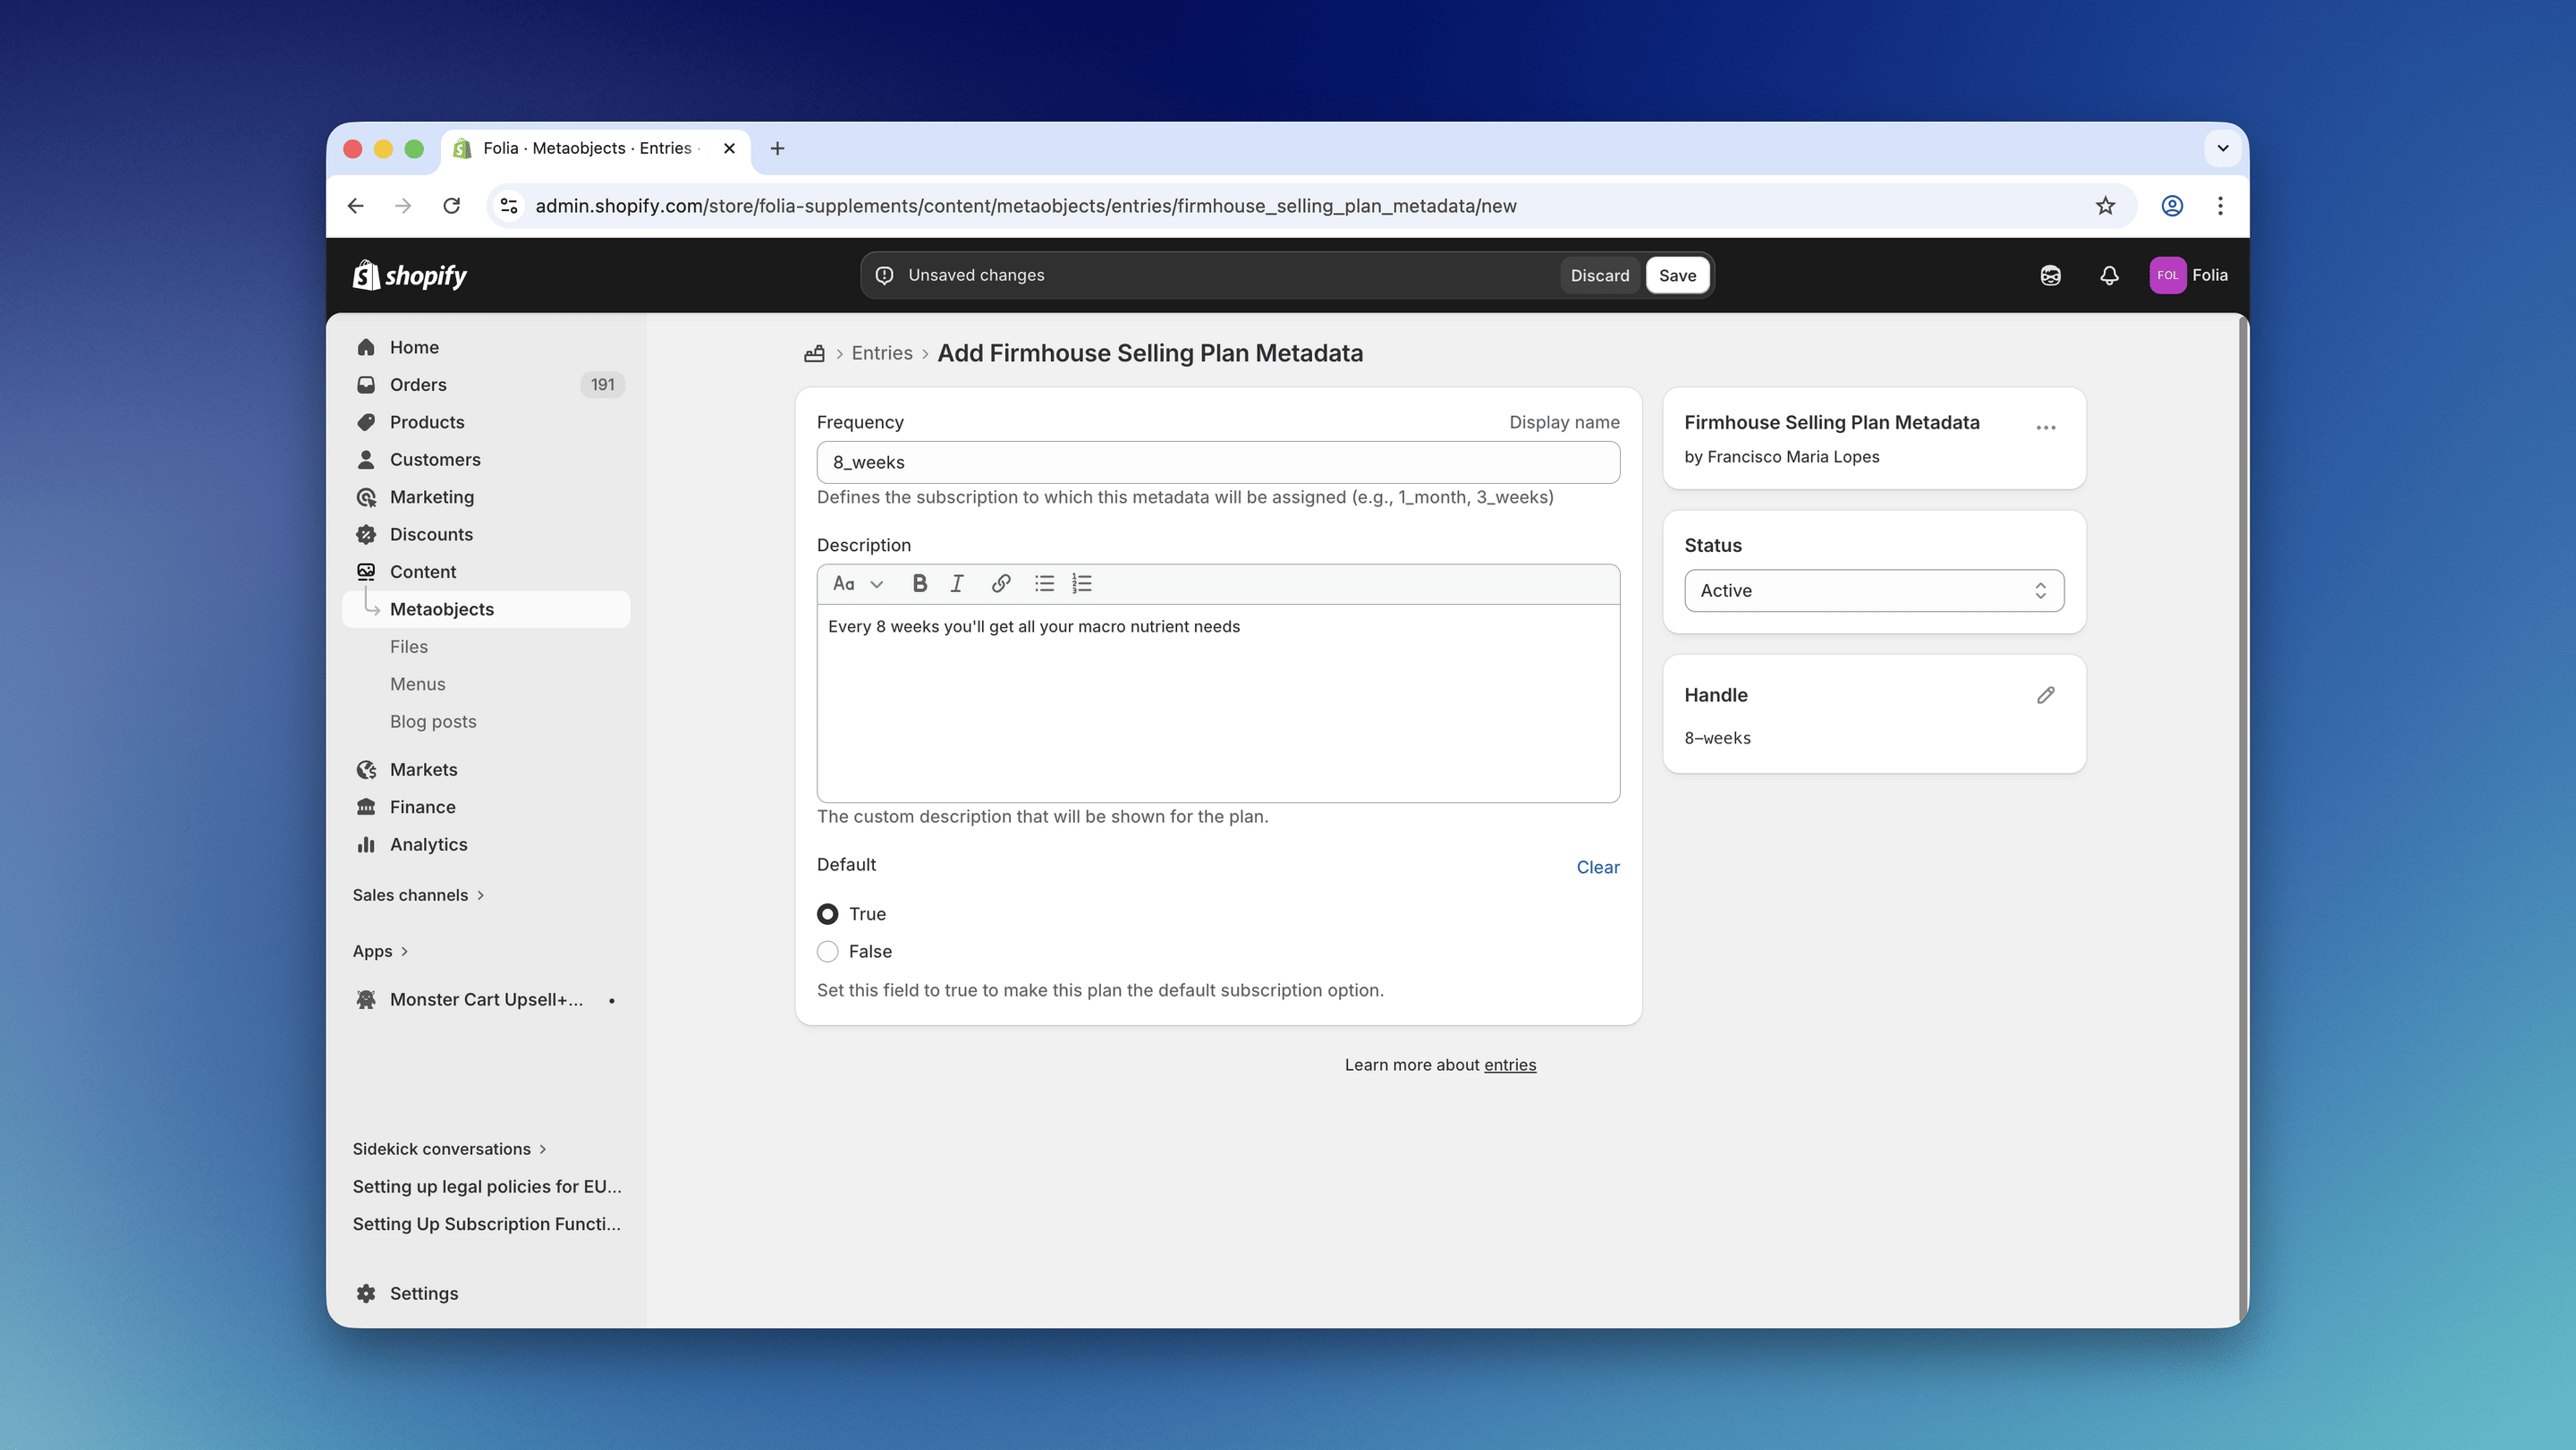
Frequency Field
- Type: Single line text
- Name: Frequency
- Key:
frequency - Description: Defines the subscription to which this metadata will be assigned (e.g., 1_month, 3_weeks)
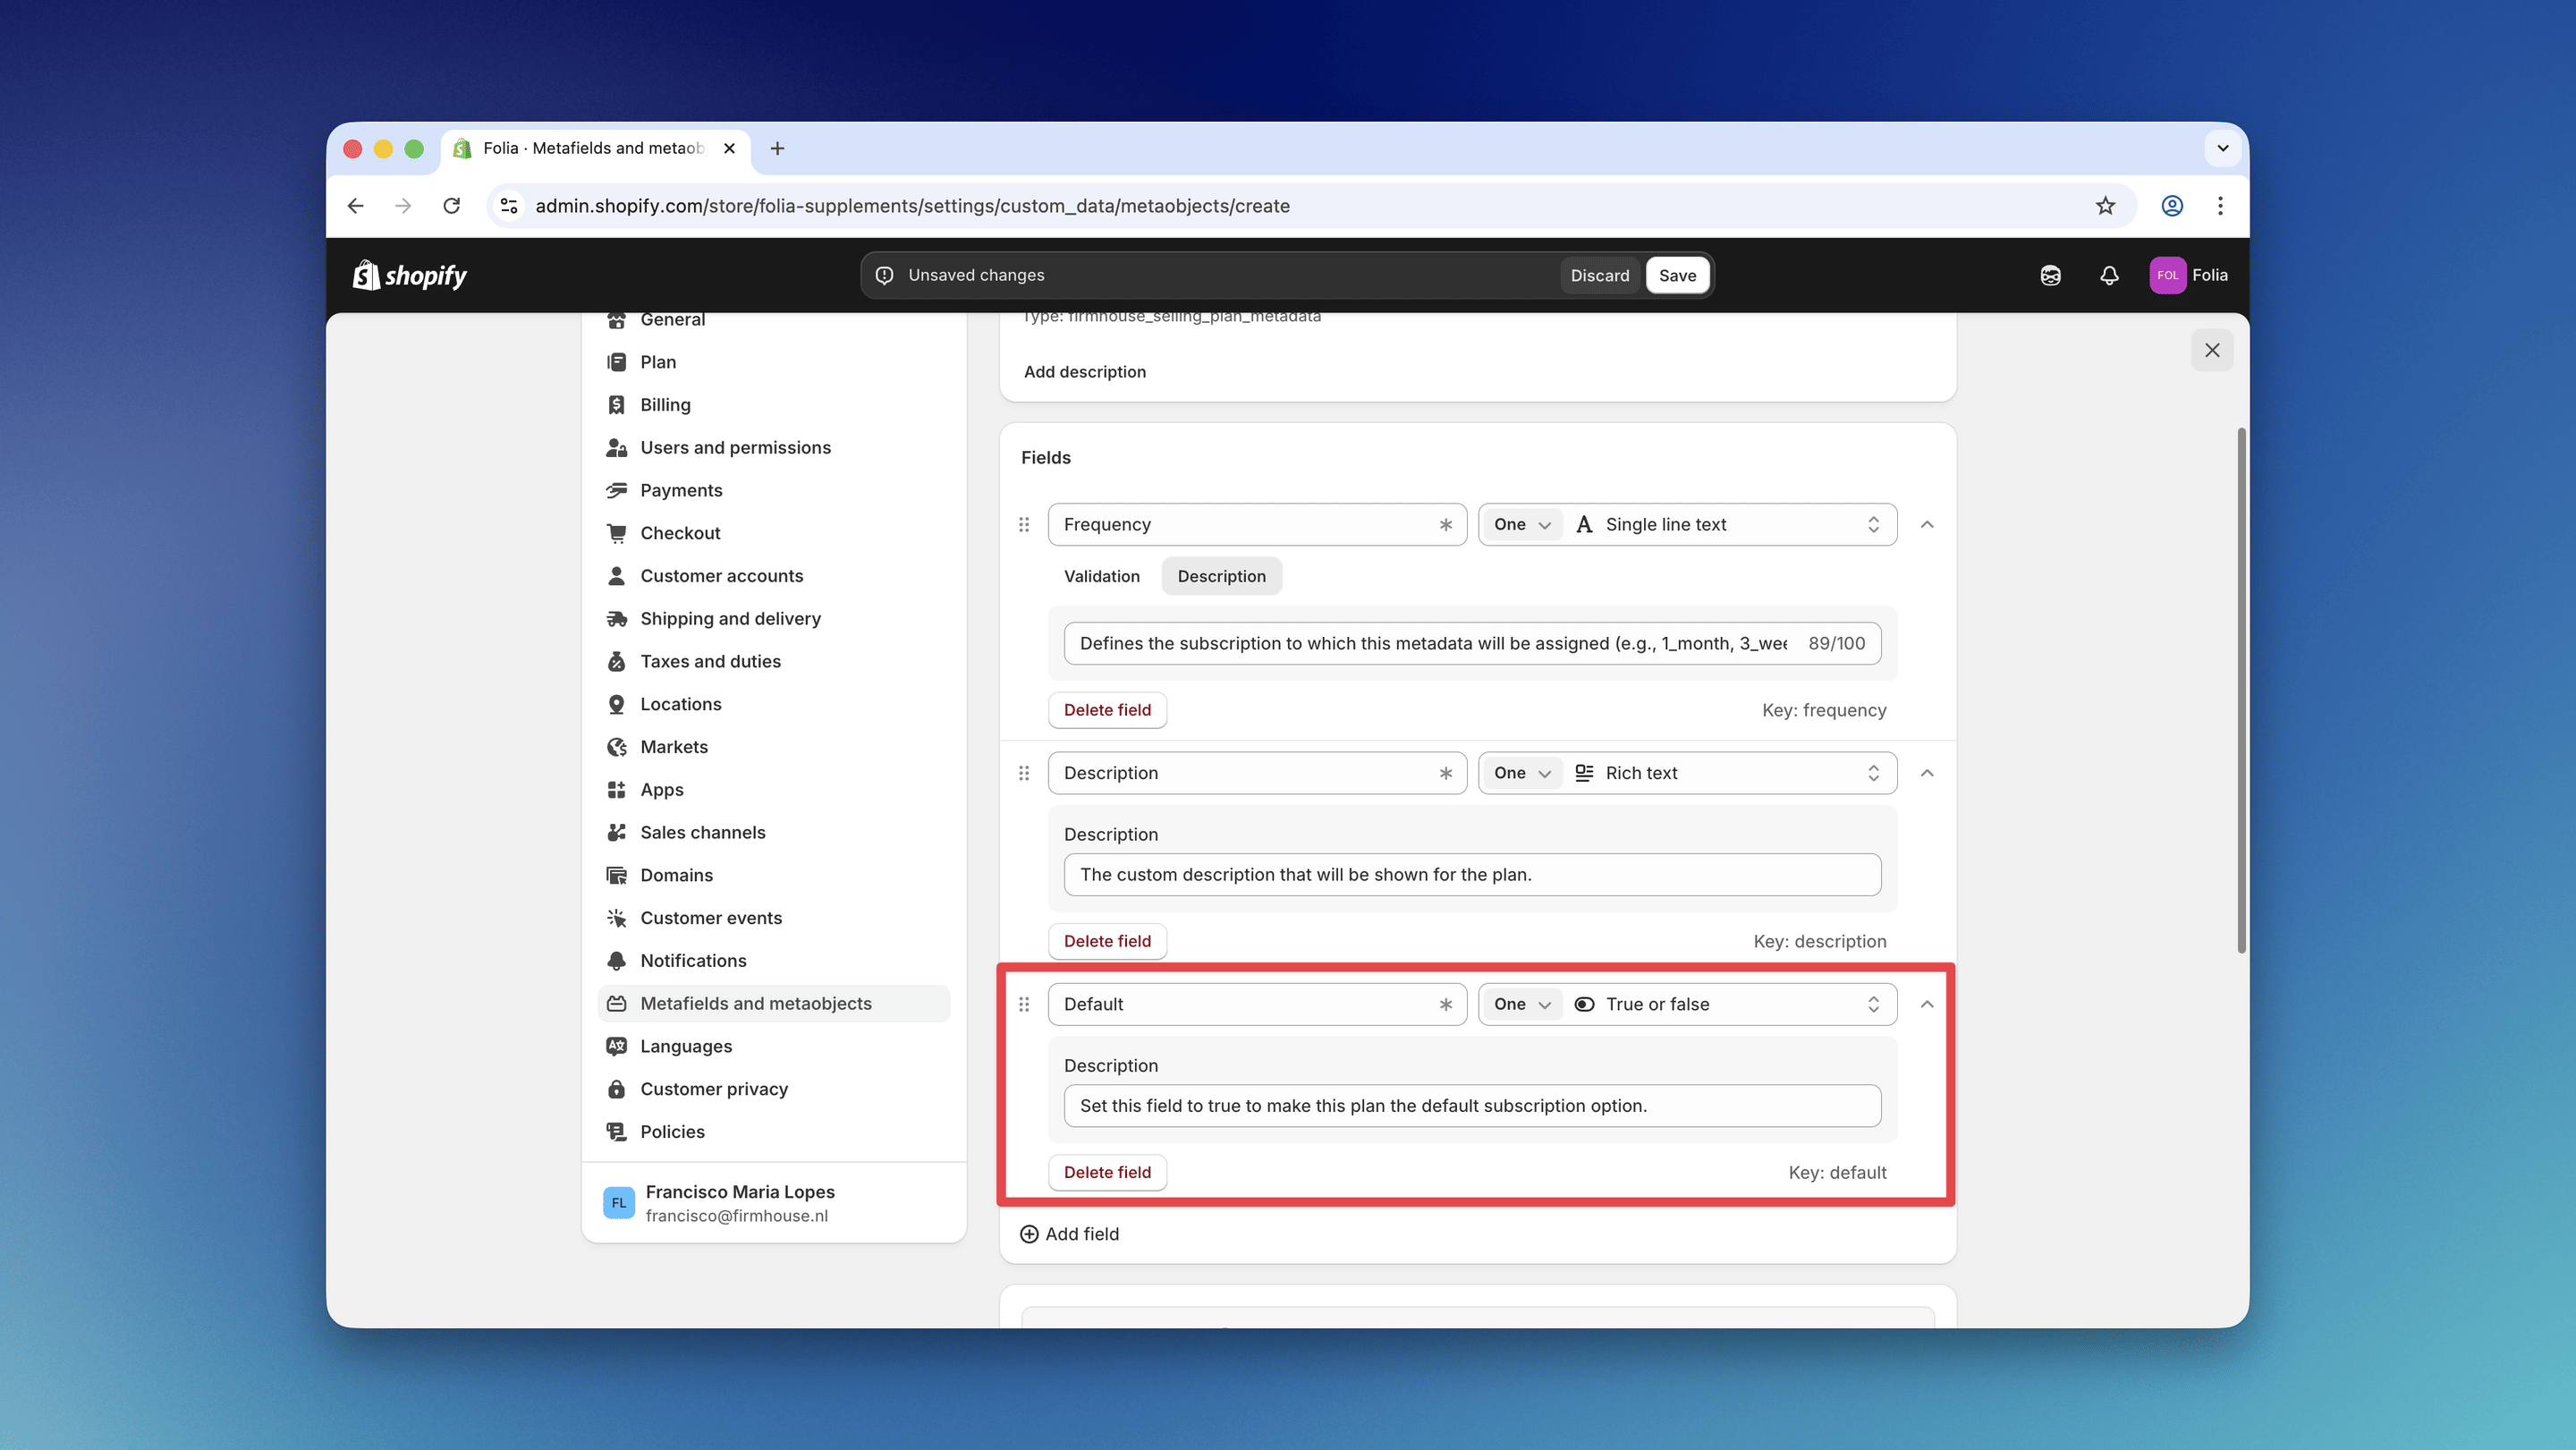
Description Field
- Type: Rich text
- Name: Description
- Key:
description - Description: The custom description that will be shown for the plan.

Default Field
- Type: True or false
- Name: Default
- Key:
default - Description: Set this field to true to make this plan the default subscription option.
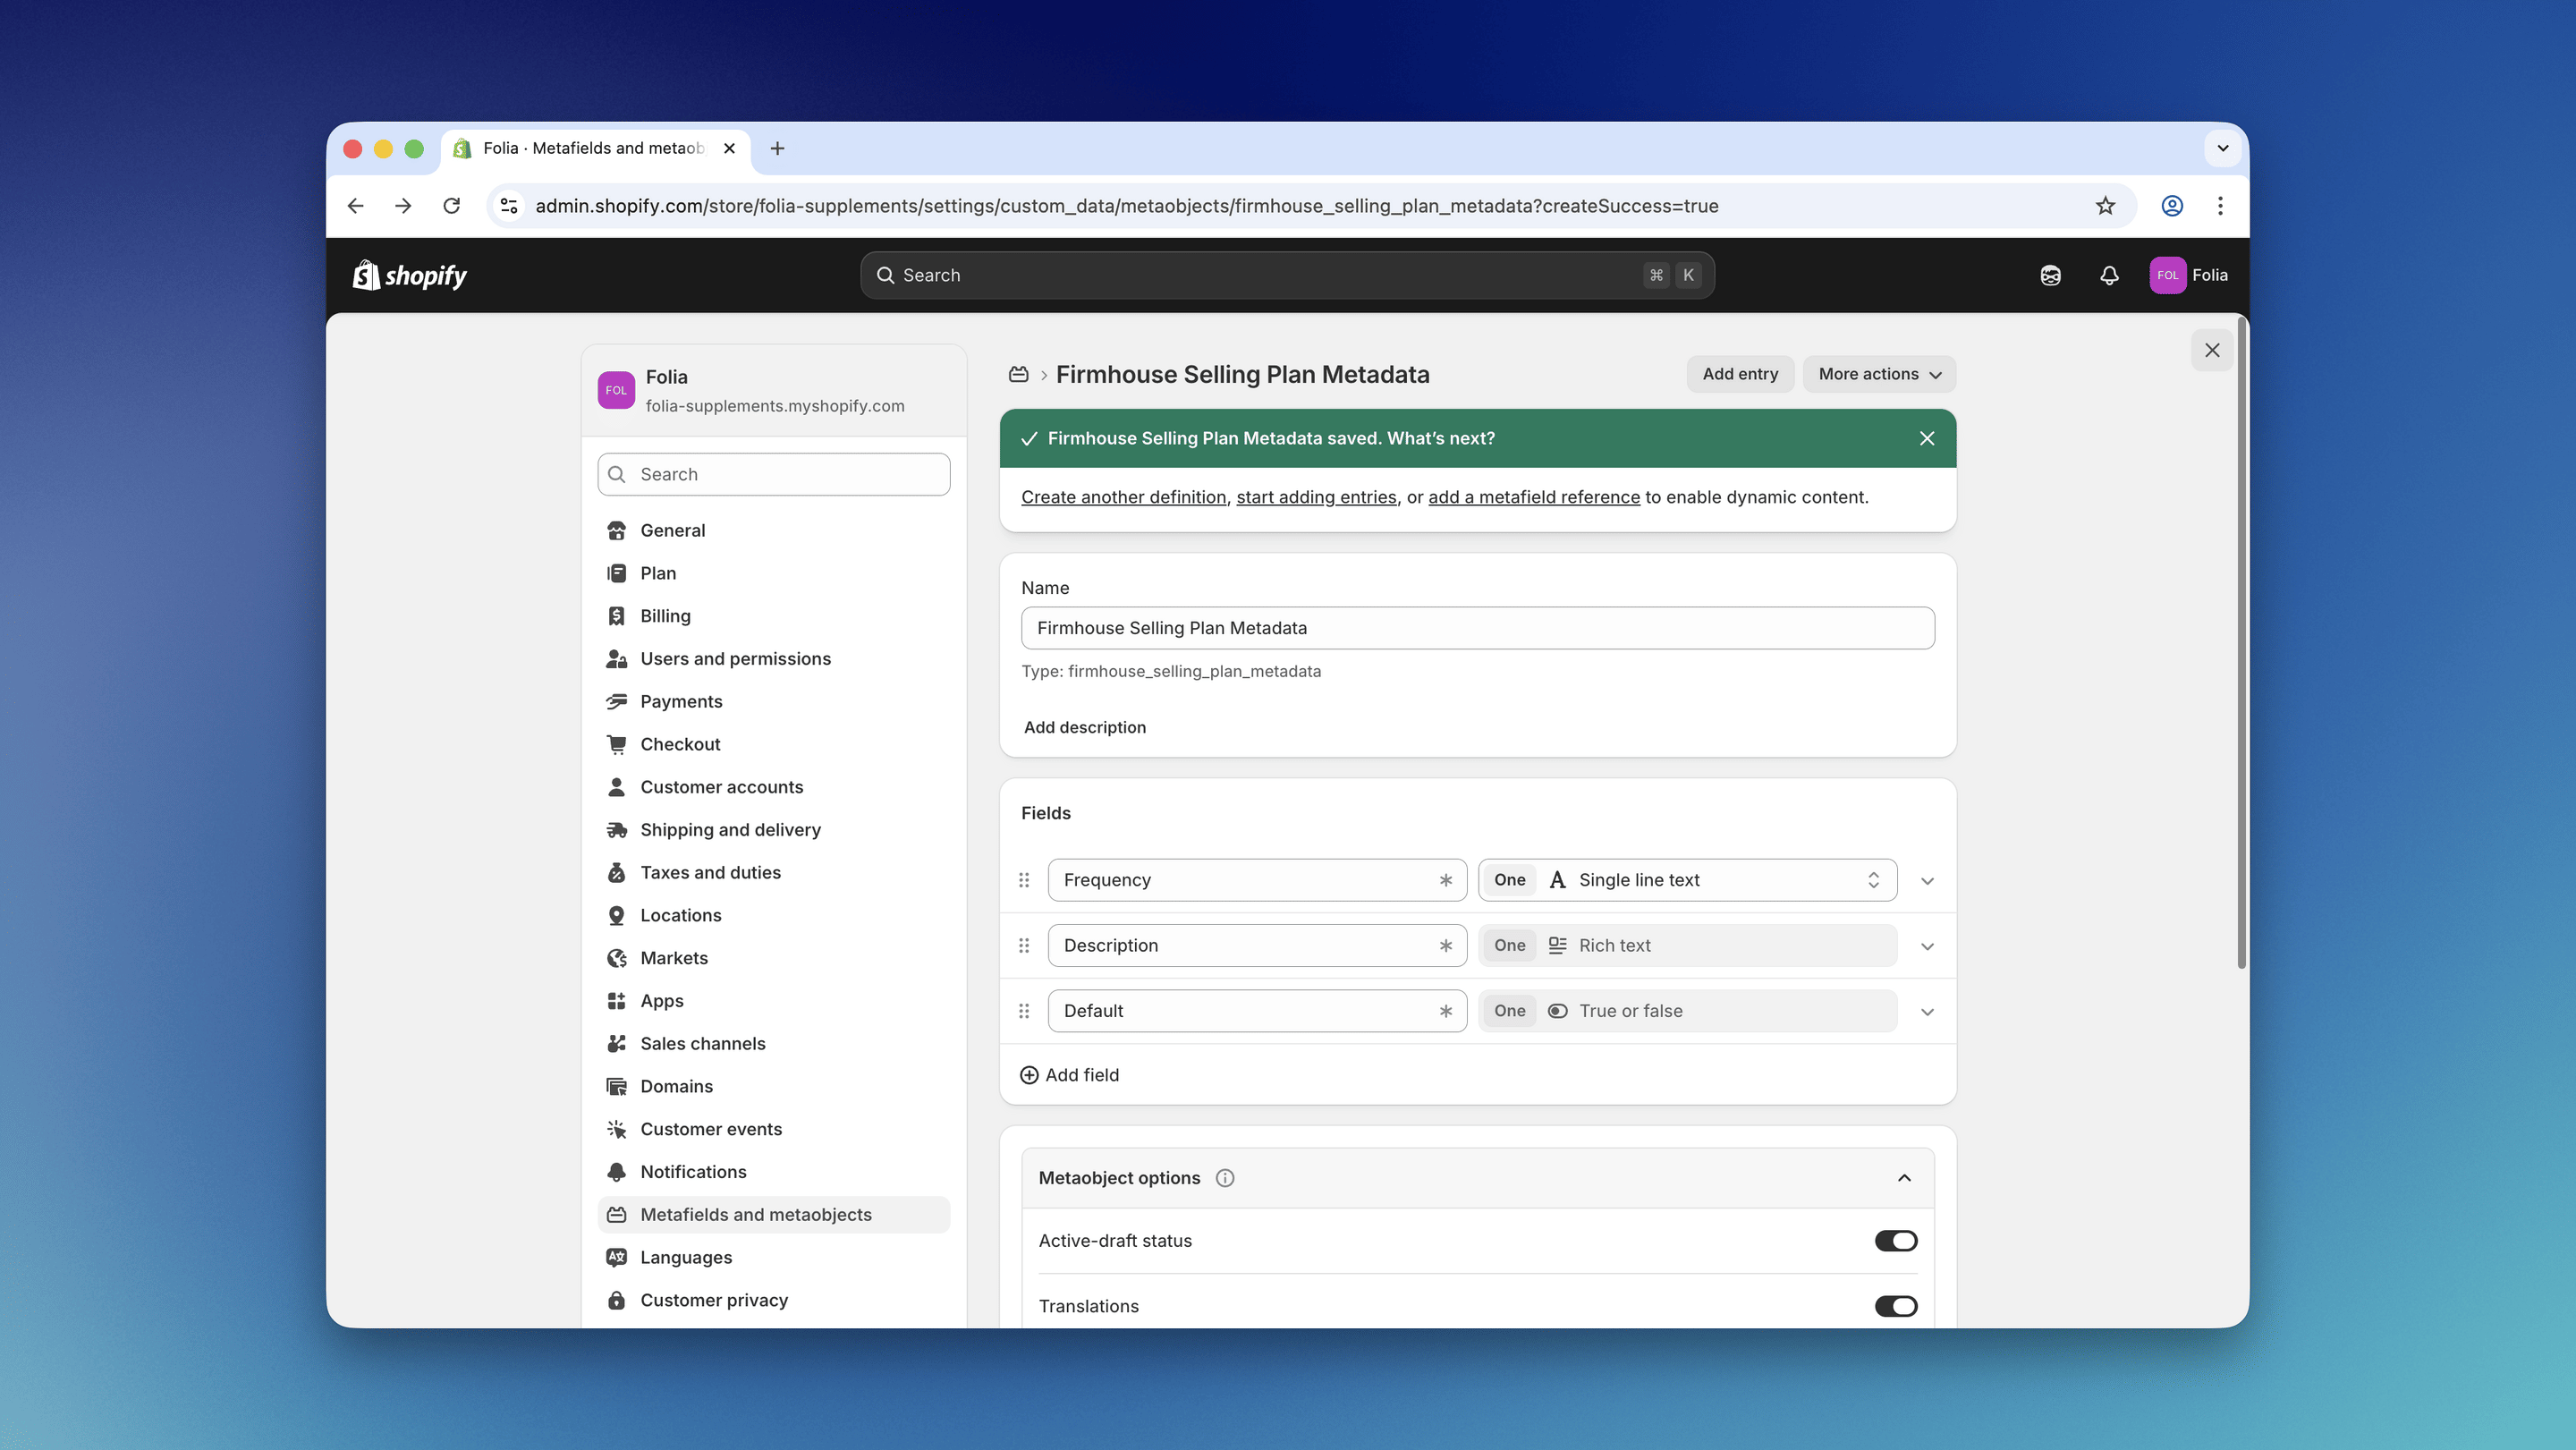
Step 2: Create Metaobjects for Each Plan
Now that the metaobject definition is ready, you can start adding the configuration for each plan by clicking the Add entry button on the metaobject definition page.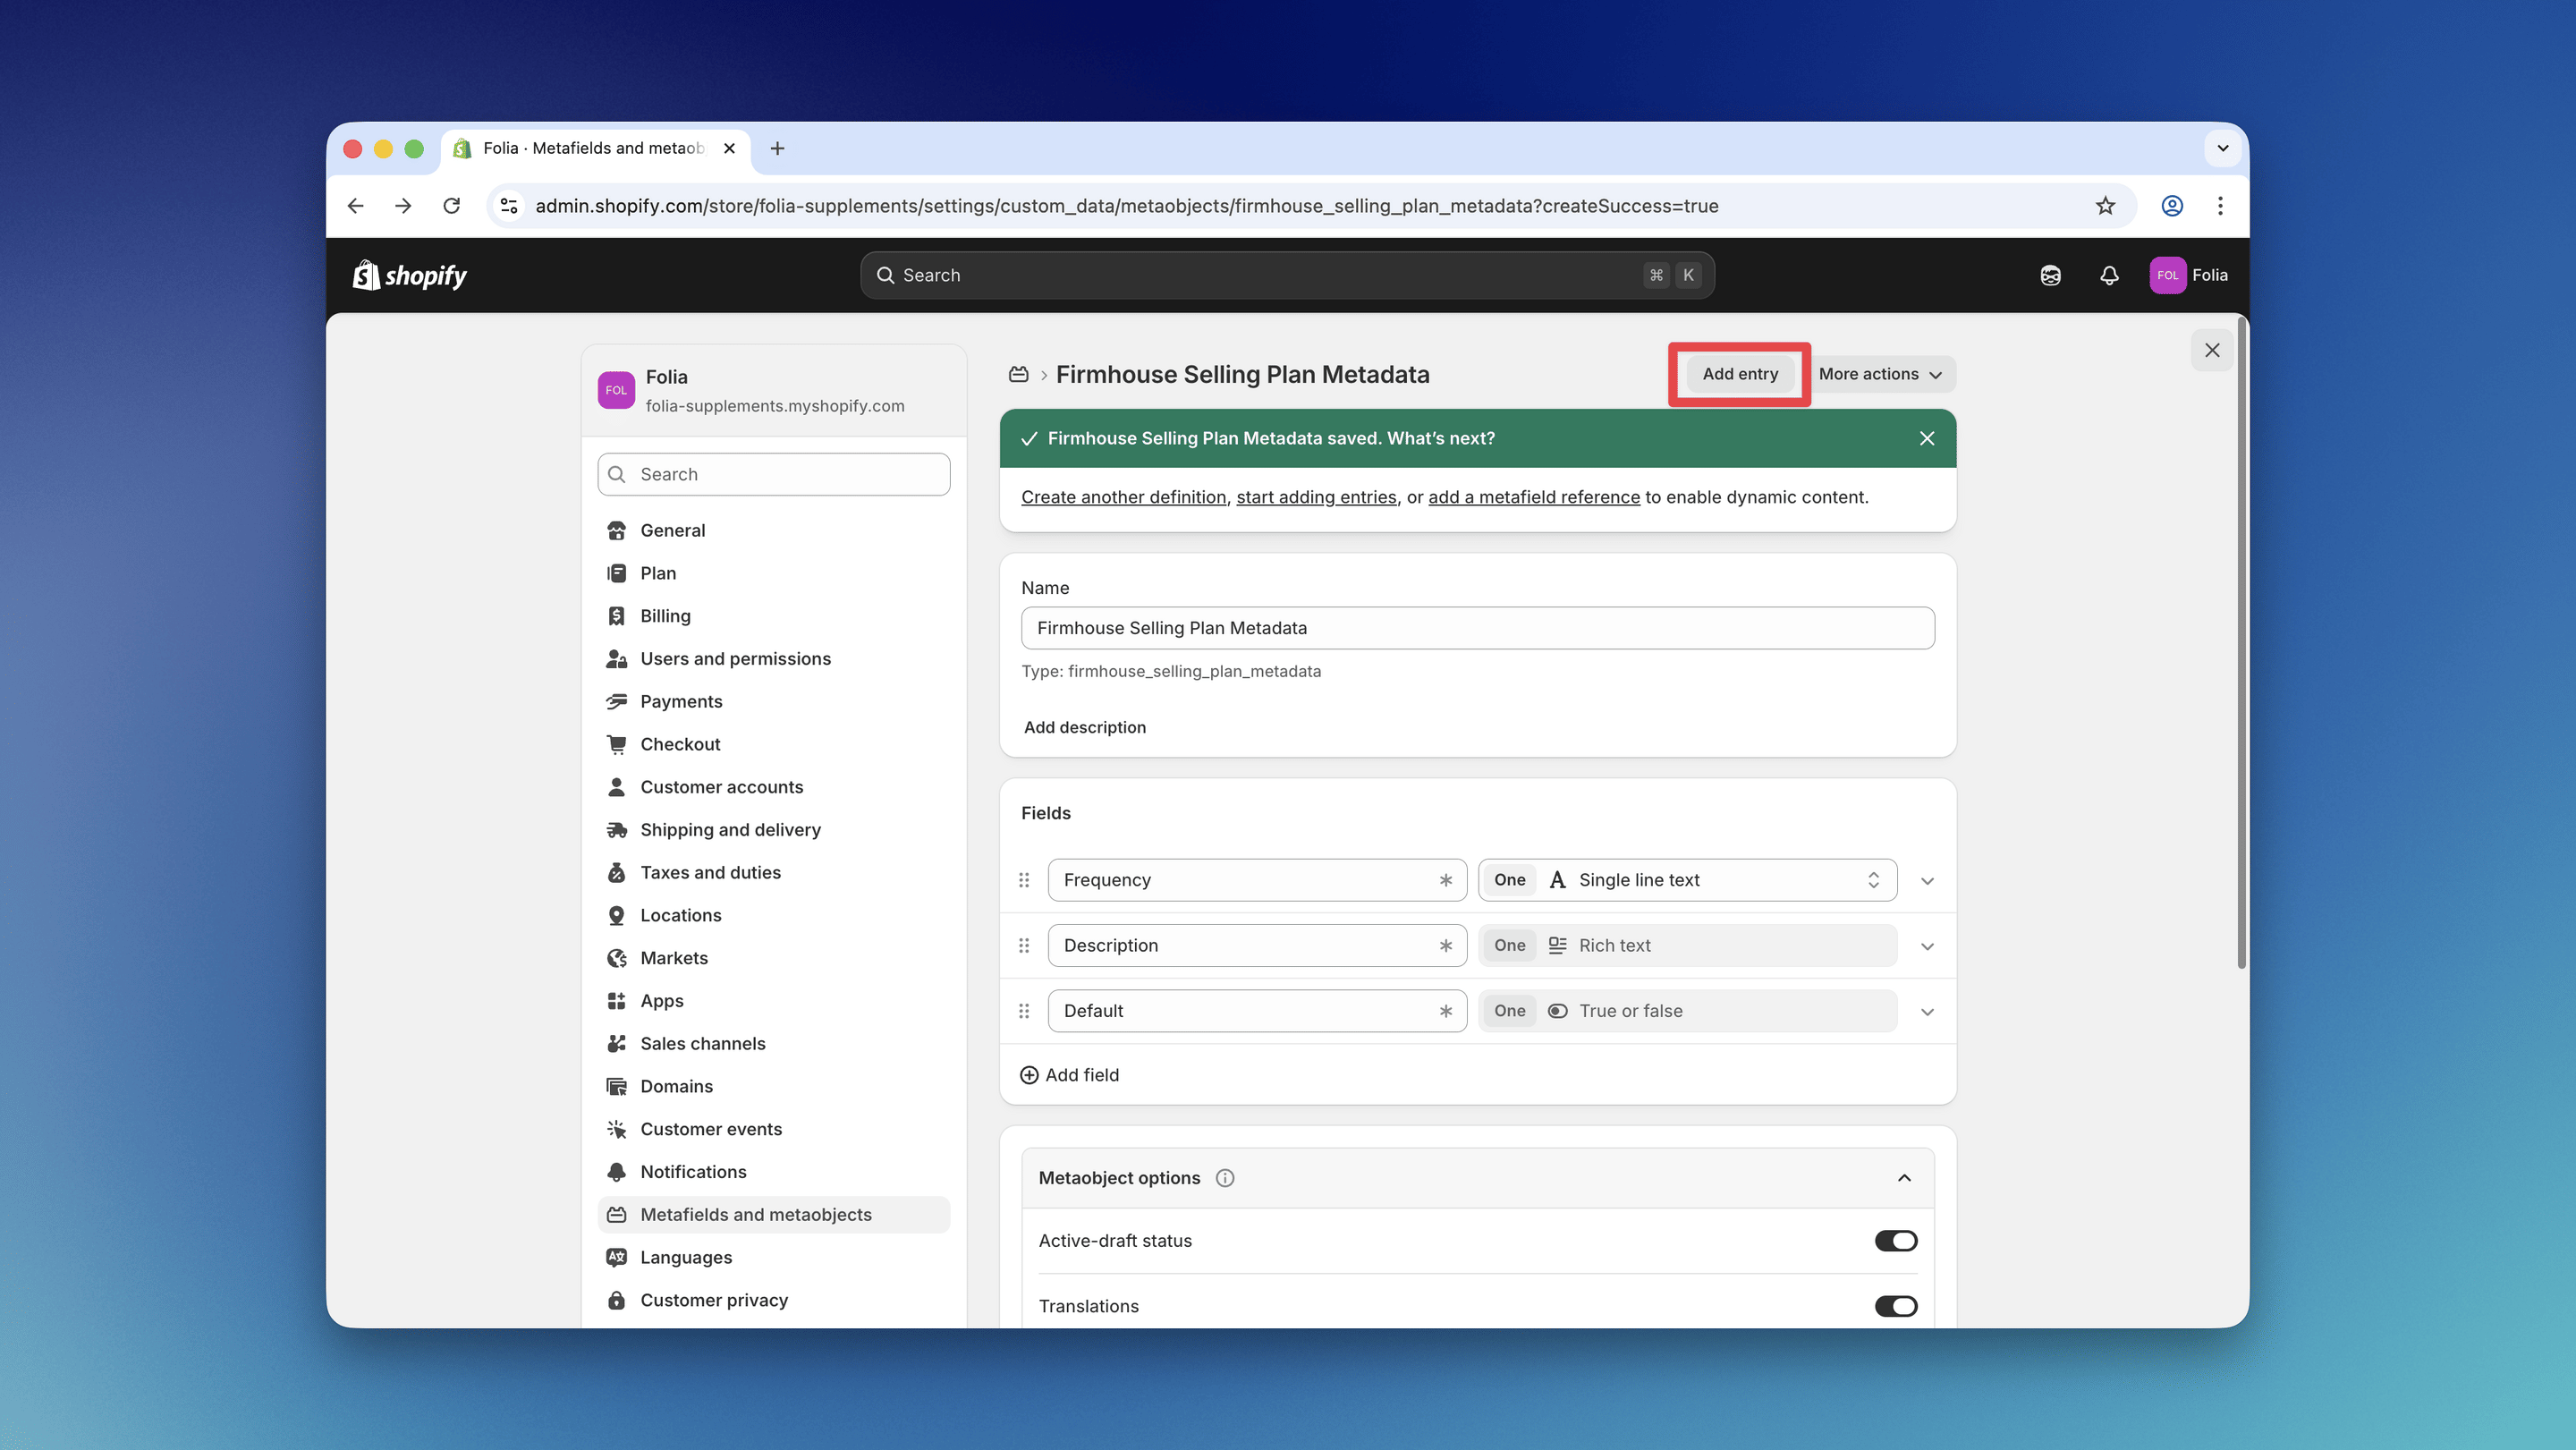
<number>_<unit-in-plural-form> (e.g., 1_week, 2_months, 15_days, 1_year). To create a default description for all options without a matching metaobject, use default as the frequency field value.
If you use placeholder as the frequency value, that description is shown when the placeholder option is visible on initial page load (with Require plan selection confirmation enabled).
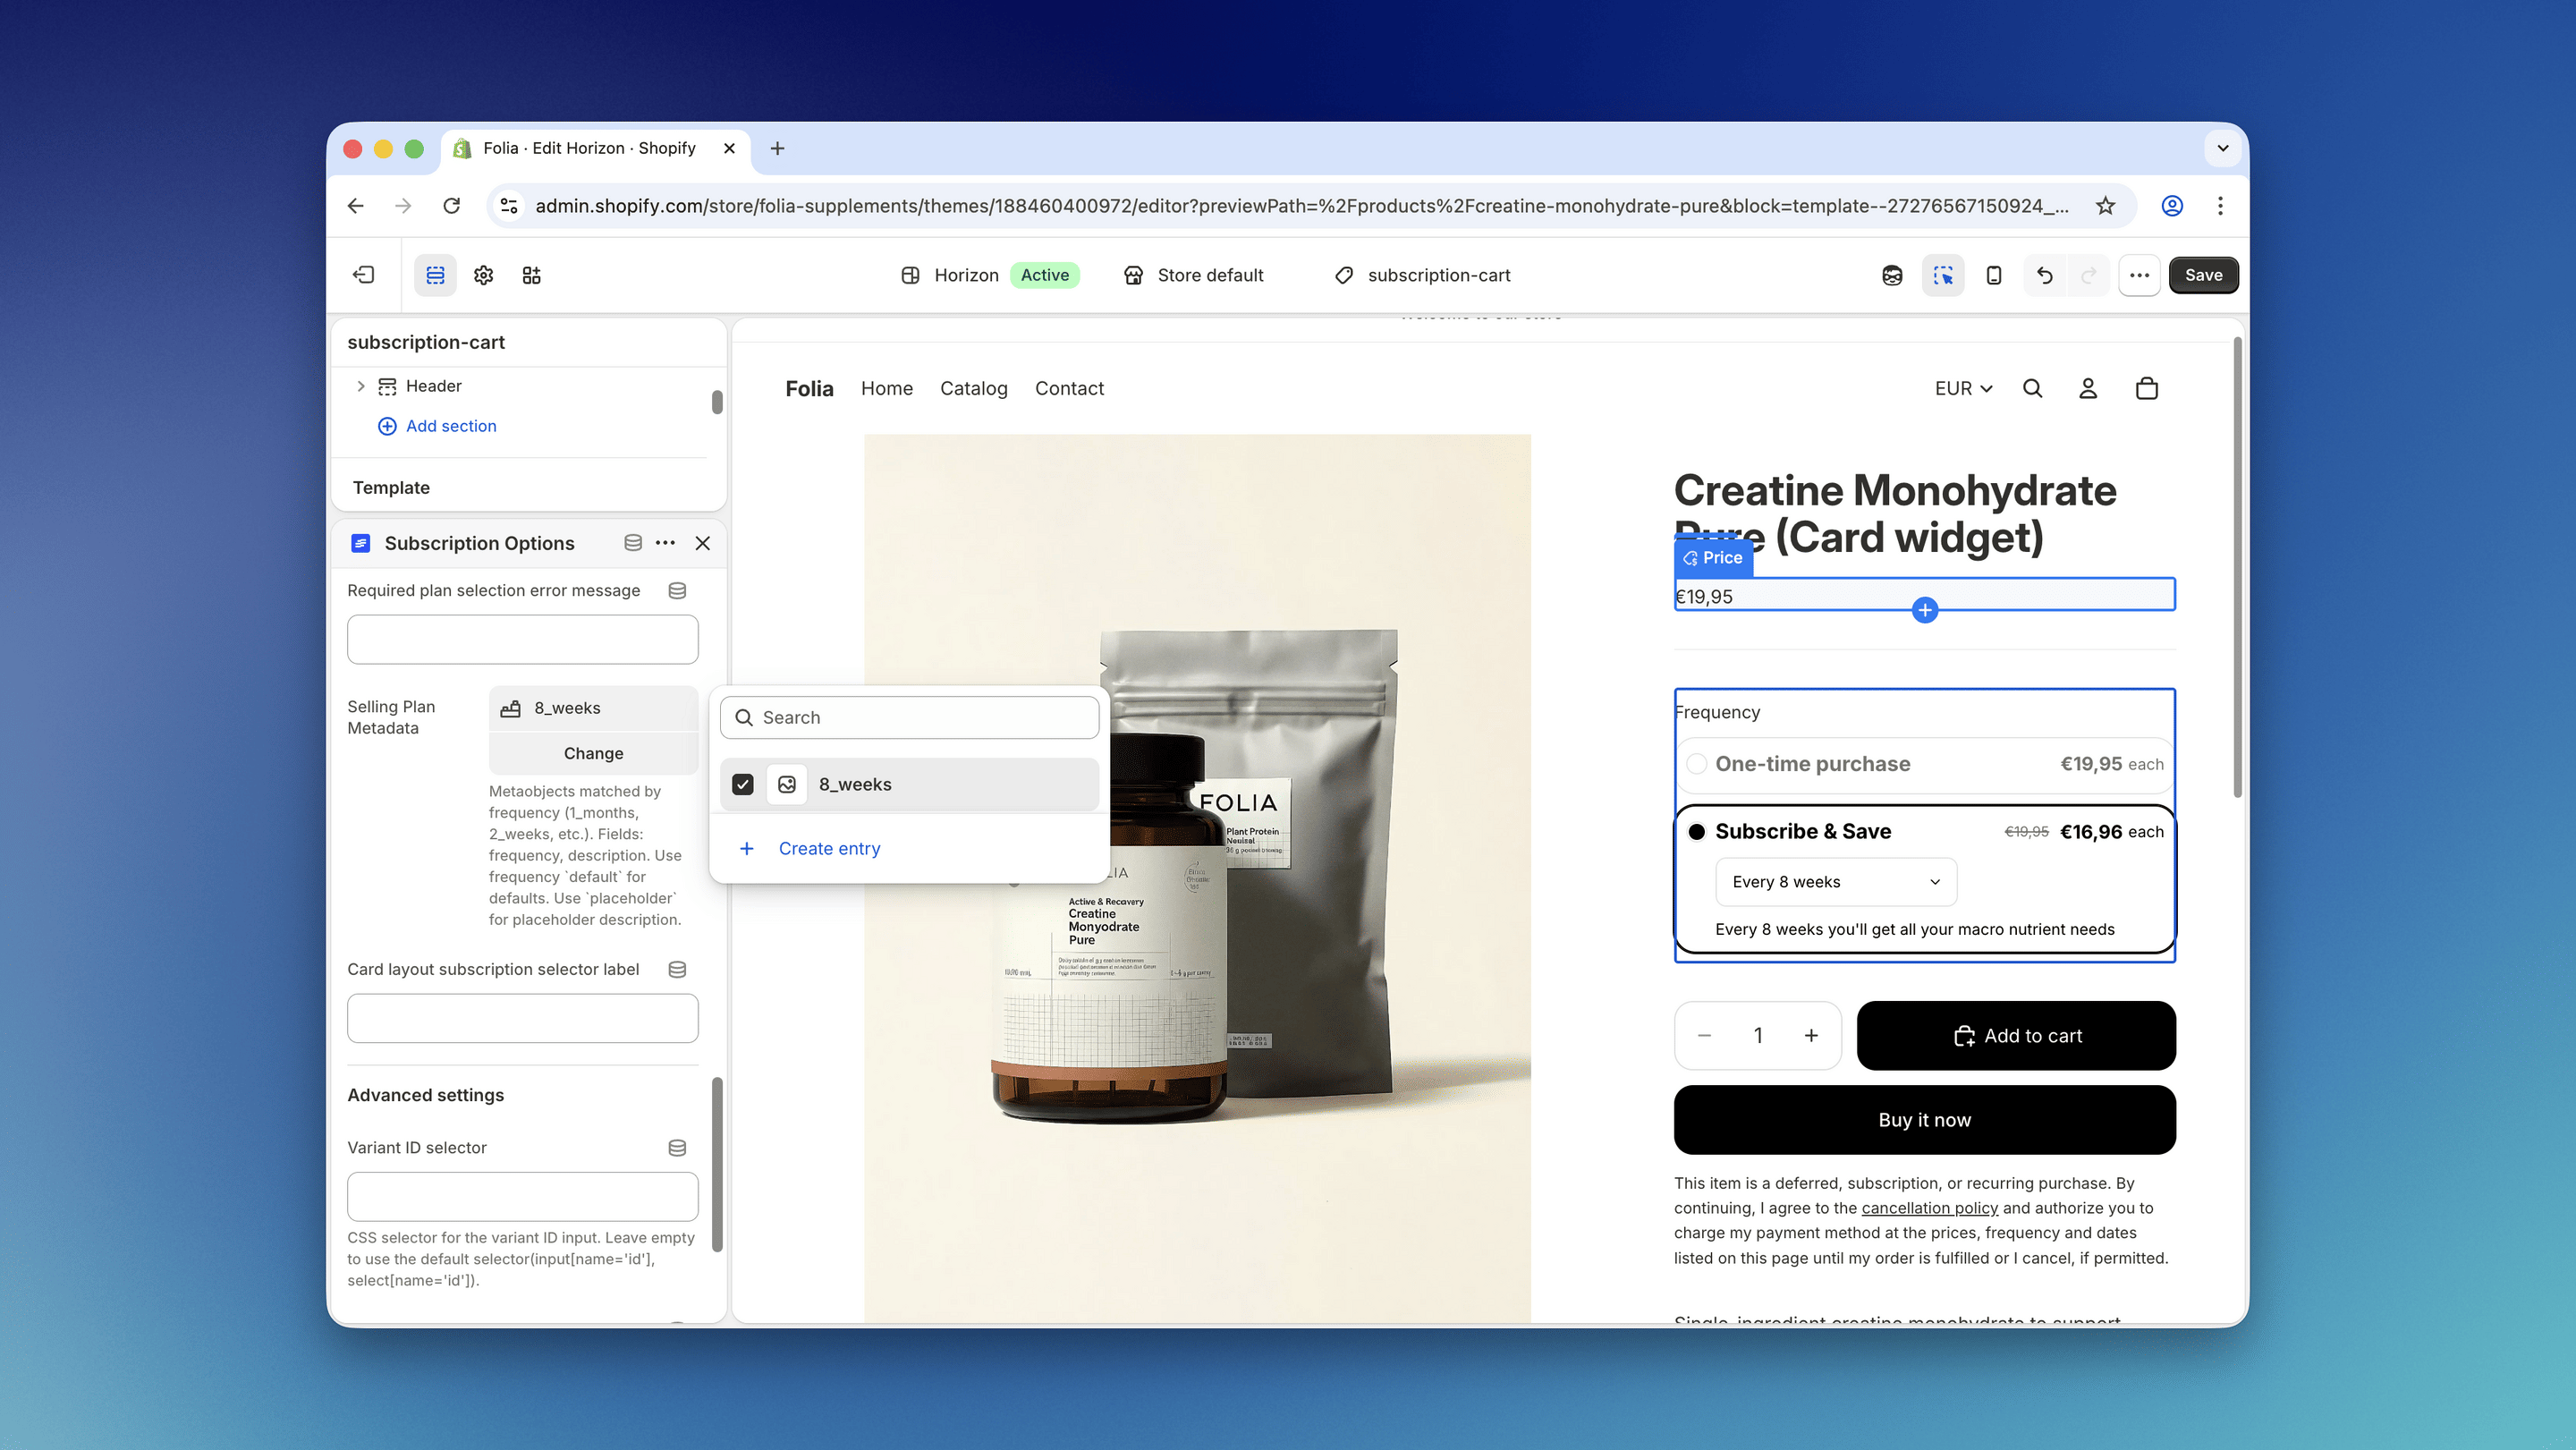
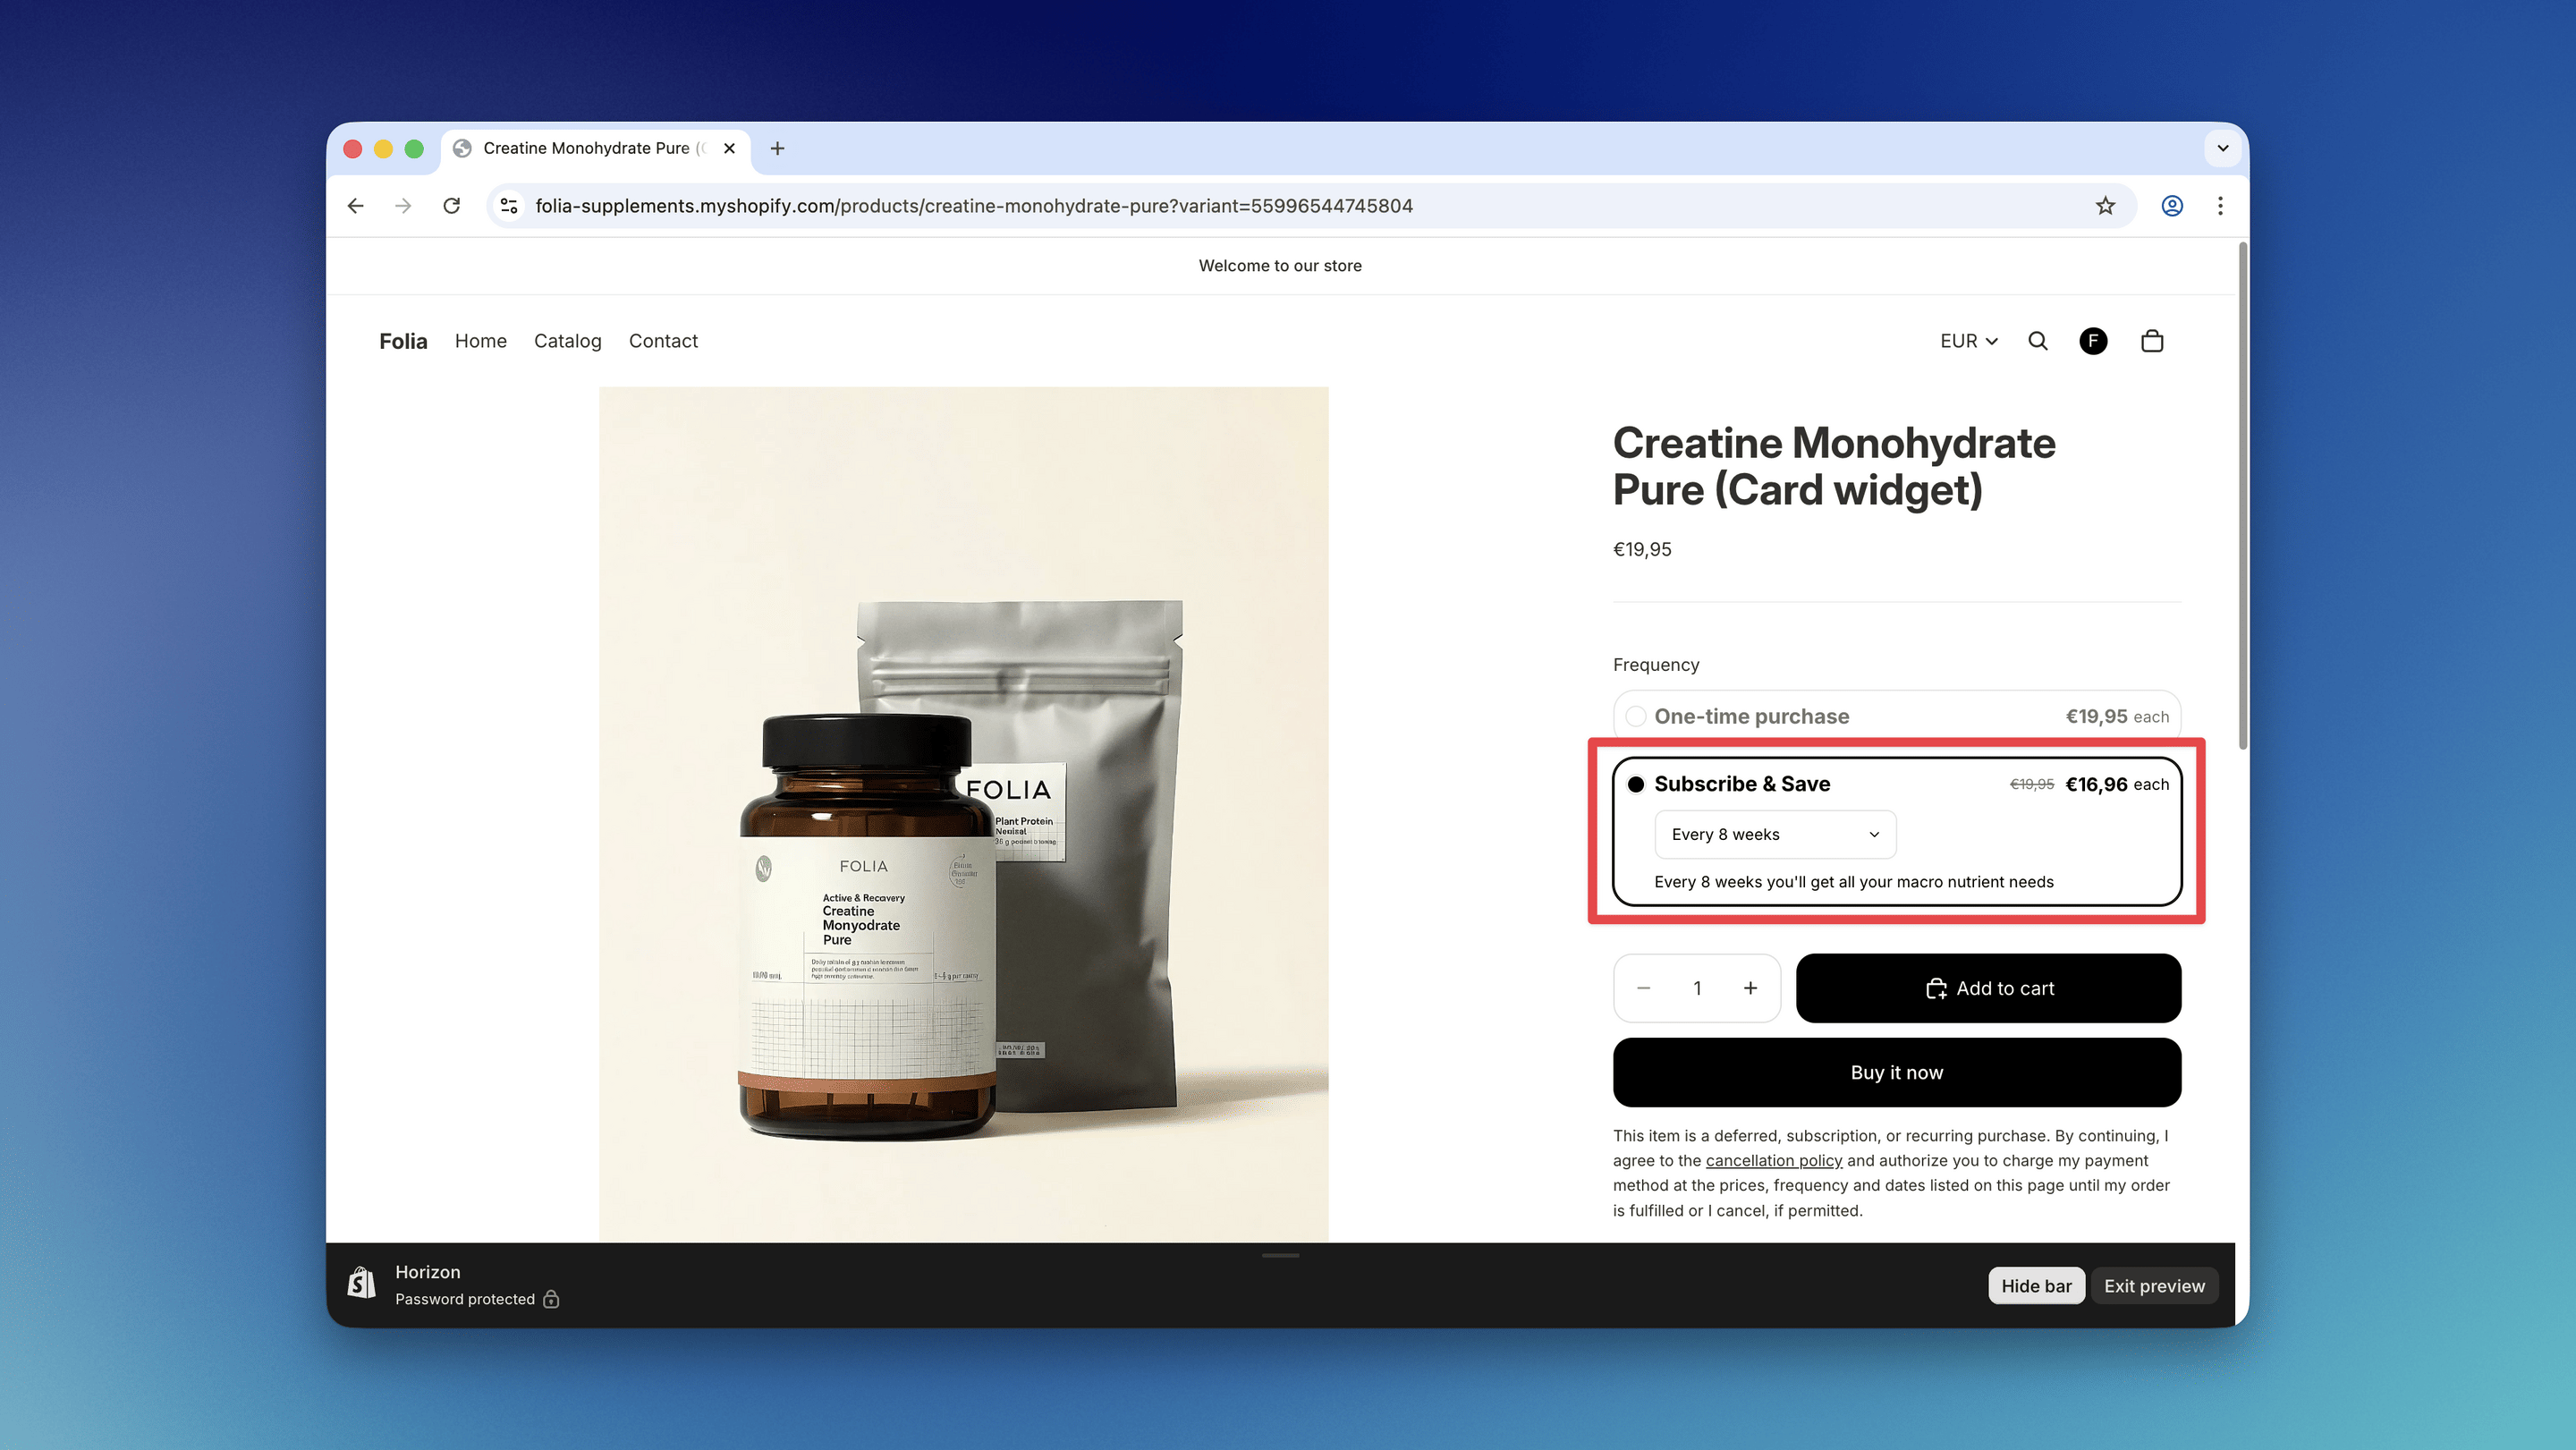
Step 3: Add the Metaobjects to Widget Configuration
You can now assign the metaobjects to the Subscription Options configuration.Steps
- Go to the theme editor and open the Subscription Options widget settings.
- Scroll down to the Card Layout Settings section.
- Click the Select button next to the Selling Plan Metadata field.
- Select all the options you have configured.

Optional: Require Explicit Plan Selection (Card Layout)
If you use the card layout, you can require customers to explicitly pick a plan before adding a subscription to cart.Steps
- In the Shopify theme editor, open the Subscription Options block settings.
- In Card layout settings, enable Require plan selection confirmation.
- Optionally set:
- Placeholder text: shown as the first option in the frequency selector.
- Plan selection error message: custom error text shown when the customer tries to add to cart without selecting a plan.
How it behaves
- The frequency selector starts with a placeholder option.
- If the customer clicks Add to cart while the placeholder is still selected, they will see:
- an inline error message in the subscription card (above the plan description)
- a red error highlight on the plan selector dropdown
- After a valid plan is selected, the error state is removed and Add to cart works normally.
Step 4 (Optional): Translate Your Metaobject Content
If your store supports multiple languages, you can translate the metaobject content using the Translate & Adapt app.Steps
- Go to the Metaobject translation section in the Translate & Adapt app.
- From the top bar, select the market and language you want to translate the content for.
- On the sidebar, select the metaobject you created for the widget metadata (for example, Firmhouse Selling Plan Metadata), and update the translations for each field (such as the Description field).
- Save your changes and test on your storefront by switching to the translated language.
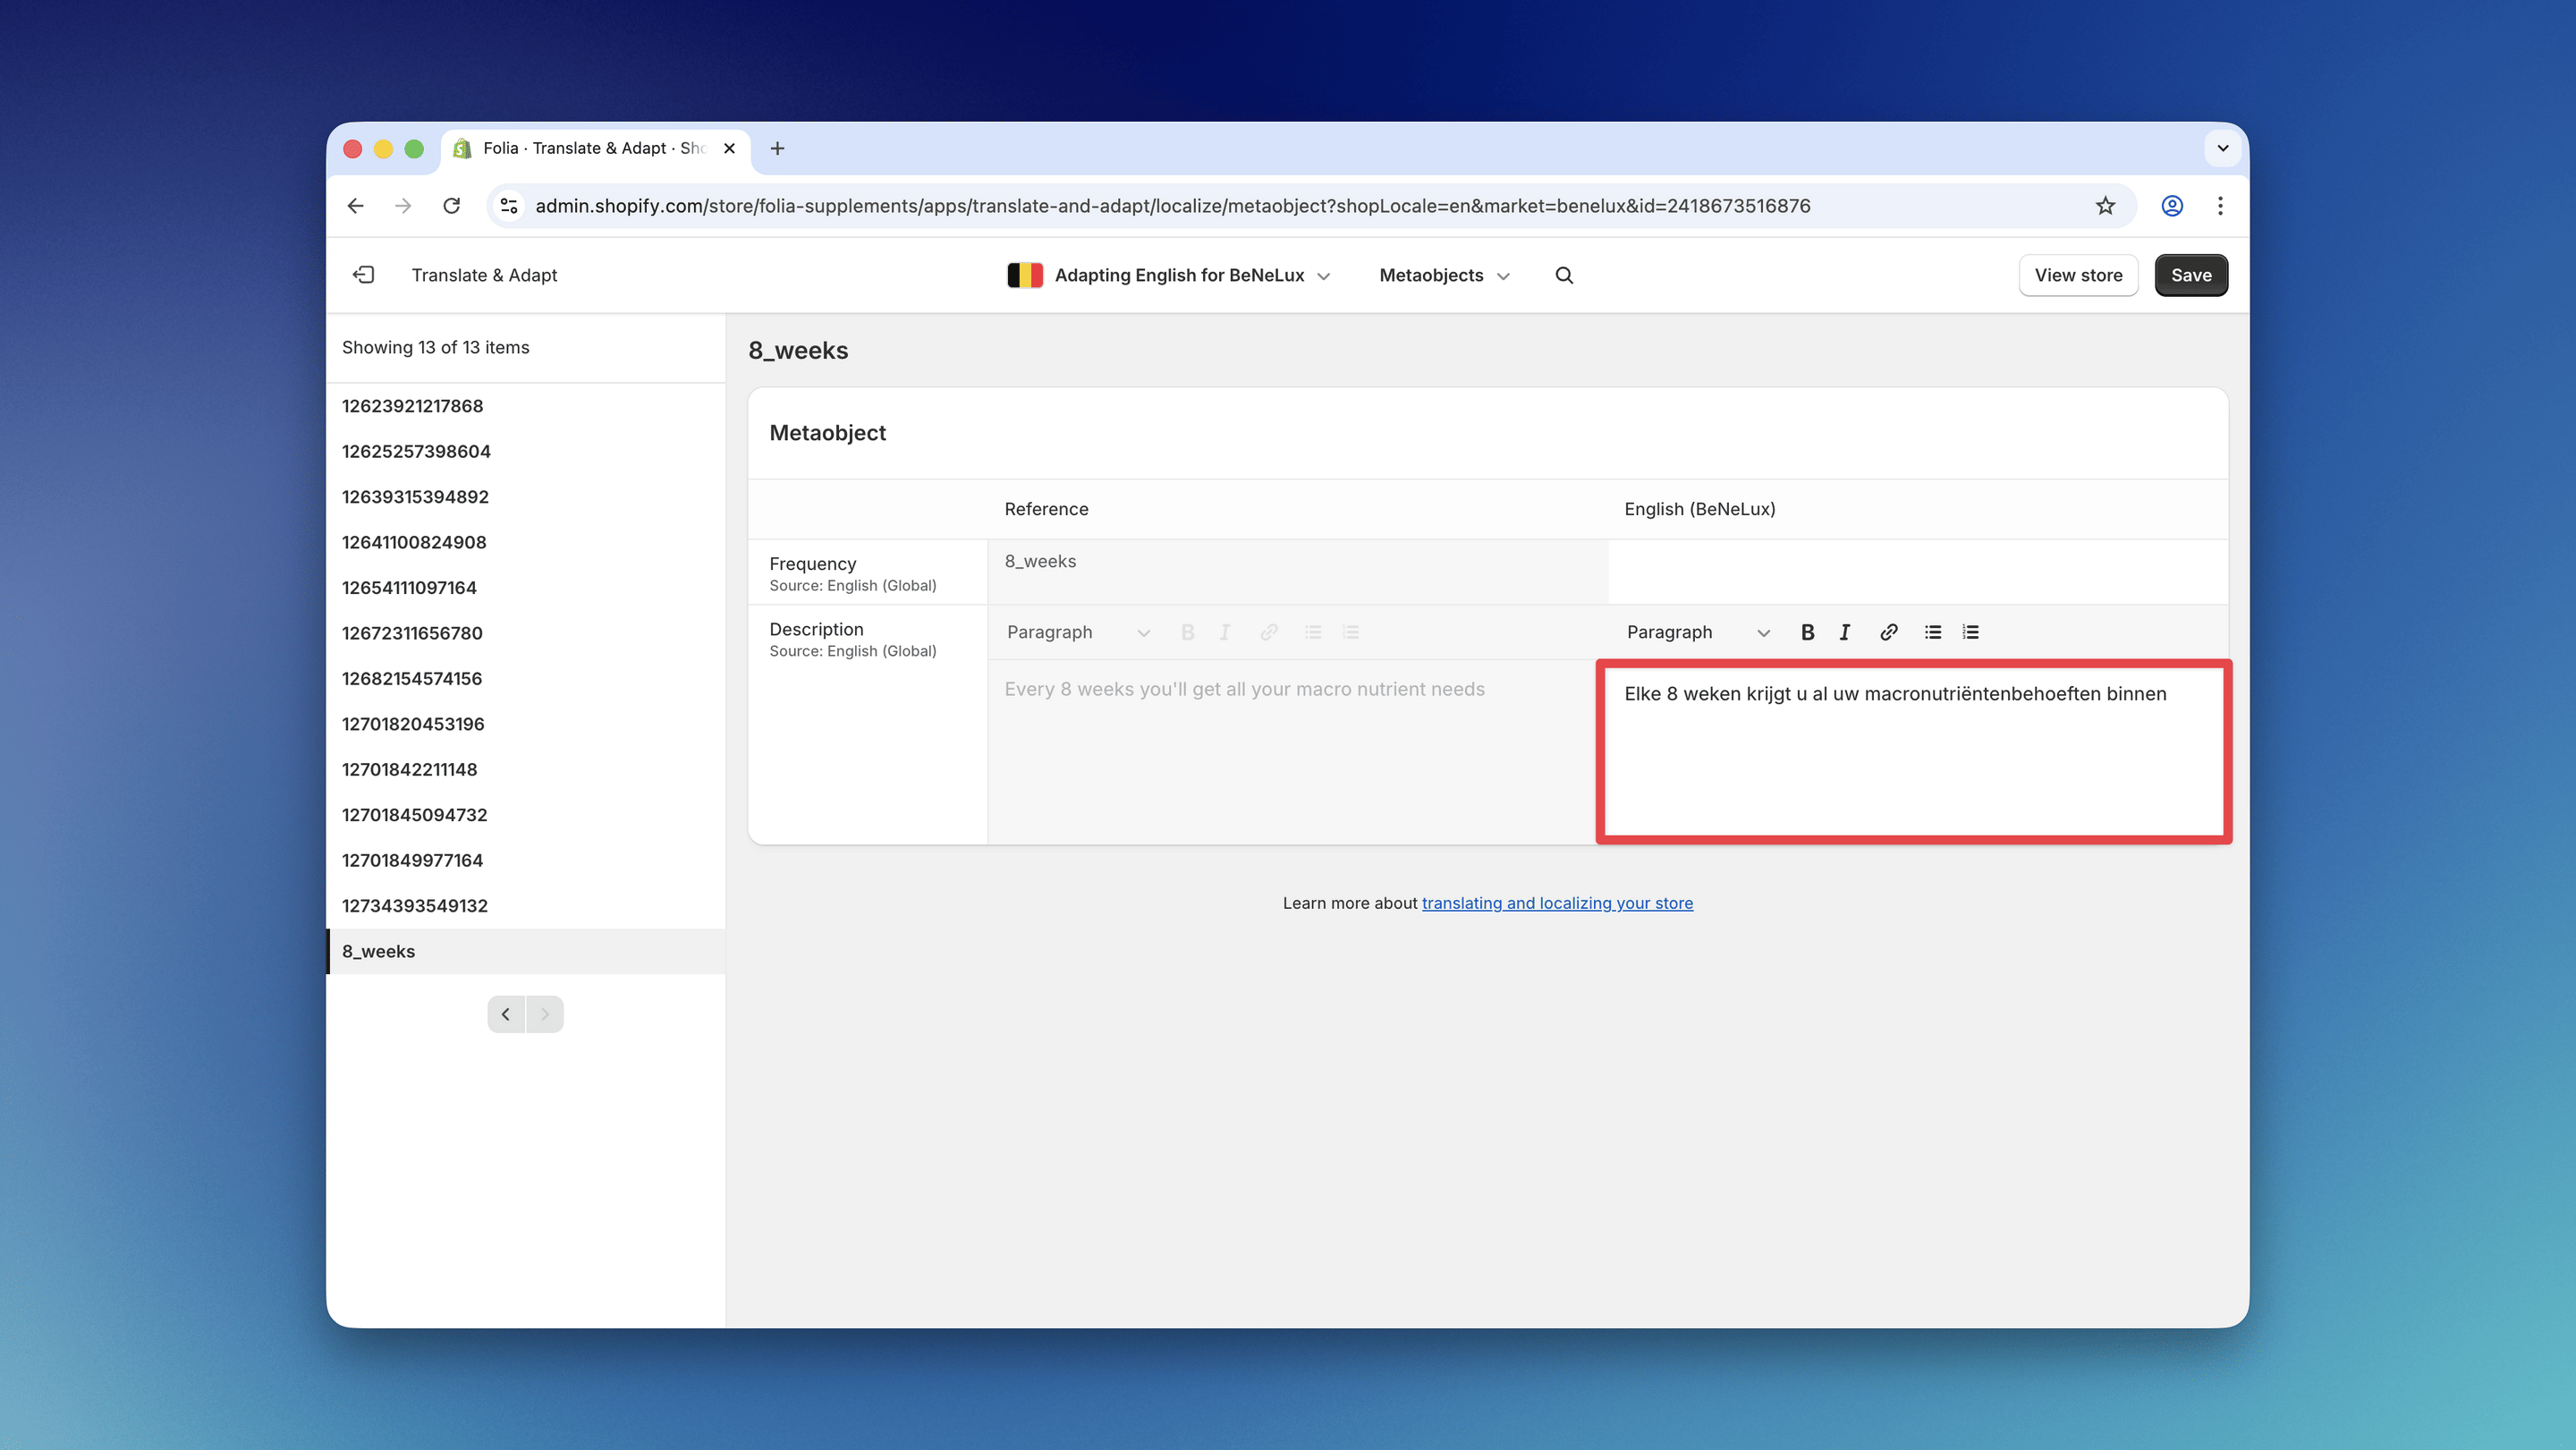
2_months, 4_months, etc., otherwise the translation will not work correctly.